I recently was asked to address some envelopes for a friend's daughter's wedding invitations. I enjoyed doing it so much...I dabble in calligraphy and decorative writing so it was so much fun to do it. I was really happy with the results...I handed the finished envelopes off to the bride's mother the other day and she said she loved them and thought they looked fantastic. I was proud. LOL!
I decided it would be fun to make the bride a set of thank you note cards that she could send out. I had asked her mother what the bride's wedding colors were and she said "cream, blush, and celadon green". What the heck??! LOL!!! I'd never heard of celadon green but apparently it's a grayish green. Anyway, I figured the chance of getting an exact match with that green would be difficult so decided to just use some paper from an "old" paper stack I had on hand. I used Neenah off white cardstock for my base. I decided to make the cards mostly flat for easy mailing for her. I initially put ribbon on but decided to minimize it and simplify it and took the ribbon off.
I used my new BFF MISTI to stamp the sentiment and am always amazed how quick and fast it is to use when you are doing multiple cards AND most importantly for me...how easy it is to align to get the perfectly straight look.
Here are the cards and I used the Paper Smooches Roses die set and the sentiment is Paper Smooches Lovely Thoughts:
I love that die set....
I also used the stitched rectangle set for my mat from Simon Says Stamp. The mat was popped up on some Stampin' Up foam dimensionals.
I added a few gold pearls for a little more interest and they were done pretty quickly.
Fun and easy...and I think she will enjoy using them for some "special" thank yous!
I also made a little box to hold the cards in from a file by Lori Whitlock purchased from the Silhouette Online store and cut on my Cameo. I've said it before...Lori Whitlock's are always so perfect and cut so well! She must have been an engineer in a previous life!
Here is the box...using the same papers from the roses and leaves:
The bride's initials were also cut on the Cameo using a font I have installed on my computer that I love...Lavenderia.
Here is another look...a little creamy organza bow finished it off:
And that's it for today...Happy Crafting and Happy Sunday!
Sunday, April 12, 2015
Tuesday, April 7, 2015
Project Life, 2015: February Layout 3
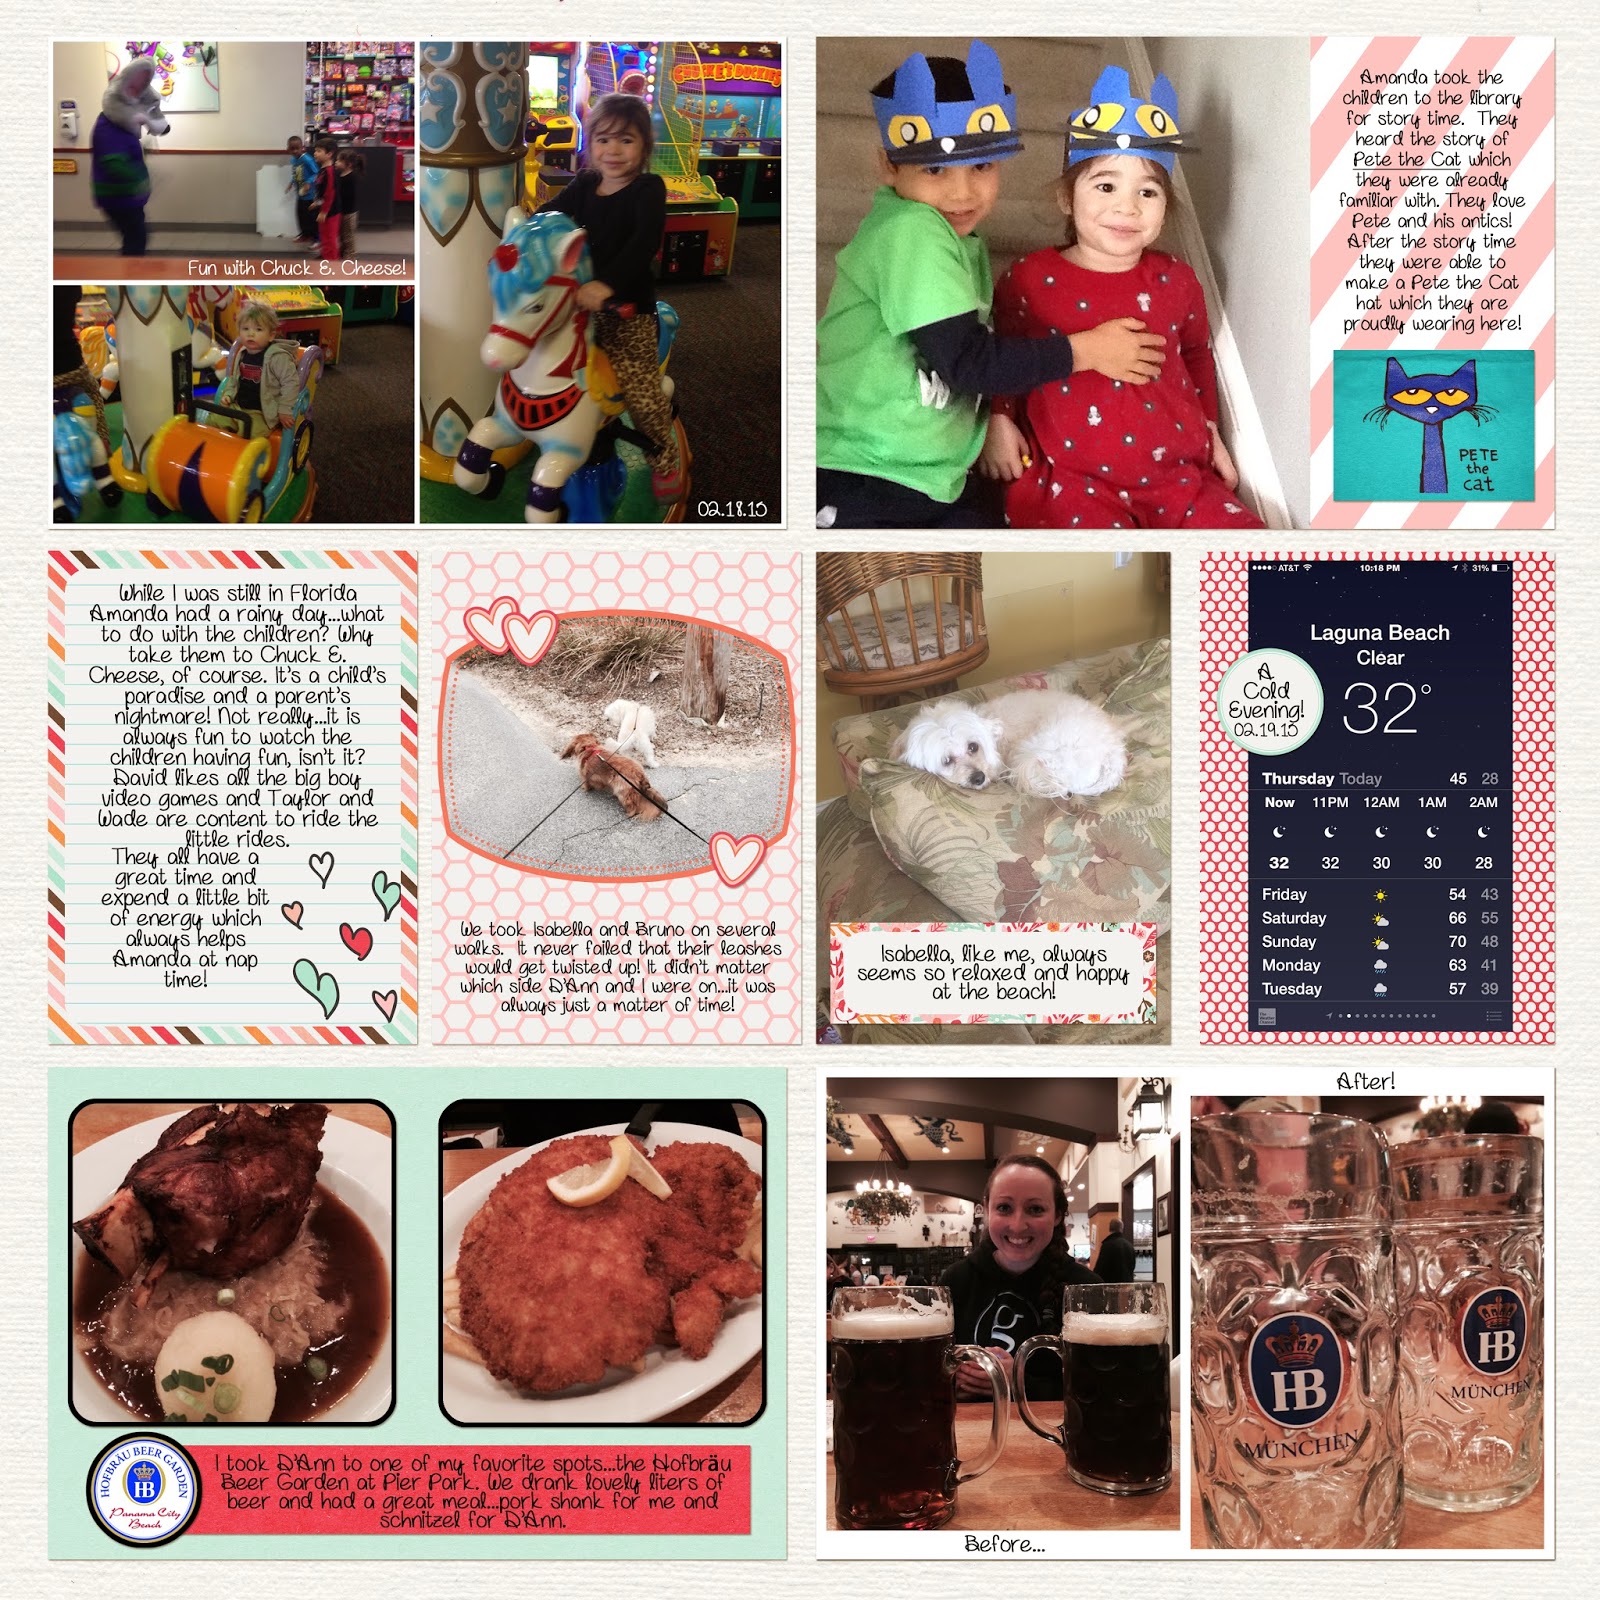
Without further ado...here are my Project Life layouts which will close out February. I ended up doing 3 sets of layouts for this month and I think it worked perfectly...
Here is the two page layout side by side so you get the full effect of how it will look printedif I ever make it to the printing stage.
I used Just Jaimee's February 2014 Storyteller kit, and my usual assortment of templates (Tracy Larsen and the Lilypad). In this kit by Jaimee she also included some photo templates and I snuck in a couple of those as well.
Here is the left side:
And here is the right:
Lots of fun, food and time at the beach!
Happy Crafting to you!
Here is the two page layout side by side so you get the full effect of how it will look printed
I used Just Jaimee's February 2014 Storyteller kit, and my usual assortment of templates (Tracy Larsen and the Lilypad). In this kit by Jaimee she also included some photo templates and I snuck in a couple of those as well.
Here is the left side:
And here is the right:
Lots of fun, food and time at the beach!
Happy Crafting to you!
Monday, April 6, 2015
Project Life, 2015 February 2
Well, hello...everyone! I hope everyone had a wonderful Easter...or for those celebrating Passover that you are enjoying those celebrations this week.
I did get back to a tad of Project Life, 2015 the other day. As I've mentioned before I am not doing week by week layouts...I'm just filling pages with photos basically within a particular month. This is working well for me...as some weeks I have a ton of photos and some not so many. As I'm not one to generally scrapbook or journal about my favorite color of fingernail polish...well, I just didn't want to be taking pictures for the sake of having something to put in my albums so I went to a slightly different format than I have in previous years.
I'll probably change it next year to something else...LOL!
But I am liking the format for now...I'm enjoying the squared corners vs. rounded corners...I've made my own 13x13 (digital, of course) templates that I can pretty much pop in cards from the digital kits I've purchased without having to do that infernal re-sizing, which I detest...and then at the end I resize the whole kit and caboodle to 12x12. This has saved me just a ton of time, I think. (At least a few minutes here and there!). It has given me more time to blog the boring details of my Project Life process....LOL!
So here are my layouts for February Part 2 which basically covers the second week and up until about February 17.
I used Just Jaimee's Quinn kit which can be purchased at The Lilypad HERE. I love Just Jaimee's kits...and even though I use them over and over again...no two layouts look alike!
Here is the left side:
Notice my cutie pie dog, Isabella. We all think our dogs are unique and wonderful. Well, Isabella is...except when she's annoying. LOL!
And here is the right side:
I do seem to have a lot of photos of my grandkids with food. I wonder what is up with that? Oh yeah...we are a family of eaters! We all love our food. My granddaughter loves pickles and egg yolks and sub sandwiches.... my grandson says he's allergic to crackers.
Those kids!
I used my usual assortment of templates for my cards....some from Katie Pertiet, Tracy Larsen, The Lilypad...some I tweaked for my own use.
And that's it for today. I think I will be able to do just one more layout to finish out February...I'd better get going...we are already well into April! My goal of staying caught up blew out the first week of 2015!
Oh well....no complaints. The fun is in the process!
Happy Crafting!
I did get back to a tad of Project Life, 2015 the other day. As I've mentioned before I am not doing week by week layouts...I'm just filling pages with photos basically within a particular month. This is working well for me...as some weeks I have a ton of photos and some not so many. As I'm not one to generally scrapbook or journal about my favorite color of fingernail polish...well, I just didn't want to be taking pictures for the sake of having something to put in my albums so I went to a slightly different format than I have in previous years.
I'll probably change it next year to something else...LOL!
But I am liking the format for now...I'm enjoying the squared corners vs. rounded corners...I've made my own 13x13 (digital, of course) templates that I can pretty much pop in cards from the digital kits I've purchased without having to do that infernal re-sizing, which I detest...and then at the end I resize the whole kit and caboodle to 12x12. This has saved me just a ton of time, I think. (At least a few minutes here and there!). It has given me more time to blog the boring details of my Project Life process....LOL!
So here are my layouts for February Part 2 which basically covers the second week and up until about February 17.
Here is the left side:
Notice my cutie pie dog, Isabella. We all think our dogs are unique and wonderful. Well, Isabella is...except when she's annoying. LOL!
And here is the right side:
I do seem to have a lot of photos of my grandkids with food. I wonder what is up with that? Oh yeah...we are a family of eaters! We all love our food. My granddaughter loves pickles and egg yolks and sub sandwiches.... my grandson says he's allergic to crackers.
Those kids!
I used my usual assortment of templates for my cards....some from Katie Pertiet, Tracy Larsen, The Lilypad...some I tweaked for my own use.
And that's it for today. I think I will be able to do just one more layout to finish out February...I'd better get going...we are already well into April! My goal of staying caught up blew out the first week of 2015!
Oh well....no complaints. The fun is in the process!
Happy Crafting!
Sunday, April 5, 2015
Happy Easter, Ya'all!
Happy Easter from Atlanta, Georgia!
My grandkids went to see the Easter Bunny the other day and it was a total #FAIL! But oh so cute anyway....
I'm not sure it was an improvement over 2014 or not...
HAHA...I think the Easter Bunny is signaling...HELP!
Kids will be kids...and it is difficult to get 3 tiny people all on the same page when it comes to photographing them! That's why many of my Project Life photos are blurry or missing body parts. But even the parts can tell a story can't they?
I did make a few other Easter cards to send...and this was not my own design but rather one created by the fabulous Impressive Ideas stamp store in my area. They did a make and take one day and I loved the card so bought the stamps to duplicate. Using MISTI helped me crank out quite a few cards in no time at all!
This was done with Impression Obsession stamps. The teeny gingham paper was actually created with a stamp. Love it! Oh la la...just think of the possibilities! And I got a great image using my MISTI and reinking!
The little bunny peeps were colored with Copics...and some Wink of Stella clear glitter was painted over one of the bunnies.
See?
Probably not... but it's there, I promise!
So Happy Easter to all of you...time to get in the kitchen and make some deviled eggs!
And Happy Crafting!
My grandkids went to see the Easter Bunny the other day and it was a total #FAIL! But oh so cute anyway....
I'm not sure it was an improvement over 2014 or not...
HAHA...I think the Easter Bunny is signaling...HELP!
Kids will be kids...and it is difficult to get 3 tiny people all on the same page when it comes to photographing them! That's why many of my Project Life photos are blurry or missing body parts. But even the parts can tell a story can't they?
I did make a few other Easter cards to send...and this was not my own design but rather one created by the fabulous Impressive Ideas stamp store in my area. They did a make and take one day and I loved the card so bought the stamps to duplicate. Using MISTI helped me crank out quite a few cards in no time at all!
This was done with Impression Obsession stamps. The teeny gingham paper was actually created with a stamp. Love it! Oh la la...just think of the possibilities! And I got a great image using my MISTI and reinking!
The little bunny peeps were colored with Copics...and some Wink of Stella clear glitter was painted over one of the bunnies.
See?
Probably not... but it's there, I promise!
So Happy Easter to all of you...time to get in the kitchen and make some deviled eggs!
And Happy Crafting!
Friday, April 3, 2015
Happy Easter!
I made a few Easter cards to send to family and friends using a "HAPPY" die from Impression Obsessions I bought at Impressive Ideas (our fabulous local stamp store) a week or so ago. I thought this was a great and versatile die.
These cards whipped up pretty quickly...the die cuts beautifully!!!
Here is the first one I made:
"Easter" was done with the Marketing Script font and cut on my Silhouette Cameo. I also cut a shadow to fit behind it to give it a little more pop as we say in the card creating world.
I cut the letter for "HAPPY" a second time and adhered them to the card base with some foam tape.
And lastly...a bit of ribbon finished off this card.
Here is the second one I made:
Same idea...just done in a horizontal manner.
Again...easy and fast. How great is this die??? I can use it for Birthdays, Halloween, 4th of July...any number of other significant days, ya know?
Definitely one to be used again!
Happy Crafting and Happy Easter!
These cards whipped up pretty quickly...the die cuts beautifully!!!
Here is the first one I made:
"Easter" was done with the Marketing Script font and cut on my Silhouette Cameo. I also cut a shadow to fit behind it to give it a little more pop as we say in the card creating world.
I cut the letter for "HAPPY" a second time and adhered them to the card base with some foam tape.
And lastly...a bit of ribbon finished off this card.
Here is the second one I made:
Same idea...just done in a horizontal manner.
Again...easy and fast. How great is this die??? I can use it for Birthdays, Halloween, 4th of July...any number of other significant days, ya know?
Definitely one to be used again!
Happy Crafting and Happy Easter!
Wednesday, March 25, 2015
Project Life, 2015: February
Wow...life has really been happening! But Project Life has not! Card making and paper crafting have not! But busy I've been. I promise.
I have tried to sit and work on some digital Project Life but just haven't seemed to get very far...but I'm glad to say that I finally finished the first layouts of February for my 2015 challenge and venture.
Here is the two page layout side by side:
I used Just Jaimee's Bryce Collection for the papers and elements...and templates from Ali Edwards, Katie Pertiet, Tracy Larsen, and Lily Pad. Basically if there is a 4x6 inch template or a 3x4 out there in digi land it is probably slapped right here on my layouts! :) I love using the templates...but I do find it can be a bit time consuming!
Here you have a closer look at the left side:
Get a load of Wade sneaking a sip of his big brother's drink! That kid is so funny!
Here is the right side:
Life at it's best with lots of photos of happy grandchildren! It makes an Omie happy, I tell you.
And that's it for today...a quick blog entry but many hours went into completing these layouts. They are never quick for me! But I love the process...no complaints here!
Happy Crafting!
I have tried to sit and work on some digital Project Life but just haven't seemed to get very far...but I'm glad to say that I finally finished the first layouts of February for my 2015 challenge and venture.
Here is the two page layout side by side:
Here you have a closer look at the left side:
Get a load of Wade sneaking a sip of his big brother's drink! That kid is so funny!
Here is the right side:
And that's it for today...a quick blog entry but many hours went into completing these layouts. They are never quick for me! But I love the process...no complaints here!
Happy Crafting!
Saturday, March 14, 2015
Long Time, No See!
I may have used this title before...it is reserved for when I am AWOL for extended periods. Well, life just got in the way... you know?
I got back from my 6 weeks at the beach. The last few days were not very pretty sun-wise but I love the beach in any type of weather...I even love when it rains there! But, before I left I had the chance to see a sunset that was like none other. The mother of all sunsets....it was so incredibly gorgeous...
The sky was ablaze, as they say. By the way...the photo above was taken with my trusty iPhone. They do say the best camera is the one you have with you...and I am not complaining about the iPhone camera one bit!
Pretty picture.
On to crafty stuff. I finally got all of my stuff unpacked and put away so was in the mood to make a card (or two) this evening.
But wait...in the past few weeks I have learned about the MISTI which stands for (Most Incredible Stamping Tool Invented). I was hesitant. I. Was. Skeptical. But. I. Bought.
I ordered straight from the manufacture which is www.MySweetPetunia.com. Within 4 days that baby was in in my hands. Great and very fast shipping. Simon Says Stamp also carries it but their price is much higher and then you have to pay shipping on top of that so why not go with the manufacture to begin with. Makes sense to me.
This is what the MISTI looks like:
It is mostly acrylic which is hinged...their are rulers and guides to help you with your positioning.
It is so easy to use...and makes the accurate positioning of stamps so easy and so fast! I love it!
Here are a few cards I very quickly duplicated tonight:
It was so easy to place things and make sure the sentiment was perfectly straight.
I loved my new friend, MISTI. I think she will become a really close friend, indeed.
The cards were made with Stampin' Up inks and papers. The white cardstock is the thick cardstock from Hobby Lobby which works pretty well for most stamping, I think. The sentiment is by Hero Arts. The flower stamp set are by SSS.
If you do a lot of stamping and like positioners then you would most likely find this an invaluable tool.
Happy Crafting!
I got back from my 6 weeks at the beach. The last few days were not very pretty sun-wise but I love the beach in any type of weather...I even love when it rains there! But, before I left I had the chance to see a sunset that was like none other. The mother of all sunsets....it was so incredibly gorgeous...
The sky was ablaze, as they say. By the way...the photo above was taken with my trusty iPhone. They do say the best camera is the one you have with you...and I am not complaining about the iPhone camera one bit!
Pretty picture.
On to crafty stuff. I finally got all of my stuff unpacked and put away so was in the mood to make a card (or two) this evening.
But wait...in the past few weeks I have learned about the MISTI which stands for (Most Incredible Stamping Tool Invented). I was hesitant. I. Was. Skeptical. But. I. Bought.
I ordered straight from the manufacture which is www.MySweetPetunia.com. Within 4 days that baby was in in my hands. Great and very fast shipping. Simon Says Stamp also carries it but their price is much higher and then you have to pay shipping on top of that so why not go with the manufacture to begin with. Makes sense to me.
This is what the MISTI looks like:
It is mostly acrylic which is hinged...their are rulers and guides to help you with your positioning.
It is so easy to use...and makes the accurate positioning of stamps so easy and so fast! I love it!
Here are a few cards I very quickly duplicated tonight:
I loved my new friend, MISTI. I think she will become a really close friend, indeed.
The cards were made with Stampin' Up inks and papers. The white cardstock is the thick cardstock from Hobby Lobby which works pretty well for most stamping, I think. The sentiment is by Hero Arts. The flower stamp set are by SSS.
If you do a lot of stamping and like positioners then you would most likely find this an invaluable tool.
Happy Crafting!
Subscribe to:
Posts (Atom)