Showing posts with label Lawn Fawn. Show all posts

Wednesday, February 3, 2016

Who Would Have Thought?!

Who would have thought you could make a simple cornflower with just some simple strokes of a paintbrush??? Well, I certainly did not know but I learned this simple technique with the Online Watercolor Class - Intermediate that I am taking. Yana Smakula whose blog is HERE is just an awesome cardmaker and crafter! Anyway, she did an awesome video and tutorial on using a round brush, loading it with pigment and water and bringing it to the paper.


Voila(!) a cornflower!

It was so much fun....I did the blue cornflower...this is my first and only attempt but it would be fun to do it in some other colors....red would make a pretty carnation, wouldn't it?


I used some some green watercolor to make a wash and then cut out "hello" with a Lawn Fawn die.  I decided to cut it out in white, too, and then offset it a little and put it on a vellum band.

And that's it for today!

Monday, February 1, 2016

Loving Watercolors!

I am taking the Watercolor Class - Intermediate at Online Card Classes.  I am barely through Lesson 1 (ok, I'm NOT through Lesson 1 yet!) and have already learned so much.  It's a really great class and if you have any interest in increasing your watercolor skills then I certainly recommend it!

In the pre-class exercises we worked on color swatching, color mixing, and transparency vs. opacity in our paints.  Very interesting stuff there! In Lesson 1 we actually created a card where we applied our new found knowledge of creating color washes.  Interesting and fun stuff!

The instructor, Dawn created a really awesome card by tracing around a pear and dropping color onto it.  I didn't have anything like that and the supplies I had on hand were limited so I cut out a design with my Silhouette and traced around it.  Two little birdies.

Here's the first one I did with Kuretake Gansai colors:

The bird on the right got a little muddied as the colors mixed but it was fun to do anyway, and since I took this photo with my iPhone the colors may be a bit off.  I think they are more vibrant in real life.
I used a Lawn Fawn sentiment stamped in Hero Arts Cup o' Joe.

Then I did it again using Winsor and Newton tube paints.  Basic red, blue, and yellow that I mixed for a variety of colors.

I love the variations of the red, blues and purples.....a little yellow and red for an orangey beak and all the colors mixed for some variations in brown on the limb.  I stamped the sentiment with MFT's Things With Wings stamp set.

And voila (!)....they look like birds on a limb! LOL! Very fun to do and pretty easy...but of course, you'll never get exactly the same results twice. 

Off to Lesson 2 1b! 

Happy Crafting!

Monday, November 9, 2015

Hello You!

When I was at the very impressive Impressive Ideas grand opening the other day I came across an interactive die by My Favorite Things Die-Namics.  It is called the Interactive Trio card and when cut on your handy dandy die cutting machine makes a little 3 window panel...but instead of having full cut outs of the "panes" it creates a score line so you really get a cute little flap.

So cool!

I spent way too much time making this card but it was very fun to do.  I CASEd (copy and steal everything) one by Stephanie Klauck at MFT but mine is a bit different...mostly because I didn't have all the stamps she used in her card.

Here is mine:

I used Things With Wings stamps by My Favorite Things


as well as the Scripty Sayings sentiment, "hello you", by Lawn Fawn.

 I stamped the sentiment with VersaFine ink and then heat embossed it with clear embossing powder (a favorite technique!).  The butterfly and ladybug were colored with Copics and the little flowers were colored with Wink of Stella Pens.  I also added a layer of Clear Wink of Stella to the butterfly and ladybug.  Can't have enough shine now, can you?!

So when you open the little flaps you see a little scene with oh-so-cute owls. I didn't have a tree stamp that would work (yes, I have tree stamps but none that would work for this scene) so I drew the little tree limb.

I love the little owls...they are actually two separate stamps...and they are looking at each other.  Too cute!

I used some Distress Ink to sponge around them to get a bit of a sky look....and I added Wink of Stella to nearly everything!

Lastly, layered the scene and windows on top of a piece of green cardstock and mounted onto white Neenah for a finished A2 sized card.

This took a while to do...but I'm not giving up on it...want to play with these little windows and flaps again soon! Maybe today! ;)

Happy Crafting!

Thursday, May 14, 2015

Happy Birthday to You!

Can it be???! A second post for today?  I felt sort of guilty about just posting about Evernote and how great the program is for keeping track of your stash so I decided to actually post a recent card I made. Evernote is great...but that whole post was sort of blah...so here's to a little non-blah, I hope.

I recently bought the Kuretake Gansai Tambi watercolors. I had seen so many of my favorite bloggers using them that I just had to get a set of my own.  They had been on my wish list for a long time so I finally bit the bullet and picked them up off Amazon.  How wonderful and vibrant they are! I have enjoyed playing with them a bit recently.

I made this card using the fabulous (and older) Secret Garden set from Stampin' Up.  I also used a die from Lawn Fawn for the sentiment.  Before coloring in the flower I heat embossed the stamped image with white embossing powder.


I swear the watercoloring looks better with prettier shading in real life.  Trust me! It couldn't be that I don't know what I'm doing...LOL!

Happy  Crafting!


Sunday, April 19, 2015

Beyond the Sea....

I have been oh-so-lucky to spend part of my winter at the beach for the last three years.  I have a wonderful friend who has a house in Laguna Beach, FL just west of Panama City Beach. Oh, how I love the white sands and emerald green water of the Gulf. It is truly a happy place for me and I love being down there in the winter. It's not tropical in the Florida Panhandle in the winter...it's not sunning yourself on the beach kind of weather but I love the cool crisp air and the sound of the waves. And the winter sunsets are so spectacular! Happy. Place.

Anyway, I always make a few cards for my friend as a little additional thank you and they are done with a beachy or ocean theme.  This is what I came up with for this year:
I made several different versions before setting on this one....I tried different backgrounds...different ways to do the little sea turtle...etc.  But was pretty happy with this fun and cheerful card when it all came together.
I used Lawn Fawn's Critters Under the Sea for the turtle and coral. They were colored with Copics and cut out to adhere to the little water scene which was done with Ranger Distress Inks and blending tools.  I used a die from Paper Smooches called Stitched Flourishes to do the little flourish behind the turtle...I thought it made it look like there was movement and of course, there is...the turtle is swimming! LOL! And the little turtle was popped up on some foam tape to give a tad of dimension.  Since these will be mailed, I presume, I didn't want too much bulk.
I used some circle dies from Lifestyle Crafts and cut the scalloped circle from a Spellbinder die onto some orange paper which I embossed with a Cuttlebug embossing folder called "Tiny Bubbles".
I used a sentiment from an old stamp set that a friend gave me.  There is no name on the set so I don't know who the manufacturer is and Google did not help me! I set the stamp up on my friend, MISTI which made stamping the image in the very same place (since I made multiple cards!) very easy!
I brushed some clear Wink of Stella glitter shimmer over the turtle and the coral and added some glossy accents for "bubbles".
I think my friend will like them.  I would love to receive one of these! :)
They make me want to head south and back to the beach!
And that is it for today...it is wet and gloomy here in Atlanta. We have had so much rain recently but it certainly has helped with all of the pollen!

Happy Crafting!

Thursday, July 31, 2014

Thinking of You

You can never have too many "Thinking of You" cards.  I mean, who doesn't like getting a card that lets you know someone has had you on her mind?  Seriously...

I used some items from the July Simon Says Stamp kit which I may have mentioned once or a thousand times how wonderful that month's kit has been.  I loved everything that came in it...particularly the stamp set which you can see here:
 
I just love it...will use it again and again (if I remember!)...
So here's a card I made with some of the stuff that came in the kit.  I wanted to use up some of the printed papers and some of the little puffy stickers that came with it.


Here is a bit of a closeup:

 The matts/cards were die cut with the Lawn Fawn 3x4 die I have that puts a really cool little "stitched" edge around it.  It's hard to see here but it's there, I promise.  I heat embossed the sentiment with some Zing embossing powder.  I love the way it embossed...such a great stamp.  I used the EK Success little punches for the banner.  I cut out the little typewriter at the bottom from some of the printed paper and put it on some foam tape.  The BFF and Miss You stickers are part of the Pink Paislee puffy stickers pack.  Too cute.  Simple...and I used up some scraps!  Yay!

Hope you all have a fabulously creative day!

Wednesday, June 18, 2014

New Favorites!

I had ordered the Scribbled Flowers stamp set and dies from Simon Says Stamp and they came yesterday.  I had it in my cart and took it out...had it in and took it out.  And, uh, finally left it in.  I'm so glad I did.  I love it!  I love the look of hand drawn things and this one is perfect for that!
Here are the stamps and coordinating dies (if you click on the image it will take you to Simon Says Stamp and the featured set):
Simon Says Stamp Flower Scribbles Set 
And here is a card I made with it which was CASED from a card I saw by the fabulous Shari Carroll.


  The "hello" sentiment was from a Lawn Fawn set and the "you're one of my nicest thoughts" came from a Hero Arts set which I heat embossed with white embossing powder.  
I love this bright and happy card stamped with Memento Luxe inks and will make more!

Gotta run!

Happy Crafting and Keep Creating!

Monday, May 26, 2014

Boy, Oh Boy!

Yesterday I wrote about the difficulty I have making non girly cards.  Girly just seems to come a bit easier for me...is it that there is such a plethora of more feminine things in paper crafting?  Or is that must my imagination and really just an opportunity for me to use the word "plethora"?  :)

Anyway, I did make a few cards with the Simon Says Stamp May kit which you can see here but is, of course, already out of stock!  You can get the product individually, though...

and I do love the cute stamp set!

Here is another card I made:
I used a Lawn Fawn journaling card die which has the cute perforated edge that I cut out of vellum.  The little game controller was stamped on another piece of vellum with VersaFine ink and heat embossed with clear embossing powder and then colored on the underside with some Copics.  I cut it out and then added some black cording for the wire.  The sentiment was also stamped with black VersaFine Ink and then heat embossed with clear powder.  And....That's it!
Actually this is a non gender specific card.  It's not really just for boys, is it?  We girls can rock a game controller, too!
(When we first got Nintendo back in the early 90s and we had Super Mario Brothers...when my kids would go to bed I would play by myself.  And I loved Tetris! More than once my kids busted me!  And I still hear the story which begins with "Remember when Mom used to play Super Mario Brothers late at night?"  LOL!!!  Those kids fergit nuthin'!)

Happy Crafting!

Saturday, May 24, 2014

Happy Memorial Day Weekend!

I know that most people will be celebrating the long weekend with cookouts and parades but I hope that the reason for this "day off" will be remembered...and that is to honor those who died while serving in the US Armed Forces.  This should be a reminder that our freedoms came at a huge price.

My dad served 31 years in the United States Army.  A career veteran.  He passed away many years ago but I do remember his very profound sense of patriotism.  He (and my mother) are buried in Arlington National Cemetery.


And now onto card making...not a very graceful segue.... :)

I made this as a congratulations card for a recent graduate.  I liked the fun paper from My Mind's Eye that said "Follow Your Dreams".  Appropriate for a young adult venturing out in to the world!

Congrats was stamped with a Lawn Fawn stamp in Versafine Smokey Gray onto vellum and then embossed with some clear embossing powder. 

A simple card...mostly flat and easy to mail! 

Happy Crafting and Happy Memorial Day!

Tuesday, May 6, 2014

You Are Missed

Sometimes, just sometimes and not very often...I get a kick out of making a relatively flat card.  Mostly, though, I like lots of layers and SCHTUFF on my cards.  Bling, ribbon, buttons...whatevs...I love all the schtuff.  I personally think dimensionals and foam tape were invented because of me.  LOL!!! Ok, that sounds a bit egocentric but when we all started adding dimension onto scrapbook layouts or cards...well, that made me very happy.  I jumped on that bandwagon and have NEVER gotten off.

But again...flat can be good.  I had a lot of fun making this flat little baby.  I used a Lawn Fawn journaling card die...which puts a little stitched edge around it...how cool.  Stamped the flowers and leaves and sentiment which are all from the Simon Says Stamp February Card kit and put it on some Basic Grey paper.  Very simple and easy and I am happy with simple and easy!


Flatness can be a good thing.  OK, now I realized I fibbed on the whole flat thing...I actually did add foam tape (I couldn't resist) being the journaling card.  but it is mostly flat....I swear!

And here is the February Card Kit again with the fabulous stamp set.  Love it. 

And that is it for today my flat and dimensional friends!

Happy Crafting!

Wednesday, March 12, 2014

Giving Thanks

I am basically "creation-less" since I've been back from the beach almost a week ago.  My big accomplishment was getting all the STUFF I took with me put back in its place in my studio.  (I like calling it a studio...it sounds so artsy.  I don't usually call it a studio.  I usually just call it my scrapbook room.  BUT...since I do oh-so-much more than just plain old scrapbooking, I think STUDIO is just so way more appropriate! LOL!)  Anyway, I got all my toys put away and am now ready to get going on making some things. 

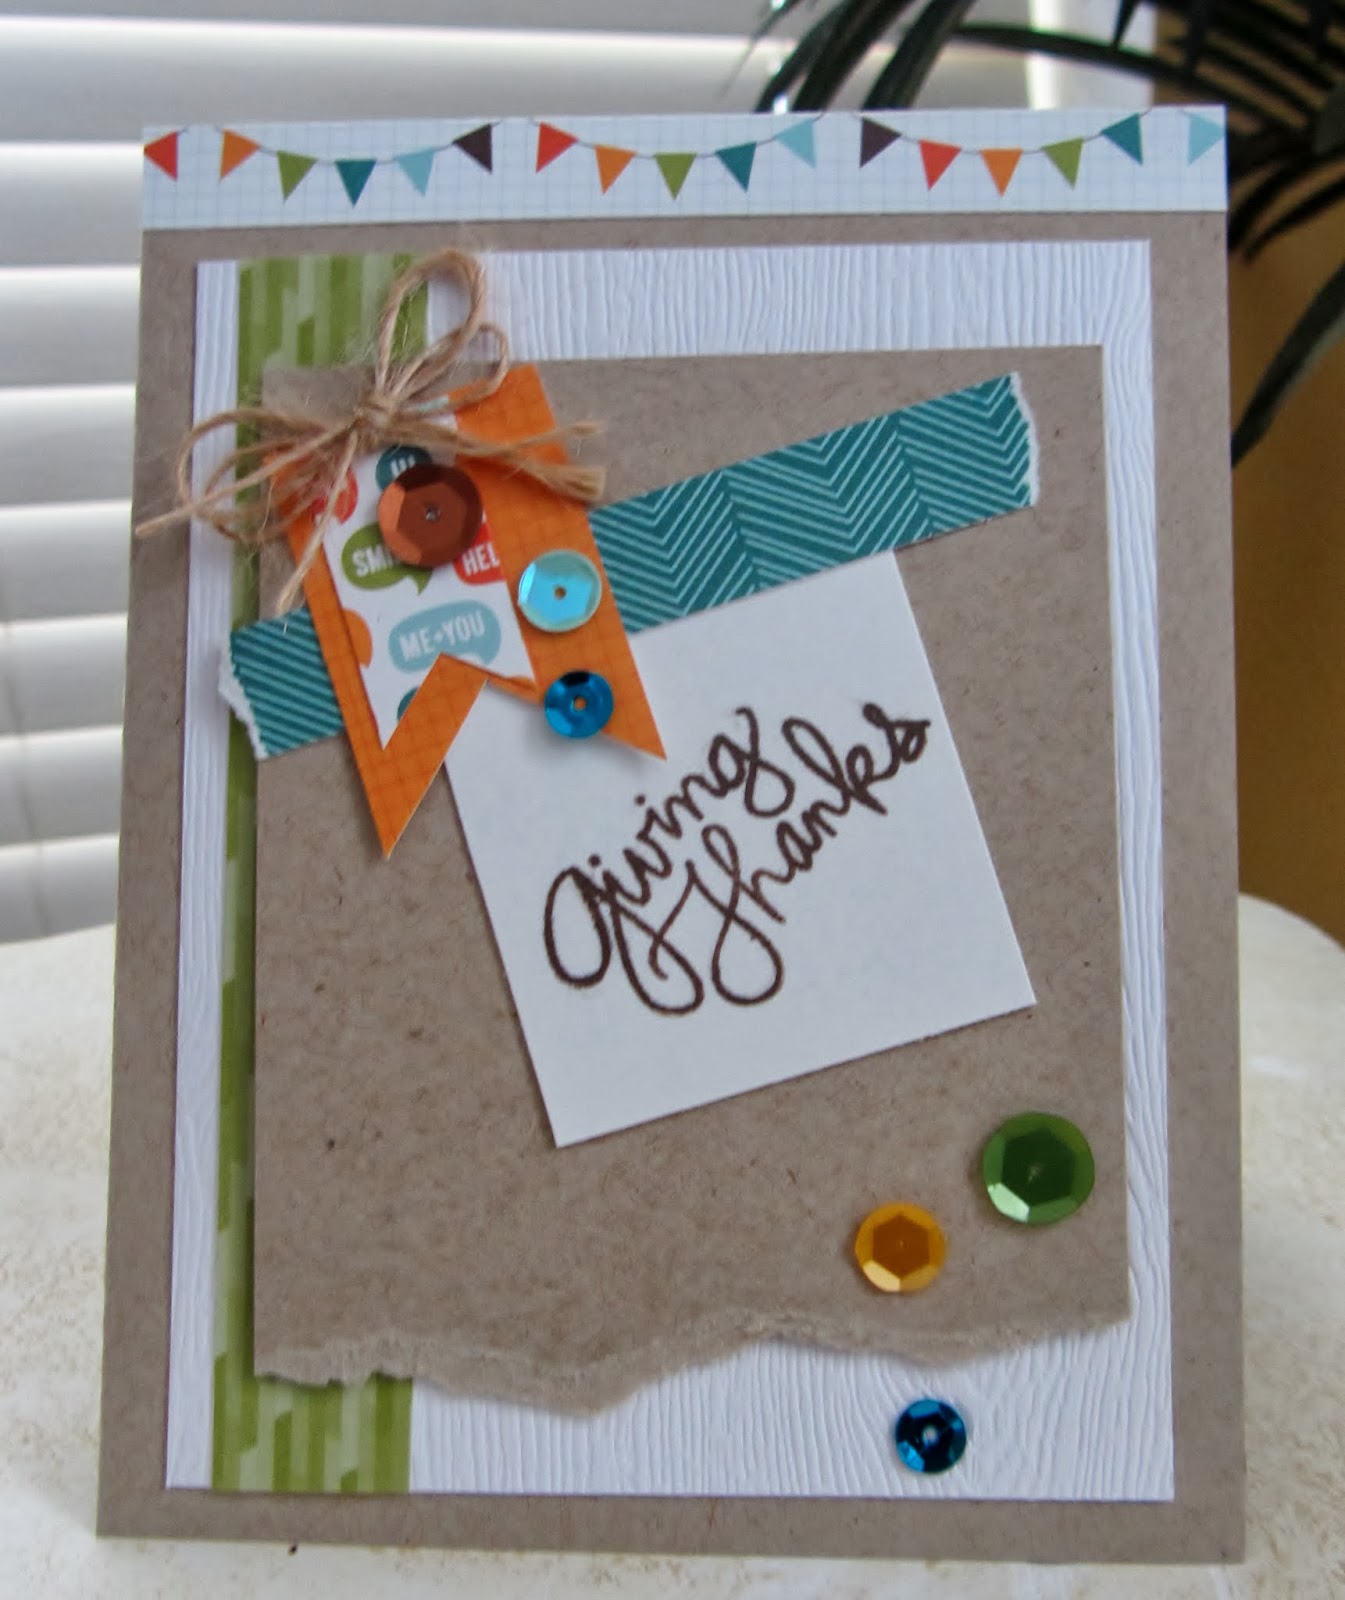
But while I was in Florida I also made this little card with scraps left from a Simon Says Stamp card kit.  Yeah, it's more a card for the Thanksgiving season...but I really think if I put the sentiment inside that said "For You" that it could be a great card to send anyone special to you.  You know?

It's done with mostly Lawn Fawn papers...don't you love the perfectly matched sequins?
This is another great way to use up some fun scraps....

Well, off to take care of some rehearsal dinner stuff.  Have a fun crafty day!


Thursday, November 21, 2013

A Couple of Cards...

I did a little crafting over the weekend which was fun (I AM SO FAR BEHIND!).

I've talked before about how much I enjoy the Simon Says Stamp Card Kit which comes out monthly.  They are fabulous kits which come with SSS exclusive stamps that are so much fun and are generally so versatile.  My wish list at SSS is longer than my grocery list for food for Thanksgiving! LOL!!!

On to my cards....here is the October card kit and was filled with the cutest Lawn Fawn papers:

Looking at it makes me want to go craft right now!  It came with the cutest sequins that I have yet to use...and the paint...and the twine....so much fun!

Here are two versions of a card I made:


And most amazingly....I even mailed these out and did not put them in my personal stash to hoard! :)

Thanks for the emails and messages about my foot.  It's coming along.  I can even get a shoe on it.  Can't walk in it but I can get it on! LOL!!!  That's not true....I did have it on for a few hours yesterday and was able to get around my house pretty easily.  I'm doing great...I head back to the doctor next week and I hope he will be as pleased with my progress as I am!

Happy Crafting, my friends...and thanks for stopping by!

Sunday, September 22, 2013

Thank You

I made a set of cards for a friend of mine who has done some very nice things for me recently.  She's also the friend who owns the house at the beach that I rented earlier this year for a month.  What a lovely time that was.  I enjoyed it so much that I am booked for a repeat in 2014!

Anyway, she's helped me with a few other things and I wanted to make a few cards for her.  She requested something beachy so this is what I came up with using the Hero Arts Let's Chill clear stamp set.

I used Salty Ocean distress ink to ink up some white cardstock, tore some paper for the "sand" and stamped the other items with Jenni Bowlin and Memento inks.  I colored the palm fronds, coconuts and the little crab with Copics and  added a bit of Crystal Stickles to the coconuts.  The sentiment is from Lawn Fawn.  The palm fronds were adhered with foam dimensionals.  It came out purdy cute, I think, and my friend liked them so there you have it!


Lots of fussy cutting but it was fun!

We had a full day of rain today but the weather today was fantastic.  So pretty!!!  It was warm and sunny...I really am dreading colder weather.  Give me 80s any day! ;)

Happy Crafting!


Monday, September 16, 2013

There's a Baby on the Way!

Sometimes you make a card and you just love it, right?

Most of the time I go...'eh...' after I make a card but the one I am sharing here for my daughter who is expecting babynumberthree in less than 3 weeks I JUST LOVE!  We had a little get together with some family and a few of her friends last night and I made the card for that occasion.

I made it with the Lawn Fawn set Plus One. It's just such a cute set!

I used some older KI papers I had.  Some of the clouds were punched out with a Fiskars punch and some were cut out with my Silhouette Cameo.
I used Copics and Wink of Stella pens to color the beak on the stork and the little bag the stork is holding.  I added a bit of yellow rickrack for an extra burst of color.
I loved my little clouds.
And I loved my little sparkly bird. ;)

Below is the sentiment I put on the inside of the card:
I made an envelope with my We R Memory Keepers Envelope board and then stamped it to jazz it up a bit.
And lastly, when I was in New York recently I went to this great paper shop and bought these really small envelopes that are great for gift cards.  I stamped and colored the outside of the envelope for just a little bit more fun and just paper pieced the little "bun"!
And that's it.  I think it was perfect for the occasion and she loved it so that's a bonus!

Happy Crafting!

Sunday, September 15, 2013

Over the Hill

I have talked about struggling with MANLY cards.  I just don't love making 'em.  Give me a flower or something frilly any day over man stuff! LOL!

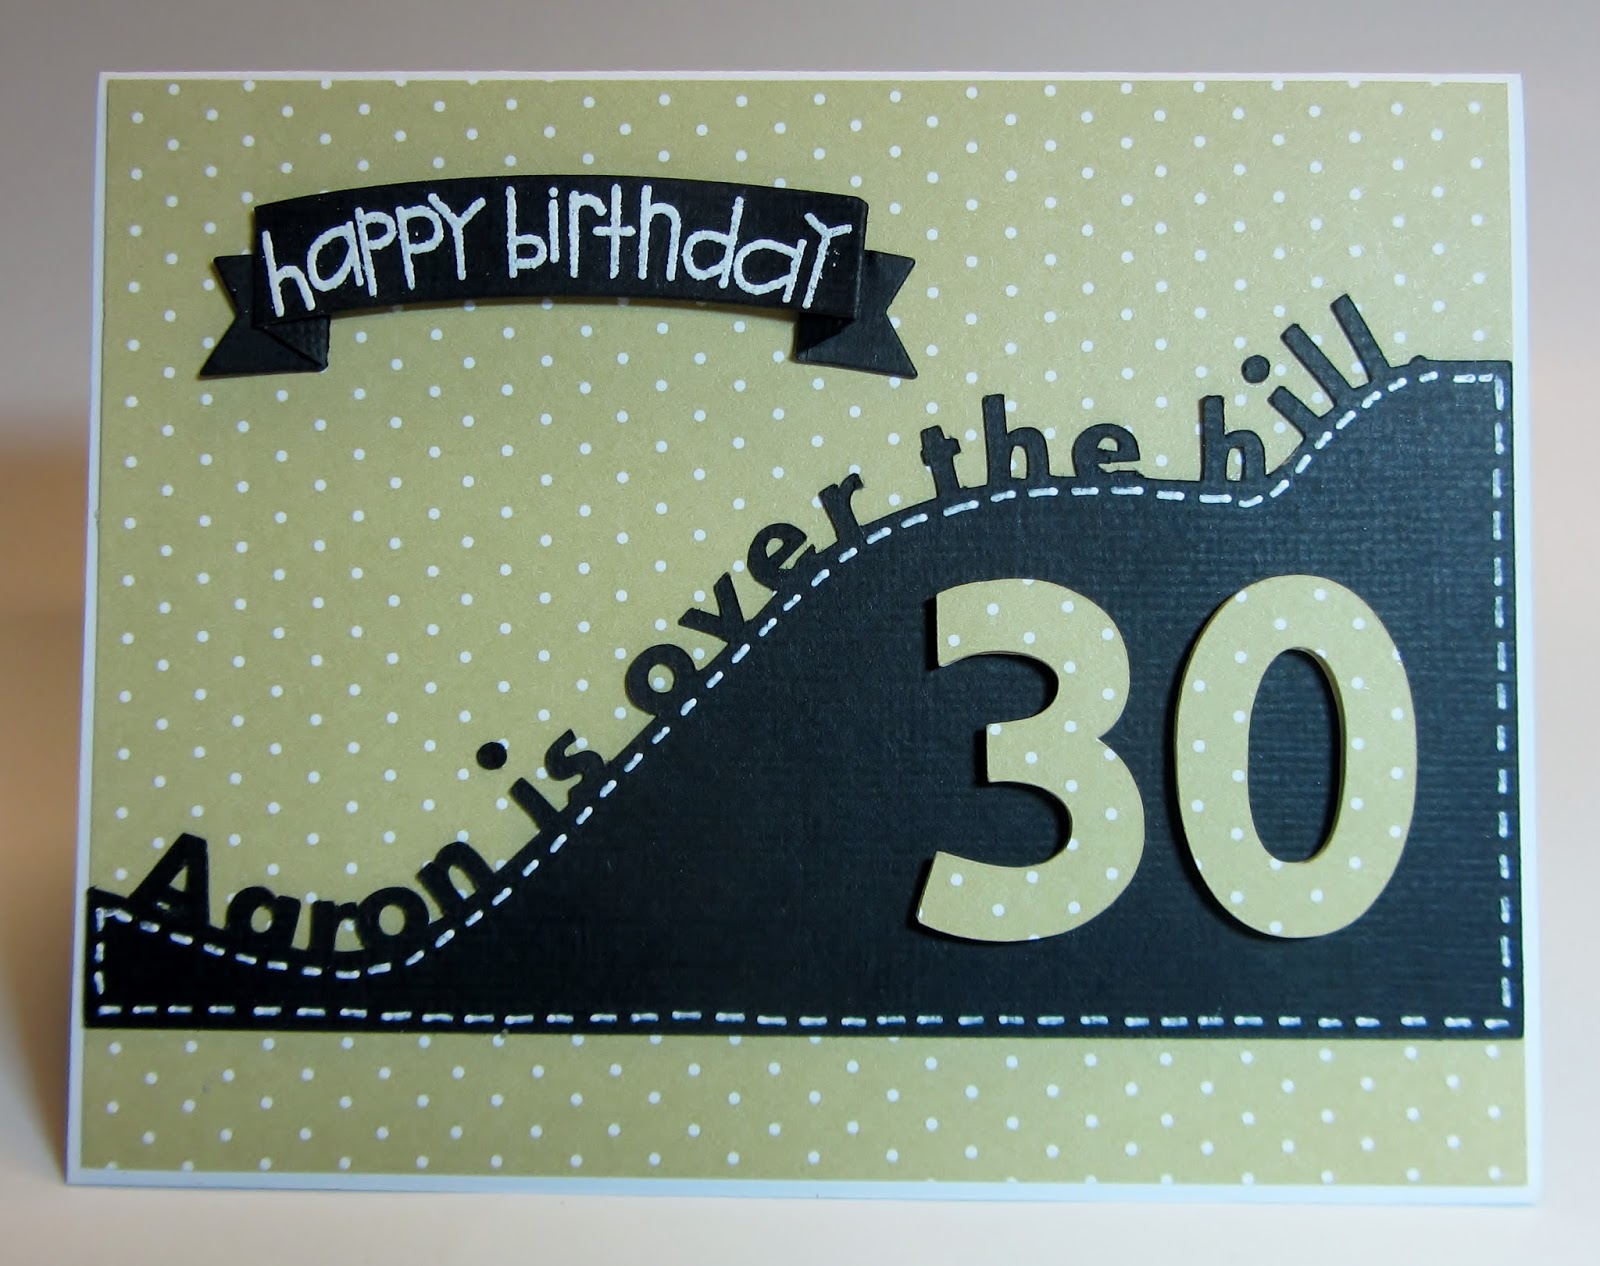
But I was asked to make a card for a friend's friend who is turning 30 and so I thought...well, heck...I will give it a try and was really happy with my effort.  Maybe there is hope for me, after all!

I did the over the hill part with my Silhouette Cameo.  How I did it is this:
1.  I created a rectangle approximately 5 1/4 inches wide.
2.  I clicked on edit points and then adjusted the top line of the rectangle to make it look like a hill.  I'm not the greatest at editing points so it did take me a while to get it smooth looking.
3.  I made a copy of my new shape.
4.  I created the text using the font Aharoni.
5.  I dragged it to my new "hill" and let the text wrap on the path and adjusted the spacing out, as needed. 
6.  I then brought my saved shape over and slid it in place making sure my text overlapped the hill slightly.
7.  I selected the whole kit and caboodle and then clicked on the weld button and had a new shape!

It sounds easy but since I didn't know what the heck I was doing it did take me a little while!

I added some gel pen stitching around and then created the banner with a Simon Says Stamp die...heat embossed it with some Zing powder and a Paper Smooches stamp which I was able to curve a little bit.

I cut out the "30" twice with my good pal, Cameo, and then glued them in place...popping the top layer up.

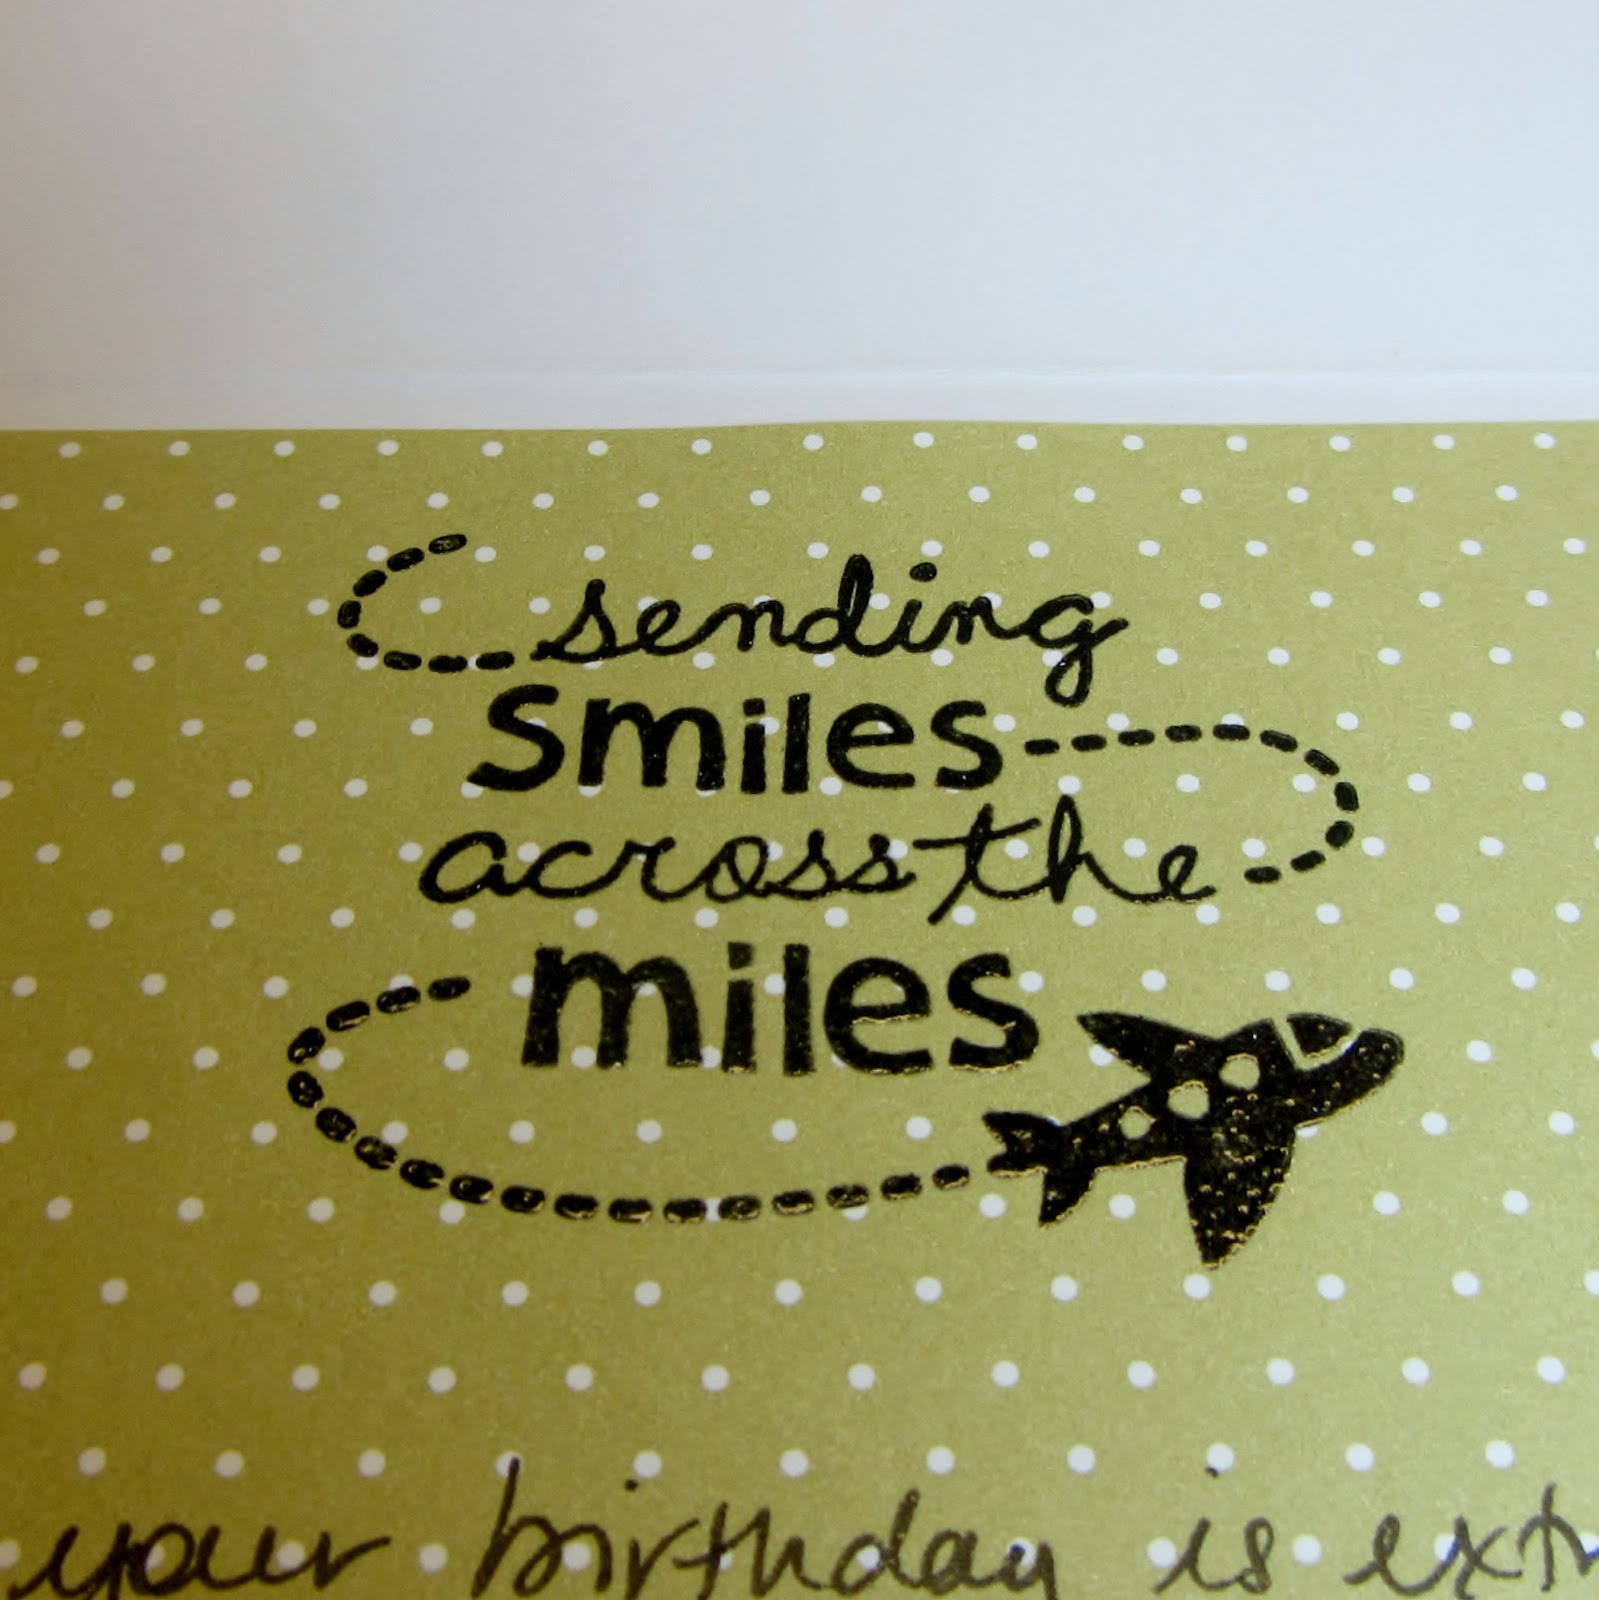
Here is the inside of the card embossed with some clear embossing powder and with a Lawn Fawn stamp:
I decorated the envelope a bit with a Simon Says Stamp set called Envelope Sentiments.  What a great set this is:
And here is the back flap:
T

The paper I used is from Papertrey Ink and the black cardstock (which cuts well in the Silhouette) is American Crafts.

And that is it for today!

I entered this in the Welding Challenge at the Silhouette Blog HERE.
Happy Sunday and happy crafting!!!


Wednesday, August 7, 2013

Happy Birthday!

A special little boy in my life, JP,  is having a big 5 year birthday in a few days and I wanted to make him a card with a big old 5 on it.


I used some Cosmo Cricket paper from a stash I had.....I'm wondering if I used this same paper on a card for him last year?  LOL!

I cut the "5" window on my Silhouette with the Arial Bold font.  So easy and so fast and I could size it exactly the way I wanted.  I just created a rectangle in my Silhouette Studio software and positioned my 5 where I wanted it and cut it out.  Easy peasy as they say.

The birthday cake was made with a Lawn Fawn set.  I know I should have put 5 candles on top but they were just so teeny and tedious to cut out and I took the easy way out!
The "turning" stamp is from Paper Smooches.


Here is the inside and was done with Penny Black and Paper Smooches stamps:

And lastly, I decorated the envelope with a stamp set from Simon Says Stamp and some Stampin' Up inks:
Not that JP will care but I thought it was a cute touch and since it will travel in my daughter's purse to the destination I think there is a less likely chance that it will get tossed or lost!

(thinking ahead....)

And now that I look at it I think it's calling for some Glossy Accents on the cake.  Off I go!

Big day today...tennis in an hour, hair cut and time with the grandkids later in the day.  Life is good!

Happy Crafting!