Showing posts with label Watercolor. Show all posts

Monday, February 1, 2016

Loving Watercolors!

I am taking the Watercolor Class - Intermediate at Online Card Classes.  I am barely through Lesson 1 (ok, I'm NOT through Lesson 1 yet!) and have already learned so much.  It's a really great class and if you have any interest in increasing your watercolor skills then I certainly recommend it!

In the pre-class exercises we worked on color swatching, color mixing, and transparency vs. opacity in our paints.  Very interesting stuff there! In Lesson 1 we actually created a card where we applied our new found knowledge of creating color washes.  Interesting and fun stuff!

The instructor, Dawn created a really awesome card by tracing around a pear and dropping color onto it.  I didn't have anything like that and the supplies I had on hand were limited so I cut out a design with my Silhouette and traced around it.  Two little birdies.

Here's the first one I did with Kuretake Gansai colors:

The bird on the right got a little muddied as the colors mixed but it was fun to do anyway, and since I took this photo with my iPhone the colors may be a bit off.  I think they are more vibrant in real life.
I used a Lawn Fawn sentiment stamped in Hero Arts Cup o' Joe.

Then I did it again using Winsor and Newton tube paints.  Basic red, blue, and yellow that I mixed for a variety of colors.

I love the variations of the red, blues and purples.....a little yellow and red for an orangey beak and all the colors mixed for some variations in brown on the limb.  I stamped the sentiment with MFT's Things With Wings stamp set.

And voila (!)....they look like birds on a limb! LOL! Very fun to do and pretty easy...but of course, you'll never get exactly the same results twice. 

Off to Lesson 2 1b! 

Happy Crafting!

Wednesday, January 27, 2016

Reinventing the Wheel...

Sometimes you learn how to do something....and then if you're like me you don't practice enough and *whoooooosh* that newfound knowledge escapes to some place unknown where all that newfound knowledge goes!

Several months back I bought a PixScan mat and googled and read and googled and read and googled and read how to do cut out stamped images with my Silhouette.  I thought..."what great technology"....I need that knowledge.  Well, I got the knowledge and then as I said previously....*whoosh*...it was gone. It might be laying around somewhere but it certainly couldn't be found in my brain!

So I had some time the other day to try to find the knowledge again (which I did) and I thought..."now how am I going to remember it?"  It certainly won't stay in my brain as there is no room to hold onto newfound knowledge.  My brain is already overflowing with more important things like "did I turn the coffee pot off", "is today trash day?", "where is my (fill in the blank)?", etc.

I thought to myself that if I wrote myself a tutorial on my very own blog I can access what worked for me in the future (and, of course 'future' means anytime after this particular second!

I know you all know what I'm talking about!

(Now, if you do not have a Silhouette or have absolutely NO interest in this technology you can just skip on down to the end and see a couple of cards I made.  And thanks for looking!)

Here is my tutorial:

1. Your Silhouette software must be calibrated to the source that captured your original image.  In my case, it is my iPhone and I have already done that.  But if it gets out of calibration then look HERE for how to calibrate. Once your phone is calibrated you shouldn't have to do it again.  Shouldn't have to....but then again, who knows?  Anyway, mine was still calibrated just fine after the previous attempt.

2. Stamp your images on your paper in whatever ink you desire to use, keeping in mind what you will use to color them (watercolor pencils or brushes, Copics, etc).  Of course, you can go ahead and color prior to cutting if you wish but I hate the idea of spending a lot of time coloring to have my cuts not be quite right.

3.  Then place your stamped images on your Pix Scan mat making sure that it is within the black outlined rectangle and take a picture "straight on" of the images.
By the way....these oh-so-cute images are from My Favorite Things "Things With Wings" stamp set.
4. Next you go to your handy dandy computer and pull up your Silhouette software (I use Designer Edition but any will do).
5. Go to File in the top left....click on it and then find Open PixScan Image and click on it.
6.  Over on the right of your screen you will see a window open up (the previous image you had imported will also show up but disregard that) and click on "Import Pixscan Image from File".

7. Find your image on you computer....I had mine in my Dropbox folder and click on it.
8. Then your little window on the right of your computer screen will looks something like this and you will see some blue and white lines in motion where it says "Loading Image".
....and the image you are importing will also show up.  Cool!

9. Then on the main part of the working surface of the software your image will show up....like this:
  10. OK....now you need to start telling Silhouette what you want to cut.  So the first thing is to go to your Trace window which is the square highlighted in the blue.  The Trace window will pop open with some options.  You will need to select your Trace Area so click on that and then go to your image and click on what you want to trace.


11.  I wanted to trace everything of course so highlighted the whole kit and caboodle!
Once you have your traced area the way you want it.  (There are tips to tracing but I will not go over them here.  Check this link out HERE if you want some basic info on tracing.)

12.  Select the part of the image you want to trace.  In my case I wanted the Trace Outer Edge option.


13. Now you will have cut lines right on the edges of your images.  I wanted to cut with a white edge so I needed to add in another step.  I think cutting with an offset is probably a little more forgiving but I will make a note to myself to try to cut on the image at some point!

14. So now I go back to the top of the screen and click on the Offset Window.
 The following window will open.  Make sure your images are selected and then click on "Offset".
( IMPORTANT!: One thing to remember at this point is that you still have cut lines on your image and at some point you will need to drag all of those off the cutting page. You most likely will not want to cut out the image with the offset and then on the image itself!)

16. You will then have red cut lines around your image.  You will need to use the slider bar or arrows above to increase or decrease the amount of the offset.  I found that for me 0.040 worked perfectly for me. 

 17. At this point you may need to clean up your image as some things may be identified for cut which you do not want cut.  For example....in the little bird above were some extra "cuts" inside the wings I didn't want cut.  I simply went to the top of my computer screen and clicked on Object and then Release Compound Path and then was able to delete those little bits of junk I didn't want cut.

17.  Here is my totally cleaned up image ready for cut (the original cut lines have been moved off the screen....you just can't see them here.)
 18. Then you simply load your mat and set your cut settings the way you want.  I used Neenah heavy cardstock so used coverstock as my choice and actually even engaged double cut.

19.  This is what I ended up with:


So what does one do after cutting out 427 pieces?  Why make 50 2 cards, of course!
Here is the first one colored with a variety of water color pencils.


This one was colored with Zig Clean Color Real Brushes.


I used Distress Inks to create the backgrounds and some stitched dies from Simon Says Stamp.

You can see how nicely the PixScan technology worked!


Friday, November 6, 2015

Share Handmade Kindness

Well, my goodness, my attempts to start blogging again have met with a huge F in effort! I have been creating...just not sharing. Some of the things I've made are NOT shareable (LOL!...U G L Y!) but I do have a few things that have been fun and have worked out (and yes.I.copied.most.of.them from the superstars!).

But today I wanted to bring up the campaign Jennifer McGuire is spearheading at her blog which is "Share Handmade Kindness".  We all need a bit more kindness in the world, don't we?  With handmade gifts we can share that kindness and, perhaps, bring a smile to someone's face.

You can read about the campaign and challenge HERE.

I have been sending out a few cards lately and have had more fun decorating the envelopes than making the cards.  I've done some watercolor washes ala' Kristina Werner which have been well received.

And then I decided to decorate this envelope with a little scene done with some older Hero Arts stamps I have.  My friend, Amy, moved into a new house recently and I wanted to send her a congratulations card.

So here it is:

I blurred her address for obvious reasons.  Can't have ya'all stalking her!

Anyway, a little fancy hand lettering made it even more fun.

I used the Zig Clean Brush Pens which I recently purchased and absolutely love.  They are so much fun and so easy to work with and I am a huge fan of the watercolor look!

We have had so much rain lately that I slipped this envelope into a clear envelope for mailing.  I certainly didn't want my work to wash out!

And that is it for today...a little kindness is on its way to Amy!

Happy Crafting and spread the kindness!

And I am linking this to Jennifer's blog HERE.

Thursday, May 14, 2015

Happy Birthday to You!

Can it be???! A second post for today?  I felt sort of guilty about just posting about Evernote and how great the program is for keeping track of your stash so I decided to actually post a recent card I made. Evernote is great...but that whole post was sort of blah...so here's to a little non-blah, I hope.

I recently bought the Kuretake Gansai Tambi watercolors. I had seen so many of my favorite bloggers using them that I just had to get a set of my own.  They had been on my wish list for a long time so I finally bit the bullet and picked them up off Amazon.  How wonderful and vibrant they are! I have enjoyed playing with them a bit recently.

I made this card using the fabulous (and older) Secret Garden set from Stampin' Up.  I also used a die from Lawn Fawn for the sentiment.  Before coloring in the flower I heat embossed the stamped image with white embossing powder.


I swear the watercoloring looks better with prettier shading in real life.  Trust me! It couldn't be that I don't know what I'm doing...LOL!

Happy  Crafting!


Monday, May 4, 2015

And a Happy Birthday to Me!

Yesterday was my birthday...I turned a big ol' 6-oh.  I am no ashamed at all.  My mother grew up in the era where "ladies" did not discuss their ages. Not me...I'm proud I can start getting senior citizen discounts at various places! No shame in that!

I had a wonderful day including a 5 1/2 mile hike at Stone Mountain Park.  The weather was perfect...bright sunshine, warm weather...low HUMIDITY! Perfect for a wonderful walk with my #1 daughter.

Here we are at the beginning of the trail:
We had a great time...I love hiking and the Cherokee Trail at Stone Mountain is a wonderful trail that makes you think you are out in the wilderness at some parts.
Some of the views were quite lovely:
This photo was straight out of the iPhone...could be edited for some improvements, I'm sure....but isn't that reflection just wonderful?

After our big walk we went out to lunch where my son surprised me:
It was such a special treat to spend an hour or two with these two. They decided it would be fun to just have some time to Mom themselves and I loved the idea.  We will have a big get together with the spouses in another week or two. :)
Lastly I did go to my daughter's in the evening for a steak dinner.  She also prepared my favorite cake...German Chocolate and I had a little help blowing out the candles!
 Life is grand, isn't it?

And now on to my card share for today...a simple watercolor card involving the smooshing technique which Laura Bassen describes so well in her video HERE.  It is a highly technical and difficult technique. (not...)

The sentiment at the bottom is from a rub on set that was included with the Simon Says Stamp Kit for April.  Perfect for the my highly technical and difficult watercoloring.  True (the part about the sentiment, anyway.).

The striped tape is Washi....love it.

Her is a closer look at the sentiment:
It really is all lovely in person than on this dream like website.  LOL!

And that's it for today...hope you all are having a tremendous day...don't forget to stop and smell the flowers...and spend a little time daydreaming, too!

Happy Crafting!

Sunday, February 22, 2015

You've Got This!

I made another card with the very cute little Tiny Heroes set by Mama Elephant for a special young lady.  She's a blond so I made this one with lighter hair with my Copics.  My friend, Cyndi, told me my coloring was getting better and I told her that's only because these images are so teeny! HAHA!

I also used the frame die from Sew Fancy...also by Mama Elephant.  The paper is From Lawn Fawn and to make the blue sky...well, I simple used some Distress Ink on one of those little round blender thingies. 
I just love this set for and that it has both little super heroes that are girls as well as boys!

Kristina Werner shared a video last week where she watercolored some custom envelopes.  I loved what she did so much that I thought it would be fun to try.  I don't have my WRM punch board with me (the easiest way to make envelopes of just about any size!) so I used my Silhouette to cut some out (the second easiest way to make envelopes!).  I used standard 80 lb watercolor paper. Kristina's method is to use frisket masking fluid or resist fluid to write the name.  Then you let it dry...watercolor over it (done with Distress Inks) and then remove the dried masking fluid.  I made several but I wrote the address on the others before I remembered to take pictures so I don't want to share those here.  I love the custom look and I think the recipients will get  a kick out of seeing their names on the envelopes in a more artsy way.

This was the first one I did....and I think I got a little better with the masking fluid and the watercoloring for the others but you won't get to see those! Sorry...!
 The idea is simple to follow and no two will ever be the same...

Happy Crafting!


Saturday, June 7, 2014

Happy Birthday, Amanda!

We had a week of birthdays....my granddaughter, Taylor's, was on Monday and her mother...my wonderful daughter, Amanda's was on Tuesday.
She turned 29+.  LOL!

Here we are 34 years ago:
We didn't realize it at the time but the film in my 35mm camera was not loaded properly...and in those days we didn't take many photos anyway because processing was so expensive!  Anyway, we only got a few polaroids at the hospital.  Here we are on our way home.  I look dazed.  I was.  Amanda weighed 9 1/2 lbs.  She was 3 days early.  I am short...5 feet tall.  Yep, there were 30 babies in the nursery at Tallahassee Memorial Hospital in Tallahasee, FL on June 3 and she was the biggest of 'em all.  Back 34 years ago a 9 1/2 lb baby was considered a very large baby.  Nowadays those big 'uns are more the norm, I guess.
Anyway, since I am in my watercolor mode I made her this card:
 I used distress inks on water color paper and made a gradient type thing...the colors here are not "true" as there really was a little more color variation in the actual paper card.  I added a little wooden heart I also used distress ink on...and here is another disclaimer....it matched the paper better than it looks here in the photo.  I promise!


I

Oh, and after I posted my card that I made for Taylor's birthday I thought it looked so plain online so I went back and added some sequins to spiff it up a bit.  Here's the card I posted the other day:
 And here it is with a bit more flash!

What a fun week with lots of birthdays and birthday cake! Yum!

Happy Crafting!

Monday, June 2, 2014

Happy Birthday, Taylor!

Today is my darling granddaughter's 3rd birthday.  I remember Taylor's birth as if it were yesterday.  My daughter called me in the morning to tell me she thought she might be in early labor.  Well, I had a tennis match and figured I had plenty of time before this little girl would make her way into the world.  I played my match...checking my phone constantly to see if there were updates.  And of course that particular match was very long....I believe we played two tiebreakers.  It was hot and I got a terrible dehydration headache...but I made it to my daughter's house to get my grandson and my son and daughter sped off to the hospital and that little girl was born soon after!  Oh...and we won the tennis match, too!

Here is a photo of her taken at her Chuck E. Cheese birthday party on we had for her the other day:
OK, so you think...why did Susan post a picture of her when she obviously closed her eyes?  Well, that's the look we get when we say "Taylor, smile!".  LOL!!!
Here is one taken the day of the wedding recently....I love this photo of her.


She is a very sweet, loving, and silly little girl.  Happy 3rd Birthday, Taylor.

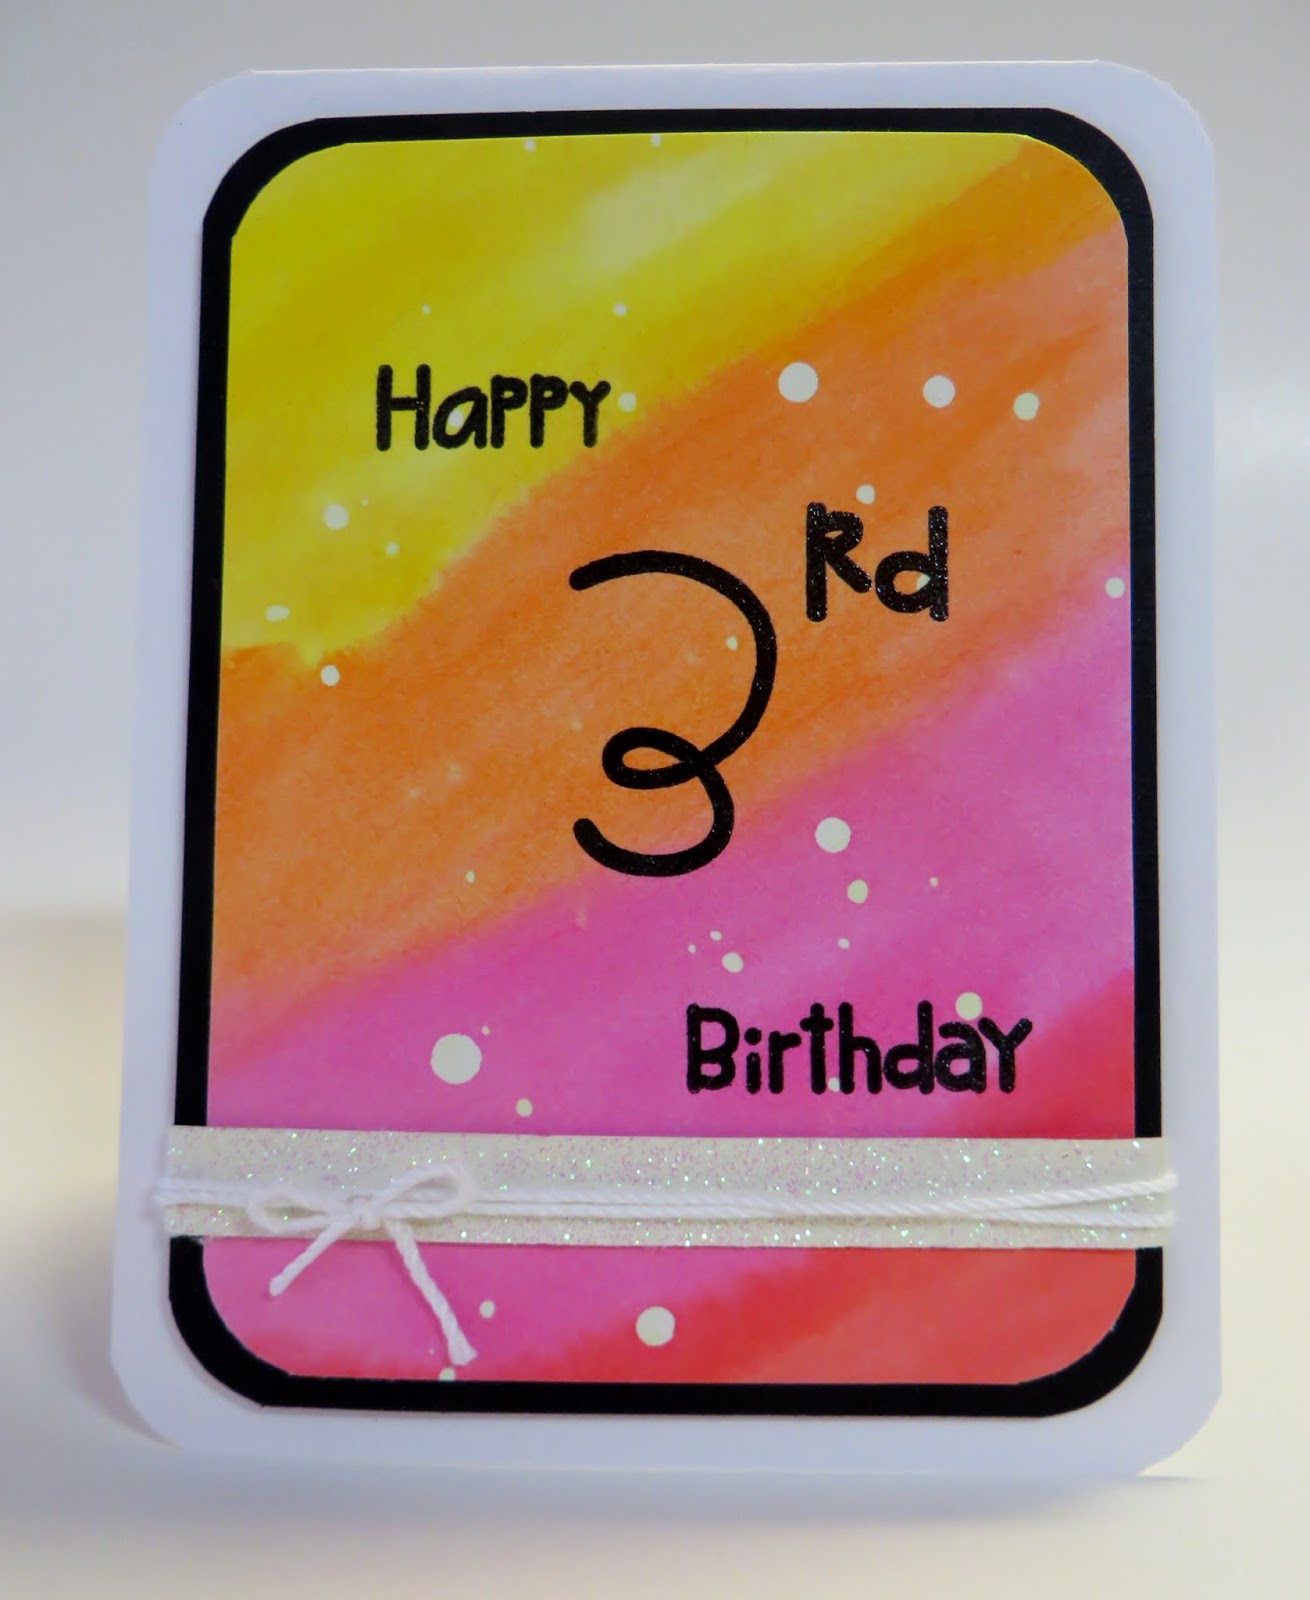
For the occasion I made this simple flat card:


I had wanted to play with a watercolor background and did this with lots of water and several Distress inks.  I just smooshed the pads on an acrylic block and then lifted the color with a wet broad paintbrush.  Just swooshed the color on...misted the paper a bit more to get the colors to blend a bit and that was it.  Oh yes...and the new thing (for me) was to use some liquid frisket which I dripped on the paper.  You let it dry and then it creates a mask.  So that's how I got those cool white dots of drip!  The one thing I learned is that the frisket smells like teetee as my grand-kids would say.   Lots of ammonia in it!  P.U.!!!
It was fun, though and I'll use it again! :)
I stamped the number and sentiment with Paper Smooches stamps and Versafine ink and heat embossed them with clear embossing powder.
That's it for today...off to celebrate with a very special little girl!

Happy Crafting!

Wednesday, April 16, 2014

Cards That Never End...

Do you make a card that never ends?  You know...you have an idea for a simple card in your head and you go to work on it.  But it doesn't just translate to paper the way you see it in your head....know what I mean?  So you stamp your image on white paper, wait for it to dry and then watercolor it...and cut it into a mat shape smaller than your card base.  Then you decide that doesn't look right so you corner round it.  Nope...that isn't going to do so then you decide to cut around the image leaving a little bit of white.  Doesn't quite work so you cut it again on the image line.  Then you remember you bought some new dies from Simon Says Stamp that are way cool postage stamp dies.  You get the correct sizes and proceed to cut them out.  You adhere your image to the smaller one and it just looks so plain so you think...ok, how about some embossing?  So you spend some time looking through your dozens of embossing folders and pick the one you always use anyway...the Swiss Dots.  So you emboss....and then you realize you debossed.  Not a huge problem, right?  You can just turn it over.  Not this gal...you don't like the way the die looks backwards because the edges of the die don't look uniform with the other die cut you've made.  You know how metal dies give that curved edge...well, it has to be curving the right way!  So you go get more paper and do another mat which you have to cut out with the dies and then emboss.  Then you assemble you card.  And you realize you need some Wink of Stella glitter on your flowers.  And the bunny nose.  And ears....and the stems of the flowers.....and after you have meticulously applied all of that....well then you decide the whole dang image needs it.  Oh....and I forgot about the part where I had stamped my greeting directly on the pink piece before embossing and then didn't like the way that looked either.  And of course stamping on the white banner took a couple of tries because it wasn't straight and if there is something that bugs the OCD in me it's when something isn't straight! LOL!!!!

And then you hate the card.  LOL!!!!

Not really....I don't hate it.  But what should have been fast and easy was NOT fast...maybe easy....but not fast.  

If you are bored to tears by my narrative.  I get it.

So instead of 4 Easter cards I only made 2.  And this is the bugger that took so long!


I used Distress Markers to water color.  The stamped ink is Simon Says Stamp as are the two colored cardstocks.  The stamps I used were from Mark's Finest Papers and were a gift from a friend.

I've entered this in the A Blog Named Hero: Challenge #42: Layer Cake.

And that's it for today!

Happy Crafting!

Sunday, September 2, 2012

Papercrafting Can Be Hazardous to Your Health!

I made this lovely card:
Just as I finished it up and was oh so proud of it I noticed some ugly spots of ick right next to the sentiment.  See?  Oh no!!!  I've done that before...finished up something and touched it to ink!  Aaarghhhh....but this time....no....it wasn't ink....It was BLOOD!  I had nicked my finger with my scissors and didn't realize I was bleeding!!! I was soooo mad at myself.  Ruined card!  All that work! LOL!!!
So yes....paper crafting can be hazardous to your health!  Beware!
Luckily I did this card with an image from the Silhouette store and I was able to duplicate it pretty easily.
I used some watercolor paper and the summer series Tim Holtz Ranger Inks as well as some water on a wide paintbrush and dabbed color on the paper.  Then I just adhered the Silhouette cut image over the watercolor paper and stamped a sentiment with a Papertrey ink stamp.  Very Clean and Simple in my opinion.

Here is a closer look:

 And here is another version where I put foam tape between the watercolor image and the die cut:

I love this idea....I love this card.  I could improve on it but I love the technique.  And of course I stole borrowed this idea from something I saw on Pinterest.  Here is the link to the original post I pinned.
I am going to a wedding celebration today and so I made a card for the bride and groom similar to one I made recently and shared HERE.
Here is my new version....the diecut is from the Silhouette store.  The sentiment is Papertrey ink and was embossed on a little banner cut with a Die-Namics die.

Update:  I entered this in Simple Salutations Anything Goes HERE!

Now...what to wear to the wedding celebration?  I know one accessory I'll have....a big old bandaid on my finger!!!

Happy Crafting and Happy Labor Day!

Saturday, July 7, 2012

Imagination Can Take You Anywhere

In yesterday's post I showed the things I brought back from my shopping spree at Scrapbook Expo.  Since I've gotten more heavily into stamping this past year or so I was delighted to see all the different stamping companies represented....and many new to me.  I didn't buy a ton of stamps because ...let's face it...they can be very expensive...but I had a great time looking.  One set I bought at a nice discount was a Unity Stamps set called Happiness Is...  I just loved this little girl on a swing.  And I love Unity Stamps. They are cling stamps and such wonderful quality...you always get a good image!
 I stamped the young lady with Ranger Archival ink onto some water color paper.  Colored her in with a combination of Stampin' Up and Close to My Heart inks as well as a little Distress ink. 
 I added a little "magic" to her hair and a few other parts of the image to simulate a bit more movement...she IS magic! :)

I mounted the image on black cardstock and then placed that on a Loolah paper that has text on it.  I'm entering this in the CAS-ual Fridays Challenge CFC60 which is for a clean and simple project using Text.

Today is the championship match of the ladies at Wimbledon.  Serena Williams vs Agnieszka Radwanska.  Power vs finesse.  My money is on Serena but hopefully the match will be a great one!

Happy Crafting!!!

Sunday, May 27, 2012

Watercoloring with Distress Markers

I was going through the closet in my craft room a while back sorting through some old Stampin' Up stamps I had and came across the FIRST EVER stamp set I bought!  My friend had dragged me kicking and screaming to a Stampin' Up party.  I was determined I was NOT GOING TO GET INTO STAMPING!  I just thought it was way too messy and I never could seem to stamp properly with the little stamps I'd picked up at Target or Walmart.  Well, of course with some demonstration of proper technique I got it and became a huge fan of stamping and a huge collector, as well!  I still have some old sets of SU stamps that I just can't part with....and I've kept this set because it was my "FIRST EVER"!  It was called Forever Friends and I got it in 2002.  Ten years ago!  Wow!
Anyway, I remember this cute image and pulled it out and thought it would be great for watercoloring with the new set of Tim Holtz Distress Markers I recently received.
I love the way it turned out....and I learned a few things....like REMEMBER TO USE WATERCOLOR PAPER. 

I forgot after I got going and so I had a little bending of the paper but it flattened out nicely.  Still, the watercolor paper would have been a bit easier to work with.  It was fun using the markers and blending and shading with them.  I was pretty happy with my first time result.
The pink paper and ribbon is Raspberry Fizz from Paper Trey Ink.  The sentiment is from Lawn Fawn.  And I used a little Glossy Accents on the little birds.

Happy Crafting!