Showing posts with label Card. Show all posts

Sunday, March 9, 2014

Rehearsal Dinner Invitation

I am back from my 5 week "sabbatical" at the beach. I left here on January 31 and returned on March 6. I rented a house in Laguna Beach, FL, took the dog down and enjoyed being away from the terrible weather in Atlanta during that time. We saw beautiful sunsets like this:
 We hiked miles and miles and miles at several fabulous parks.


 We saw some cool birds like this huge egret:
and some turkey buzzards as we call 'em in the south...you northerners might call 'em vultures:

I drank wine on the beach (in a plastic cup):
Life was and is very, very good, isn't it?

But back to reality.  And my reality is that my son is getting married in about 7 weeks!  So it is time to get going a bit more on the rehearsal dinner. 

Here is the invitation (or one of the zillions of versions) that I have created and once I have a few more details finalized will get printed by Costco.  I saw an invitation online and definitely stole used it for inspiration.  It was a great starting off point for my version. 


Sorry but I had to blur out the details because even though I love you all I don't want you showing up! LOL!

What do you think?  Any changes?  Not sure about the background...I'm still playing around with that a bit.

Happy Crafting!

Wednesday, February 13, 2013

Thinking of You

I decided to join the Simon Says Stamp Card Kit of the month.  I think it's a wonderful value and know I will look forward to the challenge of making some great cards with it each month....or using it for Project Life or general scrapbooking.

Here is the first card I made with the January kit (yes, I'm behind!....but that's ok...it will be fun catching up!):

 Pretty simple....great card for a guy or a gal, I think.... I also used the large banner die and stamp from Simon Says Stamp...I've been wanting to get my hands on this for a long time.  I love the dimension that is added by actually folding the banner (as opposed to some of the banner dies out there that are flat!).

The printed paper is Lily Bee and the tag is a Tim Holtz tag.

Simple.  I like simple sometimes....

What to do today...well, I think I'll walk the dog and then head to Hobby Lobby....I need a new embossing buddy!

Happy Crafting!

Saturday, February 9, 2013

Valentine Card ala' Archiver's Style

Time for a blog look change.  I'm tired of cold looking stuff!  But boy oh boy the northeast got hit by a humdinger!  Wow!  Hope you all up that way keep power!

Here is another card we made at Archiver's when I took the card class last week. This was done with a Lawn Fawn stamp set that is just so cute.  I love this card and of course it could work for any kind of wishes you might like to send!

Isn't that just so cute?
Here's a closeup:
Happy Crafting!

Sunday, February 3, 2013

Simply Valentines

Here is a simple Valentine's Day card for you!
White on white which I always love with a hint of color.  I used the Cuttlebug hearts embossing folder and then a tiny heart stamp from the Hearts2DieFor stamp set from the Stamps of Life.  I embossed the little stamp with some white embossing powder and then I used Glossy Accents over the top.  The sentiment is from Hero Arts.

I keep meaning to tell you my tip about Glossy Accents which I just happened upon by accident.  My tip would always clog up and I would use a straight pin or needle to unplug it.  Well, one time I accidentally left the straight pin in it.  And it wasn't clogged.  And since there is some gooey Glossy Accents in the top when I unscrew the cap the straight pin usually stays with the top.  I have used over a half a bottle of Glossy Accents and it still is flowing freely and I've never had to unplug it!  So keep a straight pin in your bottle.  It works!

Most inventions were probably by accident.  I wonder if I could patent this! LOL!

Anyway, here is my card:


Sunday, September 30, 2012

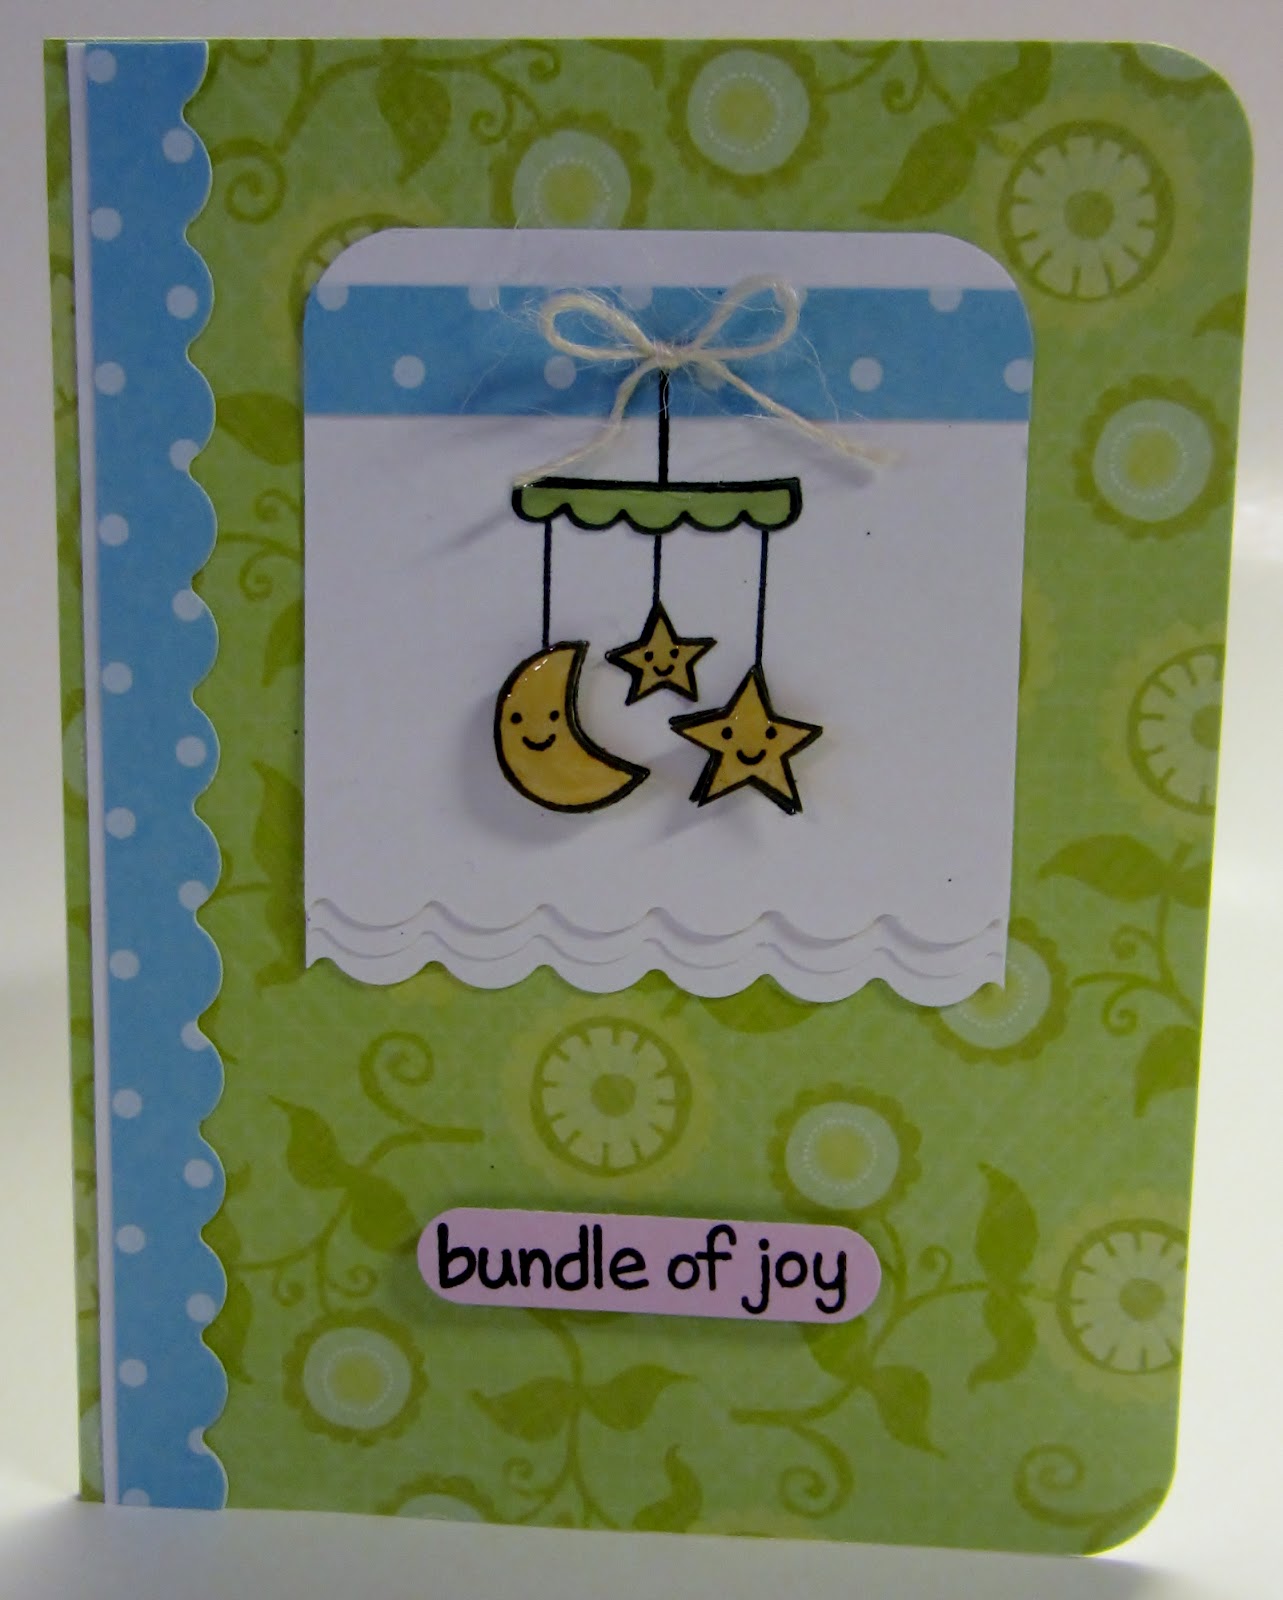
Bundle of Joy

Linda, one of my besties, favorite people in the whole world and tennis partner of more than 10 years, is going to be a grandmother next month.  Her son and daughter in law are expecting their first baby.  They are going to let the gender be a surprise....so we all have bets going.  Linda has 4 boys so I see them having a little girl to start balancing things out! LOL!

I crocheted a baby blanket for her that I'm going to go ahead and give and wanted to make a card to go with it.  I used Lawn Fawn's "Plus One"....a really cute set with a ton of stamps on it.  The papers are K & Company's Life's Little Occasions.
 I cut the large star and the moon out twice and then mounted them with foam tape.  I also used a Fiskars scallop punch for a little more fun!  We gotta use our toys, right?

 I also decided to make another Pisanki inspired card with the first image I had made the other day and MESSED UP.  I salvaged it by trimming it a bit more and placing some ribbon over a booboo.  I love when I can save things, don't you?!  The sentiment is a Hero Arts sentiment.
 Success!  Saved!

It's cloudy here today....rain is in our forecast.  I have a tennis  match this afternoon....hoping we get it in before the rain comes!

Happy Crafting!!!


Thursday, September 27, 2012

The Bold and the Beautiful!

I LOVE bold!  I love subtle, too, to be honest but I do love bold!
I love Wednesdays because Darlene of Darlene Design posts a new video.  I love her videos.  She speeds up her videos while she talks about what she's doing so you can see what she does and it does not drag on and on and on.....time is at a premium for all of us, isn't it?
Yesterday she posted a video about a split background and I loved the idea.  She used a large background stamp and I didn't have anything similar that really caught my eye so I decided to use some cling stamps I got at Michael's a while back on clearance.  I had liked the bold look of these but hadn't used them.
So, I used Versamark and stamped the images randomly to create a background and then used Zing black embossing powder and heat set it.  I never do this....and really for me it's never as easy as it looks!  I have a hard enough time seeing "at my age" and it's hard to see where I used the Versamark....the first time I tried this I over stamped and that didn't work right! Anyway....this was a bit out of my comfort zone.   I colored in the images with various Stampin' Up and Tombow markers.  Once the coloring was finished I cut frames out of it that were all basically 5/8 of an inch and mounted those on black mats cut about an 1/8th of an inch larger.  Then I just stacked them one on top of each other.  It makes for a little dimension without the bulk.  Of course I had to bulk it up by adding some gems for a little extra SPARKLE.  I stamped the sentiment with a Hero Arts clear stamp (Friends) and heat embossed it as well.  And here...is the card:

I love the look....this reminds me of that Russian art for eggs...Pisanki.

I think I will use this over and over....it is so bold and striking!

I entered this in the following challenges:
Baker Designs: Second Floor Challenge #9-Embossing
Stampendous September Challenge: Embossing Techniques 
Simon Says Stamp and Show: For the Love of Sparkle


Wednesday, September 26, 2012

The Best Things Come in Small Packages

That's what they say anyway....the best things come in small packages.  Being a small person I've used that to my benefit many times.
I don't know if that's true....my Silhouette came in a big box...my Big Shot came in a pretty big box...I guess size is relative though and those boxes were small next to...say...an elephant.

Anyway, I do like small things....and when I was at a local stamp store the other day (Impressive Ideas) I picked up this Memory Box die called Wildflower Patch which was quite teensy and proceeded to put it in my basket.  The teensy sizes of the flowers was just so appealing to me.  I like teensy!

I ran them through my die cut machine and they cut beautifully and they are just so darned cute!  I colored them with Copics and adhered them to a small 3x3 card and used a Papertrey Ink sentiment on it.  Perfect for a teensy eensy gift box! :)

Not much too it....but so cute and tiny.  Clean and crisp.  You know?

Happy Crafting!

Tuesday, September 25, 2012

You Are So Thoughtful!

I had a little time in my room yesterday....Hubby was on fixing things and putzing around the house mode and I certainly didn't want to do anything to thwart his progress!  Plus I didn't really want to help! LOL!  So under the guise of "I have some things I need to do downstairs"....I went and played while he worked.  :)

Here is a card I made using some Papertrey Ink products....a Flower Fusion set, some PTI felt and cardstock.

 I also used the fabulous new Tim Holtz embossing diffusers that my friend Melissa at Created by Sunshine Honeybee gave me recently.  They are pretty fun....the set comes with 3 diffusers....I used the circle one.  You can see how it did not emboss in a circle in the center....which then becomes a great place to stamp! 
I plopped a big ole pearl in the center....
I used a little lace that I'd gotten at Hobby Lobby. 


Simple but turned out well, I think.  I also stamped on the felt which was easy and worked better than I thought it would.  I just used Memento Ink....nothing special....but it did give a little more dimension to the flower.

Thanks, Melissa, YOU are so thoughtful! :)

I entering this in the following challenge:
Simon Says Stamp Challenge: Simon Says....Emboss!

Happy Crafting!


Friday, September 21, 2012

David's Day!

Three years ago today my life changed.  I had a great life...no complaints there...didn't really think it could get better but then my daughter and son in law gave me the greatest gift ever....my grandson, David!  And less than 2 years later they did it again with their baby girl, Taylor.  I am one lucky Omie!

Today David turns 3.  He is wise beyond his years....of course we think he is brilliant! He is all boy, of course....loves anything that has wheels and an engine!  His new areas of interest are spaceships, rockets and astronauts.  So that's what he is getting from Omie today....a Fisher Price shuttle and a few astronauts and aliens!

I made a little card with some designs from the Silhouette store....it's really a very simple card...not too much glitz and finery as he won't care.  He will just love the astronaut, though!

Then I wrapped his gift in some white paper and cut some additional images to spruce up the wrapping a bit.  I cut out his name with the Arial font with my Silhouette.

Here you go:


Happy Birthday, David....and happy crafting to you!

Tuesday, September 18, 2012

Congratulations!

A friend of mine commissioned me to make a card for her college freshman daughter who pledged the Sigma Kappa sorority at Auburn, University.
The sorority "things" (don't know what they are called) are doves, pearls and hearts so I incorporated all of those into this card:
 The dove was cut on my Silhouette Cameo with a design from the Silhouette Store.  Isn't she pretty?  Love the swirly layer which cut so nicely!  I used some Bazzill cardstock as well as some purple cardstock from a huge pack I had been hanging onto following a baby shower for a friend several years ago.  I don't use purples all that much, I guess....because that pack has just been sitting here!
The backgrounds were embossed with a Cuttlebug embossing folder run through my Big Shot.  The hearts were punched out with a Martha Stewart punch.
I found the Greek font at DAFONT and it is called "Ancient Geek" (not Greek, mind you!) and cut them out with offset to create a nice backing.  The banner was from cut with a Die-Namic die and stamped with a Papertrey Ink stamp.  I added some pearls and a purple pearl for the little doves eye.
Oh, and the border was cut with a Papertrey ink edger die (which I LOVE!).
 I adhered some of the pieces with foam tape to give more dimension.
And I also decorated an envelope....with the young lady's name as well as  few more hearts....and....
 ...Sigma Kappa symbols on the back.
That's it for today!
I entered this in the following challenge:
Use it Tuesday: Challenge #39: Anything Goes! (what have you been hoarding?  I've hoarded that purple paper pack!)

Happy Crafting!!!

Sunday, July 8, 2012

Hugs to You

Another one of my new toys I got at Scrapbook Expo is the Stephanie Barnard/Sizzix Framelits Fancy Labels #2.  This is what they look like:


  I love this set....as you can see, it comes with several sentiments and stamp frames AND a whole bunch of coordinating wafer thin dies...as well as an embossing frame.

Anyway, I had a great time playing around with this set....this card came together quickly.


I used My Mind's Eye Honey Cake papers, Papertrey Ink cardstock for the base as well as ribbon and some Enamel Accents on the hearts which were punched out with a Martha Stewart punch.

What a fun set...lots of possibilities with this one!

I'm entering this in the CAS-ual Fridays CFC60 Challenge to use text on a project.


Happy Crafting!

Tuesday, May 29, 2012

Birthday, Birthday, Birthday!

Lots of birthdays coming up for me including of course my granddaughter and my daughter (their birthdays are just a day apart).  I have some other special people in my life who are close to celebrating birthdays, too, so I've been busy making a few more cards.  I'm just glad it's not my birthday!  (Well, I celebrated one at the beginning of the month but I'm perfectly happy not having another one for a long time!)

I made this one with stamps from Lawn Fawn.  This cake set is one of those where you can build your own layer cake...too cute!

I used Echo Park paper for the background and distressed the edge.  I also added a little Rock Candy Stickles to the little hearts and some Glossy Accent to the candle flames.  The cake and hearts were colored with Copics.  And of course the cake and hearts were popped up on foam tape for a little extra dimension.  We all need an extra dimension in our lives, don't we???

And I'm entering this in the Anything Goes #64 Challenge at Celebrate the Occasion.

Happy Crafting!

Sunday, May 27, 2012

Watercoloring with Distress Markers

I was going through the closet in my craft room a while back sorting through some old Stampin' Up stamps I had and came across the FIRST EVER stamp set I bought!  My friend had dragged me kicking and screaming to a Stampin' Up party.  I was determined I was NOT GOING TO GET INTO STAMPING!  I just thought it was way too messy and I never could seem to stamp properly with the little stamps I'd picked up at Target or Walmart.  Well, of course with some demonstration of proper technique I got it and became a huge fan of stamping and a huge collector, as well!  I still have some old sets of SU stamps that I just can't part with....and I've kept this set because it was my "FIRST EVER"!  It was called Forever Friends and I got it in 2002.  Ten years ago!  Wow!
Anyway, I remember this cute image and pulled it out and thought it would be great for watercoloring with the new set of Tim Holtz Distress Markers I recently received.
I love the way it turned out....and I learned a few things....like REMEMBER TO USE WATERCOLOR PAPER. 

I forgot after I got going and so I had a little bending of the paper but it flattened out nicely.  Still, the watercolor paper would have been a bit easier to work with.  It was fun using the markers and blending and shading with them.  I was pretty happy with my first time result.
The pink paper and ribbon is Raspberry Fizz from Paper Trey Ink.  The sentiment is from Lawn Fawn.  And I used a little Glossy Accents on the little birds.

Happy Crafting!

Tuesday, January 31, 2012

Sympathy Cards

My Uncle Bill passed away on Saturday.  He was in his late 80s and was married to my Aunt Mary Louise for over 60 years.  He will be missed by many...such a kind man...always a favorite of mine.
I made this 6x6 card for my aunt using My Minds Eye Garden Vignette papers (which have a nice glittery sheen to them).  The sentiment was stamped with a Hero Arts stamp I had to cut because it was too long.  I don't usually cut my stamps but I need to not be afraid.  My stamping hero, Jennifer McGuire, does it all the time!  The oval shapes were done with Paper Trey Ink nested dies which came out just last month.  They cut great.
I actually cut two of the lacy oval and stacked one on top of the other with foam tape to give it a little dimension.
And I made a few cards for my cousins who lost a very dear father and grandfather.


 Those were done with a DCWV Mariposa Mat Stack I have had for some time.  Those papers make very pretty cards, I think.
I used an EK Success as well as a Stampin' Up  punch to cut the labels.  Paper Trey Ink provided the sentiment.  They were very fast and simple.  (I mean, how many times have I posted 5 cards in one day?!)
Well, I will be keeping David tonight so there will be no time for crafting, I'm sure!!!

Happy Crafting to you all...and I think my Silhouette may arrive tomorrow!

Thursday, January 26, 2012

Valentine's Cards or Egads(!) She Did it Again!

I made  a couple of versions of this card the other day. And yes...EGADS(!) she did it again...she pulled out THE BEAST and used it and even did a reasonable impersonation of a straight stitching!  I'm getting good, I tell you!  Before you know it the fashion houses in New York will be calling on me for my skills...and then sadly, I won't have time for scrapbooking and cardmaking any longer.  How sad....

This little card was made with some gray and red Bazzill cardstock, a Valentine print from Hobby Lobby's Paper Studio, a Hero Arts valentine set of sentiments that is relatively new, I think, and a few little silver stud looking gems thingies.  I think they are also Paper Studio. The hearts were cut at 3/4 of an inch with the Baby Steps Cricut cartridge.  I placed one heart on top of one secured with a little glue on each of the "wings" of the heart (make sense?) and taped it's wings down with removable tape. I  know The BEAST does not like having to sew through glue or other adhesives (and you really don't want to annoy the BEAST...believe you me!).After the top hearts were secured by the stitching I just removed the tape.  I love removable tape and use little sliver all the time to keep things in place.  I didn't want my little hearts slipping on me, you know...

Here's my jabberwocky closeup (don't you love that word "Jabberwocky"...love that Lewis Carrol poem!..."Twas brillig and the slithy toves...")

Hope you enjoy looking at my creation...thanks for stopping by and now I am off to see what you all have made (in between watching a replay of the Federer/Nadal tennis match in Australia!).

Happy Crafting!

Monday, January 23, 2012

And I Didn't Burn the Carpet!

So today's little Show and Tell is a little gift enclosure card that I embossed on  Paper Trey Ink's Royal Velvet with a new set that was released in November titled Stitches and Swirls.  I used Zing white embossing powder and then tied a little white cotton crochet yarn around it.

There are two reasons I am showing this....
1.  The embossing is practically perfect.  No smears...no extra flakes...the stitches are defined.  Sometimes I don't know my own strength when I stamp and sometimes I press too hard and get a goofy looking image.  I was really happy with the way this embossing turned out and I think the white on the Royal Velvet cardstock is so striking.
2.  The second reason I'm sharing this simple little card with nothing extraordinary about it is that I DID NOT BURN THE CARPET!

I have some notoriety in scrapbooking circles locally as "The One Who Burns Carpet" or "Crispy Chick"!  Once I was at a crop at a friend's clubhouse where they had just laid NEW carpet due to flooding.  Well, I was happily embossing some Christmas cards on the floor because there was no table space and imagine my horror (!) when I picked up the cards and had a lovely burned stenciled outline around where the cards had lain!  Ooops!  In my defense the carpet that had been laid was this really cheap plastic stuff...almost like astroturf and the plastic just MELTED!  LOL!!!  Only cost me $50 to repair, though, so that wasn't too bad.  LOL!  The carpet had only been down about a week.  I do have that picture somewhere, I'm sure!

And then once to further cement my status as "Crispy Chick" I was drying my hair at a scrapbooking retreat house and was sitting on the floor.  I would dry a section and then lay the hair dryer down, dry a section, lay it down.  There were about 25 women (slight exaggeration) sharing a bath and a half (not much of an exaggeration!) and the only place to dry hair was in the bedroom...there was a full length mirror but it was on the floor so to see yourself in it you had to sit down.  When I was done I noticed a few dark spots on the carpet.  Yep....burned again!!!

So, the heat embossing gun or anything that blows heat is not always my friend.  But it sure made for an entertaining story!...which gets retold at EVERY cropping thing I ever go to....and even gets talked about when I'm NOT present! LOL!!!

Happy Crafting!

Sunday, January 22, 2012

Flutterby Card

Don't you love the way kids say "flutterby" instead of "butterfly"? 
Being a speech therapist by trade I love the way children develop language.  Right now little David who is 2 and a few months will say "have it" (or more specifically he says "HAFF IT")  instead of "I want it."  For example if he drops an item on the floor out of his reach he will say "Omie, have it" which translates to "Omie, crawl on the floor under the table...watch out for the bread and butter I dropped and get my *fill in the blank* because I WANT IT NOW!" I know this for a fact.  Yesterday when we were at Cheesecake Factory celebrating my son's 25th birthday he said "Have it" several times to me as he dropped his car, his truck, his book, his crayons and his Thomas the Train at leas 21 times each.  I got very intimate with the floor under the table at Cheesecake Factory.  I will admit the floor looked much worse when we left than when we were seated!

Here is  today's Flutterby card:

The card was inspired by something I saw on Pinterest...a similar card but the inspiration card was done with the larger Martha Stewart punch. Click HERE is a link to that card. (Unfortunately the link does not take you to the site of the original card.)  I just see now where the card was also stitched.  I should have done that, too!  Now that I am pretty good at corraling my beast!
I used the new EK Success (Ok, it may not be new but it is new to me) to punch the butterflies.  The punch I used has three settings...one with a fully punched out butterfly with the more intricate look, a second that actually just punches out part of the inside of the butterfly and the third setting is a shadow or base.  In this card I only cut the "intricate" butterfly and the base.  I mounted the butterflies on kraft cardstock and then put it on a white card base.  The sentiment came from a Close to My Heart set I have.  I didn't use any foam tape but the butterflies are just glued in the centers so the wings are free and slightly bent to give a bit of dimension.

I think I will have to make more Flutterby cards!

Happy Crafting

Wednesday, January 11, 2012

Sewing Machine-a-Phobia

I love the look of stitching on paper crafts.  I enjoy hand stitching but I love when I see cards and scrapbook layouts done with machine stitching.

I, however, am DEATHLY AFRAID OF MY SEWING MACHINE!  We have a love-hate relationship...mostly hate on my end and I think the machine's love part is probably that it loves seeing me so frustrated with it.  My mom was a great seamstress.  She could do anything with a machine.  She made clothes, coats, drapes, tablecloths, all kinds of crafts.  I just knew when I grew up I would be like her.  Didn't happen.  I have had my sewing machine about 25 years...I got it shortly after my son was born and I was home on maternity leave.  I just knew I would learn how to sew all kinds of stuff while I was home with him.  I never did learn to sew from a pattern well...but I did make some curtains and some crafts...but mostly I was just plain scared of the machine.  It always seems to be possessed...had a mind of it's own and our minds were never on the same page.

But every now and then I pull out said machine and see if I can tame the monster.  Nope....I still haven't tamed it but I did do a little sewing tonight on a few cards.  I'll post one tonight and the other tomorrow:
 This card was made with papers from the Sidewalks line of the October Afternoon stash I've been using lately.  I used another new Hero Arts set which came with the Sizzix dies (just LOVE those sets).  It was fun and worked up pretty fast.  And yes...I sewed all 4 sides AND an extra part on the bottom just for the heck of it! 
Probably need to increase the tension a little but I'm afraid to do anything like that because the monster will certainly retaliate!

Happy Crafting!