Showing posts with label Close to My Heart. Show all posts

Saturday, May 11, 2013

Project Life: Week 17

My week 17 layouts for Project Life have been completed for a while but I find the whole process of taking pictures of them tedious!  LOL!  A first world problem, huh?  I'm complaining!  wah, wah, wah!
Seriously once I get the cards in their pockets I don't like removing them.  I have tried to take photos through the protectors but always get such a glare despite my many attempts.  So I take them out of the pockets and photograph and then painstakingly put them back in!  It's not so bad when the cards go in the front side of the page protector but when they go in the back side...well, it gets tedious to me.  I read where someone asked Becky Higgins if they might start putting inserts on both sides and she replied it would be "too expensive".  Oh well...I love the completed pages so I just need to stop my whining.
Stop.
Ok, There you go.

Here is the left side for Week 17....oh and I used the papers and trims and buttons from the Close to Heart pack that I did my insert page with...seen HERE and several cards for the last couple of posts. 

I opted to use one of the 3x4 slots as the "week" card for this layout.  I made my card in my Silhouette software and cut it out with my Cameo.  I added the word memories from a design purchased in the Silhouette online store.  I added a rub-on and some trim and a dot of bling to finish it.

This card was also cut from a design purchased in the Silhouette store.  I backed it with some paper, stamped the lines with an old Stampin' Up journaling stamp I have and added some buttons.
The card below was also cut with my Cameo and then I added a canvas circle from Maya Art that I inked up with some Distress Ink.  I added a little crocheted flower and a button.  I love the way it turned out!
And here is the right side:

We went to a beautiful wedding so I had to add some of those photos!  And a day at the park with my granddaughter gave me some cute pictures to use. 
Another Silhouette cut and embellished with some rub-ons and white pen work.
And oh yes...another Silhouette cut.  LOL...can you tell my Silhouette has been invaluable with my Project Life?   And thanks again, Sheryl and Phil for the awesome cradle for the children!

 And lastly...I love this picture of Taylor peeking out from the tube on the playground....and I love the quote (which is a Rub-on):


So true...so true....

Loving Project Life....loving life...;)

Happy Crafting!

Friday, May 10, 2013

Mother's Day Card!

Since the Great Scrapbook CleanOut of 2013 I am finding my scrapbook room to be a "happy place" once again.  It is just so much fun to be in there and creating.  I have always subscribed to the theory that clean, uncluttered places are relaxing but I didn't realize how it contributed to one's creative mojo!  Anyway, I have been crafting away...I'm up to date on Project Life...although I still need to take pictures of my pages....and I've made lots of cards in the past week.  (Well....about 6 or so...which is a LOT for me!)  One thing I am forcing myself to do....is CLEAN UP AFTER EACH SESSION!  LOL...everything goes back in it's place.  And guess what?  I can then find it next time around! LOL! 

Here is a card I made for my daughter for Mother's Day....I used the same scraps and trim from the CTMH paper kit I had leftover as well as the Simon Says Stamp sentiment from the May card kit.   Love using those scraps and things I already have!


I hear my room calling me....time to go make a mess....and then CLEAN UP!

Happy Crafting!

Thursday, May 9, 2013

Another Mother's Day Card

Mother's Day is just a few days away....I sure hope all you mother's out there have a wonderful time and get to spend it with your the children who made you a mother!

Here is another card I made with scraps from a Close to My Heart kit I had.

 The sentiment is from Paper Smooches...the punched edge is Martha Stewart.  The crocheted flowers were given to me by my friend, Christine.  I think they might be from Close to My Heart. 
A few pearls finished the card.
Happy Crafting!

Tuesday, May 7, 2013

Mother's Day Card 2

I rarely post more than once a day...but here I go!
Here is another card I made with the paper scraps left over from a Project Life layout.  I used Close to My Heart papers and trim.  The little flowers were stamped with Stampin' Up's Itty Bitties stamps set and punched out with the coordinating punch.  I placed a small pearl on the center of each little flower.  I used some foam tape to give the little flowers a bit more dimension.

Simple....and I love the way it turned out....

 The sentiment is from the Simon Says Stamp May Card Kit.  It's such a pretty handwriting script, I think.
I'm entering this in the following challenges (Thanks, Melissa, for the head's up!)
 QKR Stampede Ch37 Mother's Day
 Corrosive Ch173 Mother's Day
 Love to Create Ch64 For Mom or Special Lady
 Pile It On #18 For a Mother


Happy Crafting!

Mother's Day Card

Mother's Day is coming up this weekend and I hope all the mother's out there have a wonderful day.

I still have not taken pictures of my Week 17 for Project Life but after I finished my pages the other day I decided to use up the leftover paper by making some cards.  I was on a roll.  Nothing difficult...but it was satisfying to use up some scraps!

Here is one I made.
Very simple to make....just some layering of papers, an embossed heart, and some rosette trim.  The sentiment came from Simon Says Stamp.


Again, I used the same sentiment from the May kit from Simon Says stamp.  I love that beautiful and fine script.

We have had unseasonably cool weather here in Georgia the last few days.  Today, the temperatures are supposed to climb to 70 (usually a bit warmer here this time of year!) and it's supposed to be sunny...but right now it is dark and cool...and makes me want to stay in and just paper craft! :)

Happy Crafting to you!


Sunday, May 5, 2013

Project Life: Week 17 - Insert Page

Woohooo....Week 17 is finished! Done!
But I haven't taken photos of it yet so that it's debut will be in the next post.  For now you will have to just endure yet another Insert Page in one of Becky Higgins' 10x12 page protectors! ;)

My son and his girlfriend went to Tybee Island which is near Savannah, GA last weekend.  The owner of the company he works for has a house there... a might fine house, I might add....you can see it in the upper left photos:

They had a really great time...ran in a 5K, rode bikes, watched the sunset.  I think they loved their little getaway.  I loved that they both took the time to drop some photos in Dropbox for me.  I had the photos printed and ready for "production" before they even put their suitcases in the trunk of their car to head home!  I'm fast!

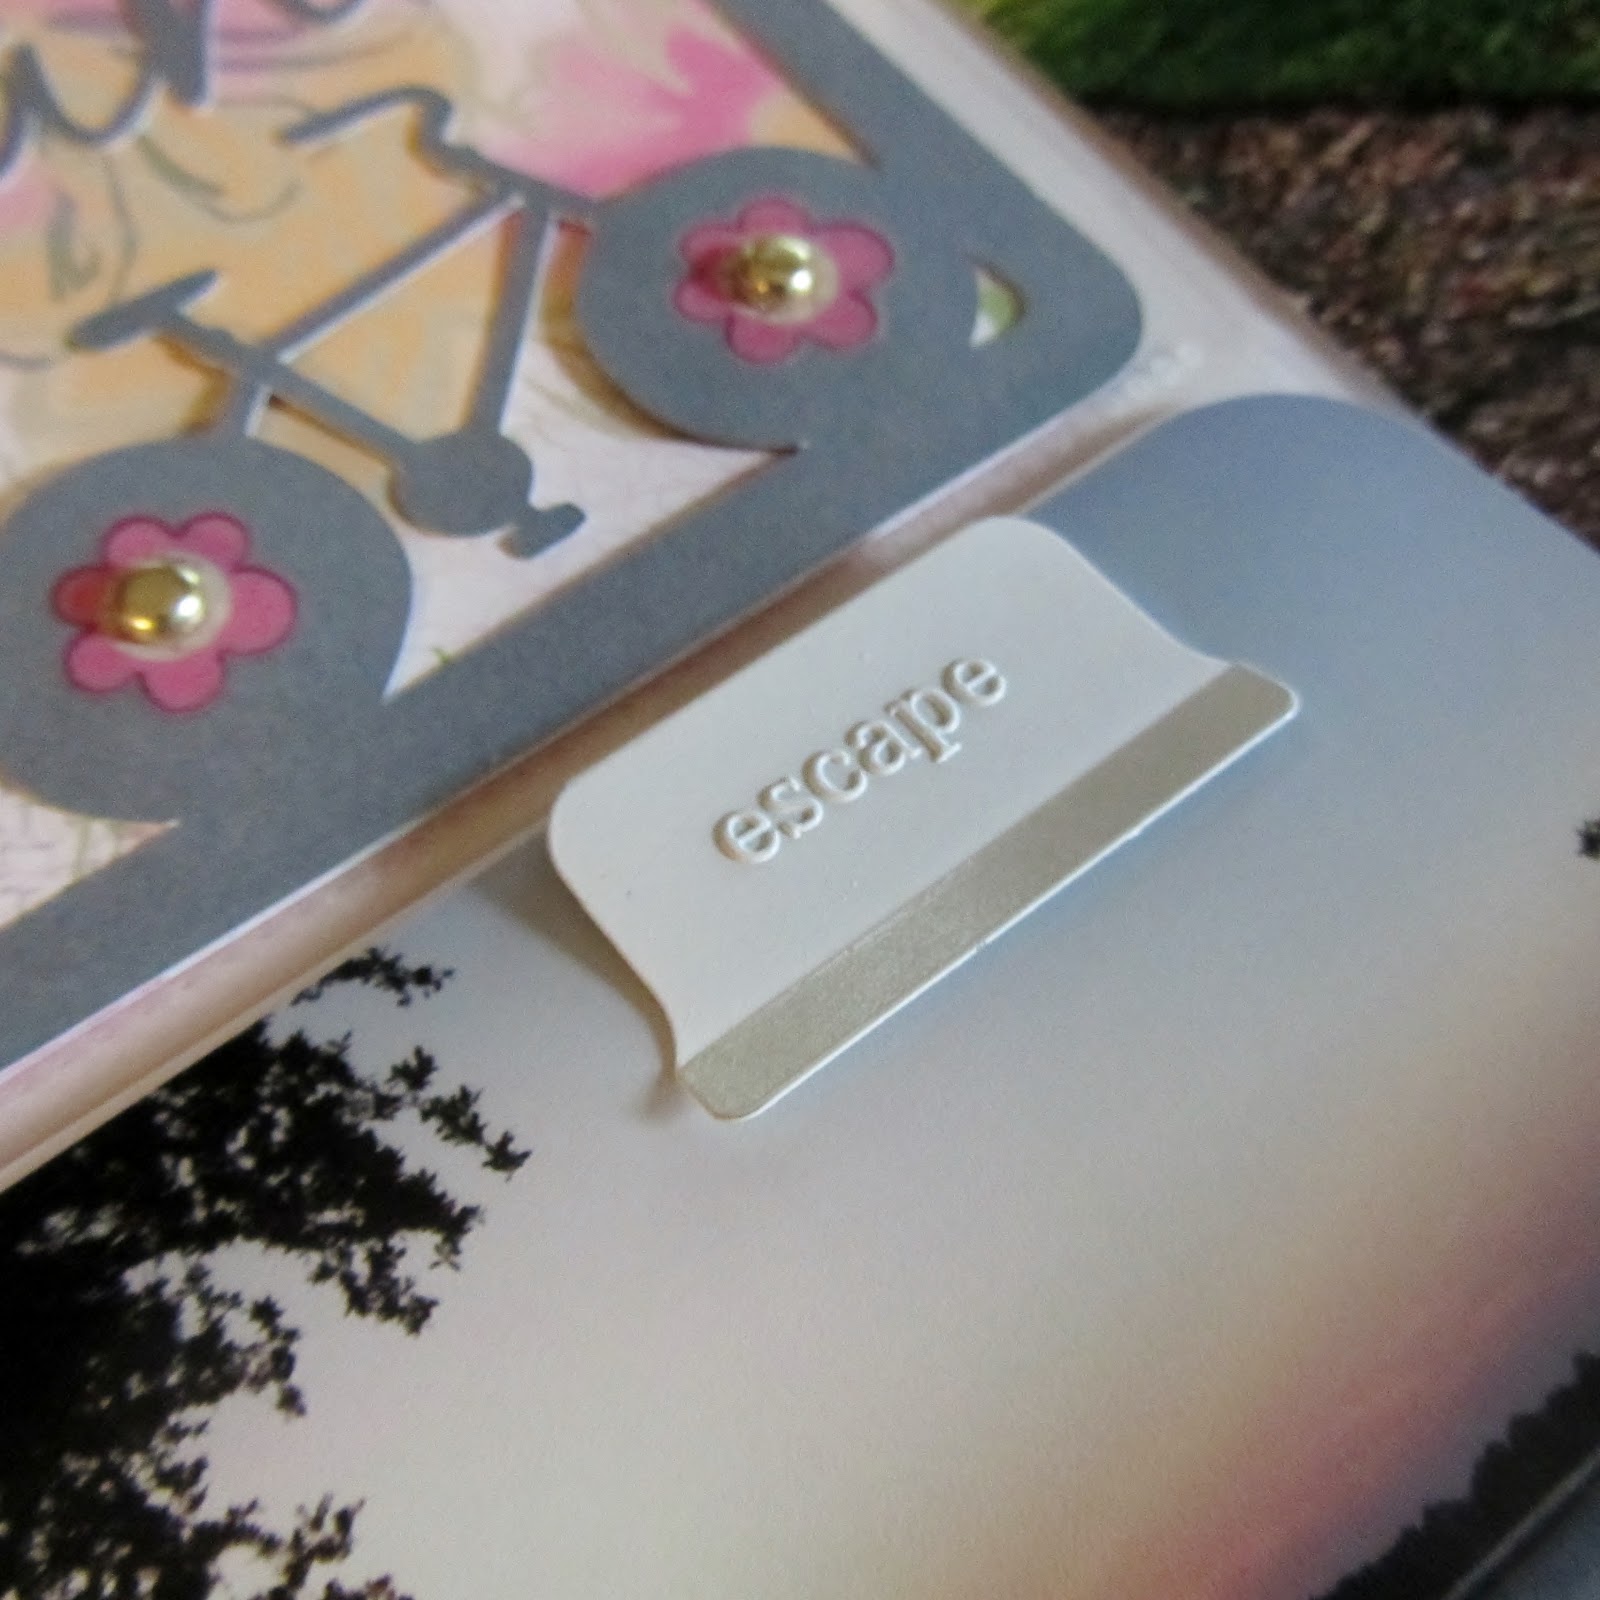
The title card was done on my Silhouette with some Close to My Heart papers.  I added some rub-ons (my friend, Cyndi calls them "rub-owns"...she is a native Atlantan...bless her heart...in a good way, of course.  I love her.) to the wheels as well as a couple of brads. Oh, and the card was cut out with a design from the Silhouette store...I just used the Blackjack font and welded it to the frame.
Continuing on my quest to use up the stuff I have in my stash (!) I came across these little clips that were leftover from another project which of course I have no clue remembering and they were perfect for this layout.  I'm glad I dug them out of the trash saved them.


Below is the reverse side:
That's my son on the left in the photo of the 3 men.

The card below was a Lori Whitlock design and I just added a bit of trim.  I didn't have room for much else! Haha!  I'm proud that I wrote more than one sentence....that's a challenge for me. 

Anyway, this will lie between the 2 page layout of Week 17 which is coming up  next.  Stay tuned!

Happy Crafting!

Friday, November 23, 2012

Flat is Phat!

OK, I am way cool...admit it.  Here I am...a grandmother of two....using the word PHAT like I know what it means.  Well, I do....do you?  Of course I had to GOOGLE it but it means Pretty Hot and Tempting.  HAHA!

So my card today is quite flat....a great one for mailing....but it is also pretty PHAT if you want my oh so honest opinion.  BTW, my husband's pet peeve is when people say "Well, to be honest with you...".  He always wants to say..."what the heck?!  Are you usually NOT honest?"  LOL...

Ok, I digress....back to my perfectly Phat and Flat card.
Here it is:
 I did some non traditional colors for Christmas starting with a blue background.  I used some blue distress ink (Salty Ocean) to color a piece of plain ol' white cardstock.  Then I stamped it with a Hero Arts background stamp (with the dots...can't recall the name of it right now)....and then stamped it again with some white Close to My Heart white pigment ink.  Don't touch it, Susan!  It take s awhile to dry!
Then I stamped with the fabulous Tim Holtz blueprint toy soldier stamp from his new Christmas set and some Ranger ink onto the background.  Stamped him again to color with some Distress markers Used my aqua pen to give the watercolor look...cut him out and smacked him down on the background.  I added some gold stickles and there ya go...Phat and Flat!
Oh, and the other thing I did before I commenced stamping was to spritz the paper with some Pearl Glimmer Mist to give it a little sheen.  You can see said sheen in the photo below.
I stamped the bottom with a Hero Arts sentiment stamp and viola....done!  I really love how different a look this is for me....and it was very fun to do!

Happy Crafting!!!

Friday, November 16, 2012

A Day of Thanks

I whipped up this little card to send to a friend.  I love the way it turned out!  Lots of fun making this one and, for me, it came together fairly quickly (READ: not many mess ups along the way!).
I used the BoBunny paper as the background and then I used the Hero Arts newspaper stamp to create the torn vintage looking mat to the leaf.  I had fun inking, tearing, and generally messing it up!  The leaf stamp is from one of the blueprint stamps that Tim Holtz has designed.  I love these stamps and the quality is so good...they just stamp perfectly each time.  I stamped on my mat with some Distress Ink and then stamped it again on some ivory Neenah cardstock and cut out the leaf after going to town with some distress inks to color it.
The "ribbon" is some seam binding that I inked up.
And then I used a little wax seal to finish it off.

Inside I stamped the sentiment which is "A dat of thanks" which was from a Close to My Heart set.
This was a wonderfully fun card to make....I loved dabbling in all the inks!

Happy Crafting!


Monday, October 22, 2012

Splish-Splash!

Hello All!  As I mentioned in yesterday's post I cropped the weekend away with some of my friends.  We had a great time and I got a lot done....for me....World's Slowest Scrapper!
I am using the We R Memory Keepers slotted page protectors for many of my pages.  I thought it would make it so much simpler to scrap but it still takes some planning and you still have to embellish...you just use smaller sheets of paper! LOL!  Anyway, I had this photo of the Splash Fountain at the pool my kids go to and found a cute one in the Silhouette Store to cut.
Here it is outside the page protector so you can see it without glare:
 I thought I was so smart cutting this and it was so cute....and then I saw the 30 or so water drops that would have to be hand adhered!  What I did was put the cut out piece over the fountain which was already adhered and then I could more easily position the tiny pieces.  I'm so smart! HAHA!
I used a little Glossy Accents on the drops and the puddle and it just turned out so cute!  Papers are from a collection by Close to My Heart.
And here is the reverse side:
Simple and fun but for me NOT fAsT!  HAHA!

Happy Crafting!

Sunday, August 12, 2012

Coloring -101!

I took a Copic coloring class with Jenny Gropp at our wonderful local stamp store yesterday, Impressive Ideas.   Now I am a Googler and a Youtube Extraordinaire and I just knew I would go and be..."ho-hum, I know all of this!".  Well, I was so very wrong.  From the minute Jenny opened her mouth to speak I was learning, learning, learning.  And a lot of what I learned was that I don't know nothin' and have so much to learn!  It was a great class with wonderful information about the whole Copic system...and we ended with some blending practice.  Again...so much to learn and I need to practice, practice, practice! :)  But, we all have to start somewhere don't we?

I came home and decided to practice on this flower and just totally threw out everything I had learned because I didn't have the right colors! LOL!  I think Copics are going to be like paper...you NEVER have the right color! So I didn't get great blending on this although I think my leaf looks pretty ok....but I do like the way this turned out and is sort of op-artish, perhaps.

I used Close to My Heart papers and a stamp set (given to me for my birthday by my good friend, Christine!) as well as some Papertrey ink twine and a Die-namics die for the banner.  The image was stamped with Memento Tuxedo black onto Neenah Solar White cardstock and cut out. The button was from "who knows where" (do you have that same line at your house?)....just a stash I had around.


Well, I had a fun time playing with my colors and can't wait to try again!  Now why is it Copic-101?  Because I need to go back to the cellar and start all over again.  I don't think I passed 101...need to start back at -101! ;)

Happy Sunday and Happy Crafting!

Tuesday, July 17, 2012

The Impossible to Mail Card!

I love big fat things....like big fat chocolate chip cookies....or big fat pieces of chocolate....but big fat cards just do not mail well, do they?  But sometimes I just can't resist!

Here is an example of an impossible to mail card:
Actually, I could put it in a padded envelope and it would be fine....but I don't know that it would do well in a regular paper envie.  You know?
When I was at the new to me stamp store the other day I picked up this wonderful little scalloped edge Dienamics die which made the center flower on my card.  It's one of those where you roll it up to make a 3 dimensional flower...and it is so cute.  I couldn't resist cutting some Papertrey Ink wool felt out with it....and then the smaller flowers were cut with one of the Paper Trey Ink's Flower Fusion sets.  The sentiment is Papertrey Ink...stamped on a piece of cardstock with some Close to My Heart ink and then the ends were punched with a large scallop.  *Cute idea, if I say so myself! The frame is a Spellbinder.  I added a few Hero Arts pearls, tied a little cotton floss into a bow and secured it and that was it!  The card base is Papertrey Ink cardstock (LOVE THAT STUFF!...it's so wonderfully sturdy!)


Simple and "relatively" fast! :)

Sunday, July 15, 2012

Cricut Challenge 31: A Day at the Gardens

I'm not much of a work in the yard person but I sure do enjoy walking through beautiful gardens.  The Atlanta Botanical Gardens are lovely....any time of the year.  In the fall there is always an exhibition of scarecrows that are made by local schools and vendors, etc. and they are such fun to see.
Here is a 2 page layout I did of a day at the gardens with some friends.  The title was cut with my Cricut Expression with the Mini Monograms cartridge and the papers and embellishments are all Close to My Heart.  I haven't used my Cricut in a while since I got my Cameo but it was fun using it and yes, I still love my Cricut, too!  Anyway, this also meets my personal challenge of using the cartridges I have for a project.

Left side:
The journaling was printed on clear acrylic and is secured with some cute little pins.
It looks crooked here because it slid a bit (I know....I should have repositioned it and taken another picture...but...) but it is fine once it is in my page protector.
Right side:
I added a few little flowers and some little flower brads as well as a bit of Glossy Accents on some of the cute little figures on the papers:

And here is a picture of how the layouts look side by side.

I loved this happy paper!

Happy Crafting!

Saturday, July 14, 2012

The Roll

This is a layout with small (horrors!) photos.  I just prefer big photos!  But these little guys worked fine for this layout.  It's funny to me that after a horse is groomed that it will go roll in the sand!  What is most aggravating is when you bathe the horse and then she runs out and rolls! LOL!

This is my daughter's horse, Corona.

The layout was done with Close to My Heart papers.  You can't see it here but some of the little circles were punched out and popped up.


Happy Crafting!

Monday, July 2, 2012

Treasured Friend

You know how one blog takes you to another which takes you to another which takes you to another?  Well, in my blog journeying I ended up on a new blog to me: Authentique Paper.  I just love the Authentique paper line...it's another favorite of mine.  I recently purchased some small 6x6 pads at Archiver's during a sale (of course!) and was eying the Genuine one to use.
I saw a sketch challenge on the Authentique blog that I decided to enter.  Here is the sketch:

And here is my very liberal interpretation of it:

I turned it on it's side and after trying some different shapes for those mats I decided to leave them off.  I used some Ranger Distress Ink (Faded Jeans) and also cut a rickrack strip with a Papertrey Ink die that is adhered to the chevron.  The lacy circle was cut with a Spellbinder and I used some Papertrey Ink twine to tie a generous bow.  The sentiment was done with a Close to My Heart stamp with Versamark embossed with some Adirondack powder.

This is quite a different card for me but I had fun doing it and enjoyed the result!

I entered this in the Authentique Sketch Challenge HERE.

Happy Monday and Happy Crafting!

Thursday, March 1, 2012

Taylor and Mommy

Here is a layout I did of my daughter holding her baby (Taylor) for the very first time.  She was just a minute or two old...how fortunate I was to be in the delivery room so that I could snap this photo and preserve this memory. 
And you may not be able to tell from this photo of the layout but I just love that my daughter's mouth is pursed into a "shhhhhh" as she is trying to comfort her baby girl from the trauma of being born into this great big world! :)

I used some Paper Studio paper I had on hand and some Color Core'dinations cardstock.  I also used a new toy...the Creative Memories Border Maker System for the scalloped edging.  I love border punches and Creative Memories has come up with a foolproof method for getting that border PERFECT!

Here is a look at the border system:

Very cool tool!

I also cut the word "Tiny" out with my Cameo and that image came from the Silhouette Store.  The journaling tags were done with a couple of Spellbinder dies.  I used some white cotton thread and used a Bic Marker to make the thread look like baker's twine.  I tied the twine through a Close to My Heart button and wrapped some around the large photo and was done!  All done in under 3 hours! LOL!  OK...this one was pretty quickly done but I am NOT a fast scrapper! 

Hope you all have time for some crafting today!

Sunday, February 26, 2012

Back Home And Tired!

I'm back home from my four day crop and although I'm glad to be back home I already miss my peeps.  We have such a good time together...laughing, telling stories, teasing each other...it's just always great fun.
But I am TIRED!!! 
I got 18 layouts done which is not too bad for me.  My friend Cyndi got over 70 pages done...she was very disappointed that she didn't get more done.  I am amazed at how quickly she can get them done! And they are cute!  But I am very slow and fiddle with everything for hours on end.  As I've said before, though...I'm a process person and do enjoy whether it takes me 20 minutes for 3 hours!
Here is a layout of a favorite photo of David when he was 6 months and is a companion page to the layout I posted a few days ago.That's me on the left and David's mommy on the right.  I just love that he was tolerating the "kiss" and that he had his little hand on me.  He loves him mommy and his Omie...that is for sure! :)
 I cut the scalloped mat with my Cameo, as well as the title and the little heart in the right corner of the photo.  The papers were all from a Close to My Heart paper pack I had.  I used a few heart brads to finish it off.

Happy Crafting!

Wednesday, February 15, 2012

Distracted Again!

I'm supposed to be planning, organizing and preparing for a crop I'm going to next week.  Four days of cropping fun.  Last time I went to this crop I got the award for having the most stuff.  And that is because it doesn't matter how much I preplan...I panic pack.  That means I start throwing stuff in my car, boxes, bags, etc. if I still have room thinking I might need it!  This time my goal is to take what I need and to NOT get the award for the most stuff.

BTW, one of my very BFFs says her goal is to have 200 pages preplanned.  CYNDI!!!  Oh my...I'll be lucky to have  25 preplanned...and lucky to get 25 2 page layouts done in 4 days.  I confess...I am a very slow scrapper! :)

But...as I was going through some pictures I came across this 8x10 photo of AG (Adorable Grandson) who is actually named David.  He was 6 months here...so round and chubby and cute with that little swirl of hair on his forehead!  It's difficult to believe that it's already been nearly 2 years since this photo was taken.

It just screamed out to me to be scrapped.  Right then and there...no packing and organizing allowed until this photo was scrapped.  So that's what I did and I am so glad I did.  I have this on my kitchen table right now and every time I walk past it I smile.  That little guy really does fill up my heart....

I used Close to My Heart Papers...a few buttons from CTMH and PTI and some red grosgrain ribbon I had on hand.  The scalloped mat was cut on my Silhouette Cameo and the word "CUTE" was also cut using Arial Bold on the Cameo.

A simple layout with the focus on this great photo (which I took, of course!).  I love using enlargements in my scrapbooking...especially when the photo is as cute as this.

And that's it for today...back to packing and planning...although I may reorganize my scrapping table first....LOL!

Happy Crafting!

Sunday, January 22, 2012

Flutterby Card

Don't you love the way kids say "flutterby" instead of "butterfly"? 
Being a speech therapist by trade I love the way children develop language.  Right now little David who is 2 and a few months will say "have it" (or more specifically he says "HAFF IT")  instead of "I want it."  For example if he drops an item on the floor out of his reach he will say "Omie, have it" which translates to "Omie, crawl on the floor under the table...watch out for the bread and butter I dropped and get my *fill in the blank* because I WANT IT NOW!" I know this for a fact.  Yesterday when we were at Cheesecake Factory celebrating my son's 25th birthday he said "Have it" several times to me as he dropped his car, his truck, his book, his crayons and his Thomas the Train at leas 21 times each.  I got very intimate with the floor under the table at Cheesecake Factory.  I will admit the floor looked much worse when we left than when we were seated!

Here is  today's Flutterby card:

The card was inspired by something I saw on Pinterest...a similar card but the inspiration card was done with the larger Martha Stewart punch. Click HERE is a link to that card. (Unfortunately the link does not take you to the site of the original card.)  I just see now where the card was also stitched.  I should have done that, too!  Now that I am pretty good at corraling my beast!
I used the new EK Success (Ok, it may not be new but it is new to me) to punch the butterflies.  The punch I used has three settings...one with a fully punched out butterfly with the more intricate look, a second that actually just punches out part of the inside of the butterfly and the third setting is a shadow or base.  In this card I only cut the "intricate" butterfly and the base.  I mounted the butterflies on kraft cardstock and then put it on a white card base.  The sentiment came from a Close to My Heart set I have.  I didn't use any foam tape but the butterflies are just glued in the centers so the wings are free and slightly bent to give a bit of dimension.

I think I will have to make more Flutterby cards!

Happy Crafting

Monday, December 5, 2011

Sharecroppers Rock!

We had a wonderful time yesterday at our 4th Annual Sharecroppers party!  Great group of ladies...we all just laugh and laugh and laugh.  Some of these ladies I've known for over 10 years...but there are always some newer faces to the group which makes it so much fun.

Here we all our together for our annual group shot:
And then we always do a goofball shot:
Because we like to do "goof" well.
Sometimes we take pictures of each other...here I am with my good friend, Debbie, with a photo bomber (Jenna) in the background!
(Our friend, Christine made these cute little elf hats for us.)
We always have good things to eat:
We play games:
We do little gifts for each other...Usually we each bring a stocking and fill the stockings but this year Debbie made this cute little burlap covered boxes:
And we each put our gifts in the boxes.
Here's a close up of my box:
We laugh a lot...and before you know it...four hours (!) had gone by and it was time to say good night and head on home. 

I <3 my girlfriends...they are the best!

Oh...and here is what I made for each of the ladies...they were little post it note holders put into acrylic refrigerator friends.  I stamped a sentiment with a Close to My Heart stamp and they turned out pretty cute, I think.
The sentiment said:  "Just living is not enough...one must have to have sunshine, freedom and a little flower." and is by Hans Christian Andersen.

I love it (although a nice new pair of boots would also be great!)!

Happy Crafting!