Showing posts with label storage. Show all posts

Thursday, May 14, 2015

Evernote: Or How NOT to Buy the Same Supples Again

My good friend, Cyndi, and I are always giving each other duplicate crafty stuff.  It's sad.  We buy...and buy again...and then realize we have just spent our money buying the same thing twice.  Sad.  Not really...because we both benefit from each other's boo-boos.  But sometimes it is a bit aggravating! You'd think we'd remember but when you have 363 stamp sets, 281 ink pads, 84 Copic pens, etc. (Ok, slight exaggeration...but not by much), etc...it happens.  You see something cute or you must have without realizing it's already in your stash. Then as you are putting your cute new item away you find the same item!  It happens...

A while back I had seen a post about how another blogger was using Evernote to keep an inventory of her files. I read about it HERE on the A Vegas Girl at Heart blog.  I loved the idea of setting something up I could access on my laptop, my iPad or my iPhone.  So despite where I am I should be able to see what all I have!

I thought I had posted about this system here on my blog at one time but I have searched and searched and can't find it so I'm starting anew.  This may be of absolutely NON interest to many of you...so just skip this post if you're not. ;)

Evernote is a great free organizational tool program which you can download HERE.  You can store documents, lists, recipes...etc...and can sync it across your appliances so that you can see the info anywhere. I do have some recipes loaded in...generally new ones I want to try...I just plop them in Evernote and then when I'm at the grocery store I can pull up the recipe to see what ingredients I might need.

(Note: Evernote is basically free but there is a limit to the amount of data that can be uploaded monthly and if you exceed this you can buy an upgrade.  I've never exceeded the limit so have been able to utilize this FREE resource.) 

But really...for this post I'm going to talk about storing an inventory of my scrapbooking/crafting things.  My system is similar to A Vegas Girl's.

After installing Evernote on your computer you will need to set up an account.  And of course you will need to have a password.  LOL...now I have a password program that keeps track of all my passwords because I can't remember nothin'!  But that's a whole 'nother story!

I have the Evernote icon on my start tray at the bottom of my computer so I just click on that to open my program.  It will open to something like this:


Oh, and see the little elephant head icon in the system tray at the bottom? That's just a quick way to open Evernote.

As you can see "notebooks" can be created to store your lists, inventories, recipes, etc. in.  I have notebooks for several things as you can see but today we will focus on my ever growing list of paper crafting supplies.  To create a notebook is simple...go to File>New Notebook.  A pop up window will appear and you will name your notebook.  If you want to be able to sync it across appliances click on "Synchronized Notebook".  If you want it only on your computer then click "local notebook".  If you are handy with keyboard shortcuts you can also right click in the area where notebooks are to get the pop up window to create a new notebook. 
If I click on my paper crafting notebook I will see the following screen:

This gives you an idea of how I have my supplies organized on Evernote.

If you click on "Stamps" you will then get into the "meat" of the notebook...where are my goodies are stored!
And then you will see something like this:

And above you can see the information I include with my stamps sets...namely, manufacturer, name of set, the style (clear or cling or wood) and roughly the number of stamps included in the set.
I always include a photo of the stamp set which I snag from the web...most images can just be dragged and dropped in.  Easy Peasy.  Another feature that is just oh so great is that you can tag the item for later searches.  Above the photo you can see my tags...they are birthday, floral, get well, rose and thank you.  THIS IS SO HELPFUL! Once tagged I can then search for the sets that say "thank you", for example and pull up those sets without having to look through all my boxes of stamps! This is a great feature! Of course, it's only as good as the tags you create.

If I wanted to add in a new set I would go to "New Note" near the top of the screen.  Once I have a blank page I would create a name (I always start with the manufacturer name) and then the name of the set.
I drag and drop the photo and then list in the other specifics about the set I like to include...and lastly set up my tags.
It's so easy.
It did take a good bit of time when I first set it up because I had a ton of sets to enter but once I got them in I, now, just have to add in newly acquired sets.

I also have notebooks for dies that I have set up in a similar manner.

I have a list for my Distress Inks which is in the form of a list:


You can create lists or notebooks for anything you want to keep track of.

Once you have your info loaded in you can click on "Sync" on the top left and this will sync your information between your appliances.  Very handy for when you are out shopping and can't remember anything! LOL!

This is what the screen for stamps looks like on my iPhone:


And if I click on a stamp set (in this case "Simon Says Stamp Congrat..." I would see this:
And of course, even on my iPhone or iPad I can use the search function.

I even have a 324 page document in pdf with the rules of tennis. You just never know when someone might try to unknowingly try to cheat you!...LOL...I can whip out my phone...got to Evernote and pull up the document as a resource!

Because, of course, my brain can't remember every single rule... It also keeps me in check from unknowingly cheating others!

Evernote is also available to Droid users.

I know I have not covered this awesome program and its capabilities but maybe this is a start for you!

And thanks to Melissa at A Vegas Girl at Heart for sharing this info with me!

Happy Crafting and Happy Inventorying!  


Thursday, September 12, 2013

A Great Find!

I love a great find, don't you?  And I love good storage, don't you?  
I got both when I happened into Michaels the other day and found this great rolling cart ON CLEARANCE!  I searched for a photo of it online but I couldn't find one...I found some similar and they were priced as high as $100 on eBay.   I paid $29.99.  Yep...great find!

Here is a photo of the box:
It comes unassembled but putting it together was a breeze.  It even came with an allen wrench so I didn't have to go hunting a correctly sized screw driver. 
Here are photos of it assembled:
 It comes with 2 chrome shelves as well as 6 drawers large enough for 12x12 paper and 3 drawers that measure about 9 inches wide.  I am storing some tools on the top shelf for now and a Close to My Heart divided box with journaling cards etc. on the second shelf.   The colored cardstock you see is actually behind the cart on my wire shelves....

 The cart also comes with drawer dividers that you place in the 12x12 drawers which are fabulous for storing smaller items like Stickles, buttons, flair, etc.

 I stacked up some of my Thickers and other assorted items in the deeper drawers and since there is clearance between the drawers they still close easily.
I have this sitting at the end of my work table and am storing Project Life items on it as well as some of my tools.  It has given me some space to get some of those things off my work table and a bit more room!
I did have a plastic cart with those snap shut containers which is great for going off to crop but a hassle when working because any time you want something you had to take the container out to open it.  Here I just slide a drawer?  Easy and fast!

Great find as I say!  I think this will be PERFECT for me!

Happy Crafting!

Saturday, April 20, 2013

Finished! Termine'! Fertig! Acabado! 完成した! เสร็จ!

 I am finally finished with my room!  It is clean...it is neat...it is weeded out...there has been major purging...it is organized....I know what I have...

Makes me almost want to go in and create!  But now I'm afraid because I don't want to mess it up! LOL!!!

So now I will give you the full tour of my "studio"...lots of pictures here so bear with me.

I don't know why I feel the need to put studio in quotes.  I mean...it is a studio according to Webster's which states a studio is  "A room where an artist, photographer, sculptor, etc., works." I am an "etc." and I work in my room so maybe it is a studio after all.  It just sounds so much hoity toitier than just plain old "crafting room".

Anyway...doesn't  matter what you call it...I am lucky to have a nice big room.  This is also a problem because it just means you have more space to junk it up. Which I did a great job doing!  But now that I have pretty much been through every nook and cranny I am once again aware of the things I have.

That's a good thing...know what you have.

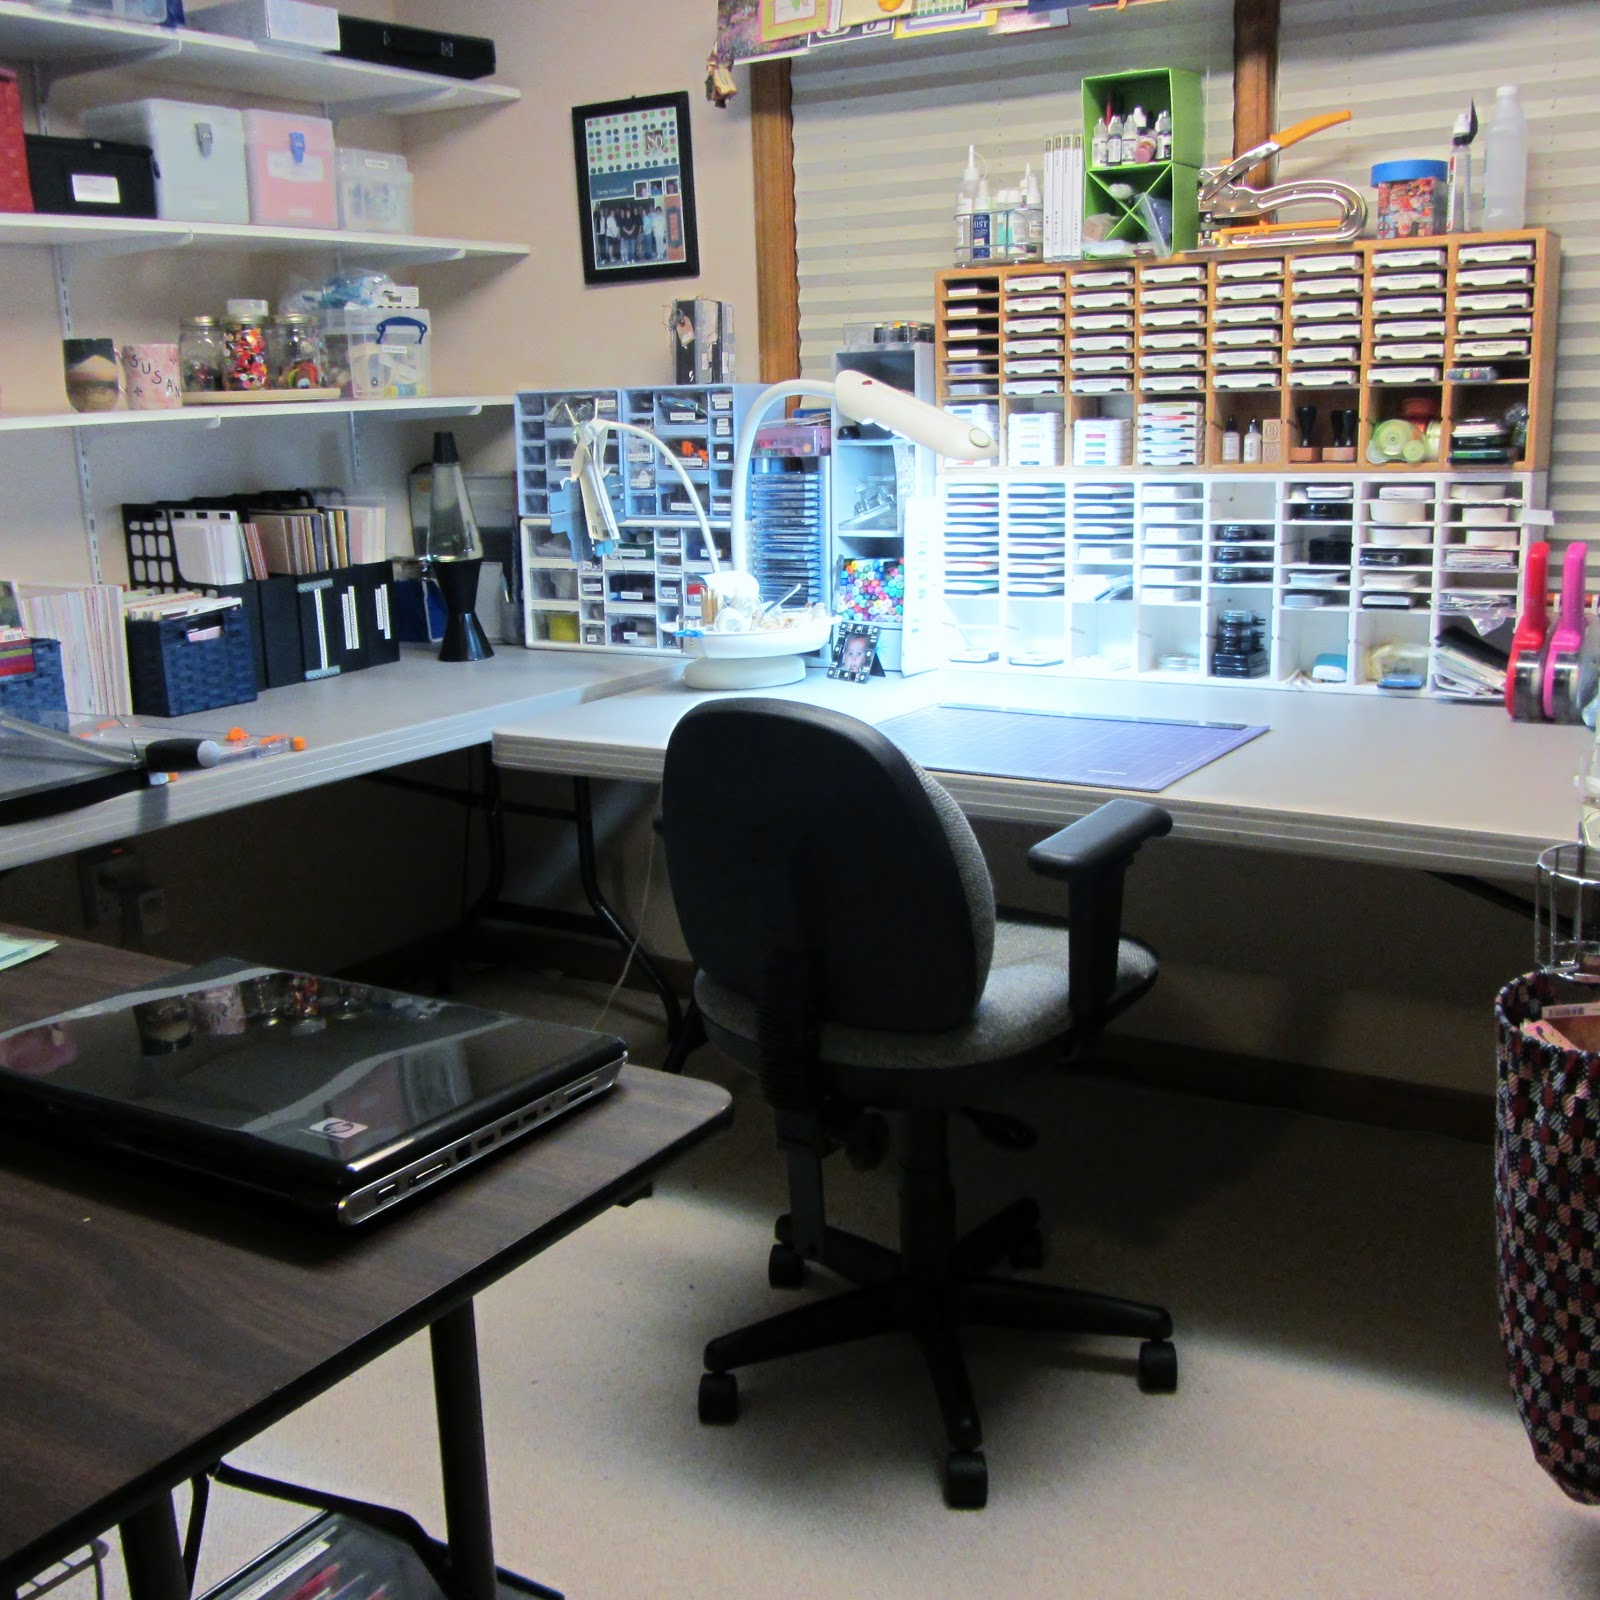
Our tour begins as you walk into my room.  This is what I see when I enter:
My work area is over to the far right where you can see my ink pads.
Below is from the same spot...just face on to the wall across the room.  You can see my heater on the floor.  It gets way too cold for me in my room.  I have to heat it even when the temps are in the 90s outside.  Otherwise I will get frostbite.  I love my heater....it has a timer on it so it goes off automatically and it is totally safe.  (I hope.)


I have very little wall space in my room....there are 3 doors and a big window so not much room for hanging things.  Well, we hung a bunch of shelves but every inch of wall space is just about taken except for this little while where  I have YET MORE RIBBON!  I have one of those Clip it Up ribbon holders which holds my spooled ribbon and then below it is the side to a baby bed that I have cut pieces of ribbon on.  It looks way more impressive in real life than it does in this photo.  I promise you.  A story....many years ago my friend Holly and I decided to buy all the grosgrain ribbon that Stampin' Up had...cut it into pieces, bag it up and resell it for profit.  We made $1, I think.  LOL....and we both ended up with a boat load of grosgrain ribbon! LOL!!!  So I've taken all mine apart and hung it over the slats of the baby bed.  Ingenious...huh?


I use an old microwave cart (I love repurposing!) as my embossing station.  I have my Big Shot set up on it.   Works well for me....  On the shelves below are my Becky Higgins Project Life kits.


In one of the drawers in my cube to the left I keep my embossing folders.  They are all in their own little file area and make it easy for me to locate the one I want to use.
Below that is a drawer with most of my Spellbinder dies.  I need a better way to organize these.  I've tried CD holders and leaving them in their packaging.  I need to still work on this.  I just want a way to put them in this drawer so I can find them! Any ideas?  I guess I could cut magnet sheets to fit the drawer and put tabs on them.  Hmmmm....maybe I will try that....

I have two 4 foot tables pushed together for my sewing machine, my Silhouette and my laptop.  I kind of have a u-shaped work area with a swivel chair so I can easily get behind me to my Silhouette.

Hurricane Debbie who helped me reorganize my room had this great idea to put all my paper kits or coordinating papers in either page protectors or Zip Loc bags.  They had been in all kinds of locations in my room and I had no idea what all I had!  Now I can just look through these easily and quickly and pull out what I want to use!  THANKS, DEBBIE!!!

 See?  Isn't that Close to My Heart paper pretty?  Forgot I had it.  Don't even remember buying it!  LOL!

That blue basket bin sits right next to my paper stacks which I shared yesterday.  On top of the paper stacks are a couple of plastic containers with some new things I still want to use...some stamps, dies, kits, etc.


Under the table with my laptop and Silhouette I have a rack shelving unit with some containers with pens, Stickles, paints, etc.  My label maker definitely got a work out today!


This is what I see when I face forward at my table:

This is what I see when I look to the right:


And this is what I see when I look to the left:


And this is what I see if I swivel my chair to get to my laptop and Silhouette:


I bought these many years ago at Target....It's just those little drawer units you get in the tool section.  It has always worked well for me...it holds Qtips, pins, Fray Check, needles, my embossing buddy, extra trimmer blades, etc.

And lastly....this little guy keeps me company (the photo got a bit of glare on it...but you get the idea... :)).


I really can't wait to do some creating in here again....but I just didn't have the energy to mess it up today.  I think maybe tomorrow....

Ack! I just realized I didn't show you where I keep my embossing powders and distress inks!  Maybe tomorrow. ;)

Happy Crafting to you!

Friday, April 19, 2013

Bigger Than Expected!

My whole craft room/studio redo has required so much more time and effort than I ever dreamed it would!  Yikes!!! And I'm still not done!  But one thing I've learned is that I can only do it for about an hour or so a day and then I gotta get outta there!  HAHA!

But it really is getting close to being done and I think I will really like my new organizational systems.  At least for now.  One thing I've noticed is that paper crafters generally love to organize and reorganize. What's up with that?!

The other day I posted "Taking Shape" and showed a picture of my nice cleaned off table.  Then Hurricane Debbie showed up and my room was again torn up and destroyed.  Debbie is a good friend of mine who is fabulous at organizing and she saw a great need to redo just about everything I'd done.  LOL!  So...for the next 5 days my table top was never to be seen.  But it has all been worth it and I'll share my progress to date.  Here it is in bits and pieces.

First of all....I love paper stacks although I am not buying 12x12 any longer (well, except for the cute one I got half priced at Michaels the other day. LOL!).  I do love the stacks I have though and had them in a basket crate thing but bought this 56 qt Sterlite container for about $7 the other day.  It's too heavy to lift but I don't plan for it to go anywhere anyway!  It sits under the table where my paper trimmers are.  I write the name of the stack and manufacturer on the binding with a Sharpie so that I can more easily pull out the one I want.

This container works well for these stacks and with the top on no dust or other particles can get in.
They are a perfect fit!

Next is a cube that I got at Michaels a while back and I have my white, brown and black cardstock stored in it.  I kind of wanted all my cardstock in one place but for now it didn't quite work out that way....it is all about an arms length to the right and to the left of where I sit.  I may work on that arrangement but that is what it is for now.
On my cutting table I have this very cool heat embossing station that my friend, Cyndi, brought me back from Kansas City.  I am known as the Fire Starter with my heat gun so she is doing her best to try to keep me safe.  Thanks, Cyndi.  Come to think of it...since I got this stand I have not burned any carpet!
Ahem....I do love 6x6 and 8x8 paper pads and here is my collection of those.  Right within easy reach. I love having all these because I might make a card one day.  (Waving at you, Cyndi!)
I have my plain 8 1/2 by 11 cardstock in magazine holders...some are labeled if the paper is oh so special and some are not.
I store most of my buttons in mason jars on a Lazy  Susan (I always took issue with that term! LOL!).

To the right of where I sit I have some wire racks and cubes that I purchased at Target a long time ago...long before Michael's came out with the nice cube system.  I'm really trying to use what I have, though so this still works for me although sometimes I wish it looked a little better! LOL!
On the right is most of my ribbon (oh, yeah...I have way more on the other side of the room which I'll share in another post). and it's in boxes and labeled.  Debbie did a great job of organizing the boxes by color.  It's so easy to see what I have.
 There is also a box with Baker's twine as well as boxes for embroidery floss and fibers.
 And...at the very bottom I have my colored 12x12 cardstock as you can see here.
 In the middle section of the wire racks I have card packs and envelopes (yes, I have a lot...and now they are all in one place! Hallelujah!).  Below that are some Hero Arts cards and products.

I have this old Cropper Hopper file box that I am using for vellum, acetate, and other specialty type papers.

 Back over near my white, brown and black cardstock I have a large box that holds my paper scraps.

I try not to keep the smallest bits but these scraps are wonderful for die cutting and I go to my box often! They are all sorted by color.
 I store my punches in the over the door shoe racks.  I have tried other ways to store punches....boxes, drawers, etc...but this works well for me because I can easily see what I have.  I have another hanger over another door with my Martha Stewart punches.
 On my table I have this little storage thing I picked up at Goodwill for a dollar which holds my Copics and my Distress pens as well as my acrylic blocks.  To the left of the little storage thing is a CD rack with my Papertrey Ink stamps.
 And here is a picture of my work table again....and you can see my ink pad storage.  I  need to paint the top one at some time...some day...maybe... LOL!  I'm probably a little more about function than I am about looks so for now this is just fine! ;)
Still a good bit to do but if I put my mind to it I think I might be able to be done by tomorrow.  I'm having crafting withdrawal but I really need to finish up before I start any new projects.  That's the deal I've made with myself anyway! ;)

I hope you've enjoyed a little peek into my studio!

Happy Crafting.

Friday, April 12, 2013

Taking Shape!

When my husband and I moved into this house it was a bit overwhelming as about any move can be.  My husband, Mr. Positive, would always say "taking shape" whenever a box was unpacked or a picture was hung on the wall.  I think he said "taking shape" 3,803 times.  After about 8 times I'd had enough! LOL! And I wanted to tell him where he could take his shapes!  I'm bad....

So earlier today I posted a picture of my scrapbook/craft room and it was a very disturbing picture.  Stuff everywhere!  But I've worked hard on it....and it is "taking shape".

Here is my work area now....at least you can see the table surface!  Yay me!
Still needs some organizing which my friend, Debbie, and I will work on tomorrow....but it IS getting there! I'm happy! 

I'm still a couple of days away from crafting but I'm getting excited about my reconfigured creativity space!

Happy Crafting!

Where in the World....

....is Susan?

...hidden under an avalanche of scrapbooking and cardmaking items in her craft "studio"! Please send in the National Guard.  She needs to be rescued! ;)

Here is an in process photo....I  have just been piling up stuff on my work surfaces so don't think I work in ALL this mess.  I do get messy but I'm not this bad!  LOL!

Scary, huh?
Why is it when we get the urge to organize that we end up making an even bigger mess than when we started out???  This has been a several day affair already....and I am ready to go immerse myself again.  I'm hoping to get everything out today that I'm getting rid of....and then my friend Debbie is coming over tomorrow to help me organize and get my work flow right!  Yay, Debbie!

I will take pictures when it is all cleaned up and neat again!

Hopefully I'll see you all in a few days...I'm missing my crafting!

Wednesday, June 6, 2012

Clear Stamp Storage on the Cheap!

As I've discussed her before, scrapbookers and paper crafters LOVE to organize.  We organize our buttons, ribbons, gems, tools, papers...etc.  And just about the time we finish one system it becomes obsolete because we outgrow it!  LOL!

I had been storing some of my Hero Arts stamps that come on 4x6 cards (as well as Lawn Fawn stamps)  in a little box.   That worked ok...I had the stamps in the original clear envelopes they came in but many of them had torn or sometimes it was difficult to get the stamps in and out of the sleeve because of the adhesive strip.  Know what I'm talking about?  It was becoming a mess!


I Googled storage systems and the great Stamping Queen Jennifer McGuire had a nice system where she used 3 ring notebooks and had purchased CD/DVD holders from an office supply store.  It looked great but the last thing I wanted to do was go buy more stuff.  I wanted to figure out a way to use what I had on hand.

I had a box of 8 1/2 by 11 page protectors and thought there should be a way to easily modify them to use.

The first thing I did was split one down the middle but I thought it would make the stamps too floppy when stored on their end in a binder.  And I also thought the top one might fall out of the opening.
So I threw that one out! :)

 Then I decided I would make a little slit on the side to slide the stamps in that way.
So....I started with an uncut page protector:
 
  In order to prevent cutting through both layers I used a piece of chipboard between them.

I used a metal ruler and exacto knife to make my cuts both about 5 1/4 inches long.
 Here is one with the slit:
Then I used the Beast (my sewing machine) to stitch down the middle and to stitch the top closed like this:


And that was it...then I just slid my stamps in the side slits and that was it!

Pretty simple, fairly quick and very inexpensive!  I'm happy!  

And I finally finished sample swatches for my Tim Holtz Distress Inks.  This works great for me because I can just see how the ink looks on white...you know how the colors on the labels aren't quite "true"...this works well!
Happy Crafting and Happy Storage....and if people have great ways of storing things...please share them!