Showing posts with label Recollections. Show all posts

Saturday, May 16, 2015

May All Your Dreams....

I have finally created a card that would be appropriate for the male species! Well, I've done masculine cards before but went "meh" when I finished them. This one I actually love.  I was at my local stamp store recently...the store features fabulous sample cards throughout and I came across one that incorporated wire and just loved it.  So  bought the stamp set...Rising Stars by Paper Smooches along with the matching dies and set to work creating my own version.

Funny story about wire...for the scrapbookers out there...remember when it was so popular to put it on scrapbook pages?  Yep, I had all the tools and all the wire and it was a lot of fun.  That box of wire supplies has sat unused for many years!  Ok, now to the funny story.  Over 12 years ago (I was living in another house) I was working on a scrapbook page in my little scrapbook nook in my bedroom.  I was using said wire.  I looked down and wondered where some red ink came from as I was not using pens or anything that had red ink.  Well, lo and behold...I realized I was BLEEDING on my scrapbook page! I had apparently pricked myself with the wire and was dripping blood on my page.  Well, I had put a lot of time into that page and was NOT going to redo it.  So I wiped off what I could and then told my husband that if he ever needed a DNA sample to go to the scrapbook from 2002 that had the fall trip to Las Vegas in it!  LOL!

Anyway, on to my wire card and thankfully, I did NOT bleed on these creations!

I made this one with Stampin' Up papers and inks, a My Finest Thing border die and some LifeCrafts circle dies:
I also used a Recollections punch I had.  Love, love, love how this turned out.  Here's a closeup of the stars and wire works:
I made this for a friend's son who is graduating from high school but once I finished it I thought...now why didn't I do it in his school colors???
So I decided to make another one in his school colors of red, white and blue....I added a little yellow because it just needed something else:
I used different Fiskars border punches but the card design is the same.  I had such fun doing this!
I love this stamp set.
And the dies:

And, of course, these cards would be perfectly lovely for the feminine species too! :)  No gender specificity here!

Well, that's it for today...off to do other wild and exciting things!

Happy Crafting!

Thursday, September 12, 2013

A Great Find!

I love a great find, don't you?  And I love good storage, don't you?  
I got both when I happened into Michaels the other day and found this great rolling cart ON CLEARANCE!  I searched for a photo of it online but I couldn't find one...I found some similar and they were priced as high as $100 on eBay.   I paid $29.99.  Yep...great find!

Here is a photo of the box:
It comes unassembled but putting it together was a breeze.  It even came with an allen wrench so I didn't have to go hunting a correctly sized screw driver. 
Here are photos of it assembled:
 It comes with 2 chrome shelves as well as 6 drawers large enough for 12x12 paper and 3 drawers that measure about 9 inches wide.  I am storing some tools on the top shelf for now and a Close to My Heart divided box with journaling cards etc. on the second shelf.   The colored cardstock you see is actually behind the cart on my wire shelves....

 The cart also comes with drawer dividers that you place in the 12x12 drawers which are fabulous for storing smaller items like Stickles, buttons, flair, etc.

 I stacked up some of my Thickers and other assorted items in the deeper drawers and since there is clearance between the drawers they still close easily.
I have this sitting at the end of my work table and am storing Project Life items on it as well as some of my tools.  It has given me some space to get some of those things off my work table and a bit more room!
I did have a plastic cart with those snap shut containers which is great for going off to crop but a hassle when working because any time you want something you had to take the container out to open it.  Here I just slide a drawer?  Easy and fast!

Great find as I say!  I think this will be PERFECT for me!

Happy Crafting!

Tuesday, July 16, 2013

Project Life: Week 28

I am rocking Project Life.  Yep, I'll toot my own horn.  I finished week 28 the other night and in case you aren't keeping up with things....Week 28 was just last week.  Yep.  Right.  For me Week 28 includes the dates of July 7-July 13.

My definition of "rocking" Project Life means I'm done.  Award winning photography?  Uh, no...
Award winning layouts.  Uh, no...

Last week I approached my pictures with the idea of "I have a lot going on so I need to get these pages done quickly".  That is something that has worked so well for me with this Project Life format.  I can be as creative as I want to be and hand make every thing.  Or not.

This was a "not" week.

That's ok.  I still rock.

Here is the left side:


I used some cards by Recollections (Michaels brand) and some little feltie embellisments from My Little Yellow Bicycle.

The word "week" was cut out with a Memory Box alpha and some Papertrey Ink felt.  The number stickers are some from my stash and are probably quite old!


And here is the right side:
The picture of my friend, Kim was actually taken the Saturday before but it's my Project Life and I can make up the rules as I go.  ;)

I got quite a few pictures of the venue where we will be having our rehearsal dinner so I wanted to include those.

And I love photos of my grandkids sweet little hands!

Here's another journaling card with a little feltie.  Too cute and so simple.


Like I said.... I rock.  (At least in my own grandmother of a mind!)

Happy Crafting!


Sunday, May 12, 2013

Project Life: Week 18 and HERO {sm}ARTS! Left Side

I love Hero Arts.  I've written about it several times in the past.  I have had a long standing love affair with this brilliant stamp company since I first stamped with one of the fine stamps this company manufactures over 10 years ago.  I have used many, many Hero Arts products in my cardmaking and scrapbooking over the years.

Hero Arts has just released the new catalog titled "Stamp Your Story".  There are some wonderful new stamps being released soon....I already have a couple of the sets on my wish list.  Hero Arts is doing a contest where the requirement is to use at least one stamp set from the new catalog in a project.  I looked through the catalog and since I am a Hero Arts stamp collector extraordinaire I saw that I had several of the sets and decided to use them in Project Life.  Perfect.  I could use plain white pieces of paper and dress them up with inks, embossing powders.  What a novel idea!  Hero {sm}Arts....that's me.

So without further ado...here is the left side for my Hero Arts laden layout:

 The first card "Take Note" was cut out on my Silhouette...oh yes, my Cameo loves being the host to Hero Arts!  I used Hero Arts layering papers and stamped the journaling box with a Hero Arts, of course, stamp.  (I'll list all HA supplies below.)  The little birds are wood veneers from Recollections and were inked and "Stickled".
 My "Week 18" card was a lot of fun to make.  I did the background with the HA newspaper stamp and embossed it with black embossing powder.  I added some stickers from my stash for the letters and then stamped onto some white medical tape to make my own Washi Tape with some HA stamps.  And then I added a couple of sparkly buttons.
I love, love, love the way this card below came out.  I cut the drama masks with my Cameo but the background is all stamping.  I used a huge background stamp and some HA ink and then used a circle stamp with some other colors to create the background.  Love the colors.  I added a little Washi tape as you can see.
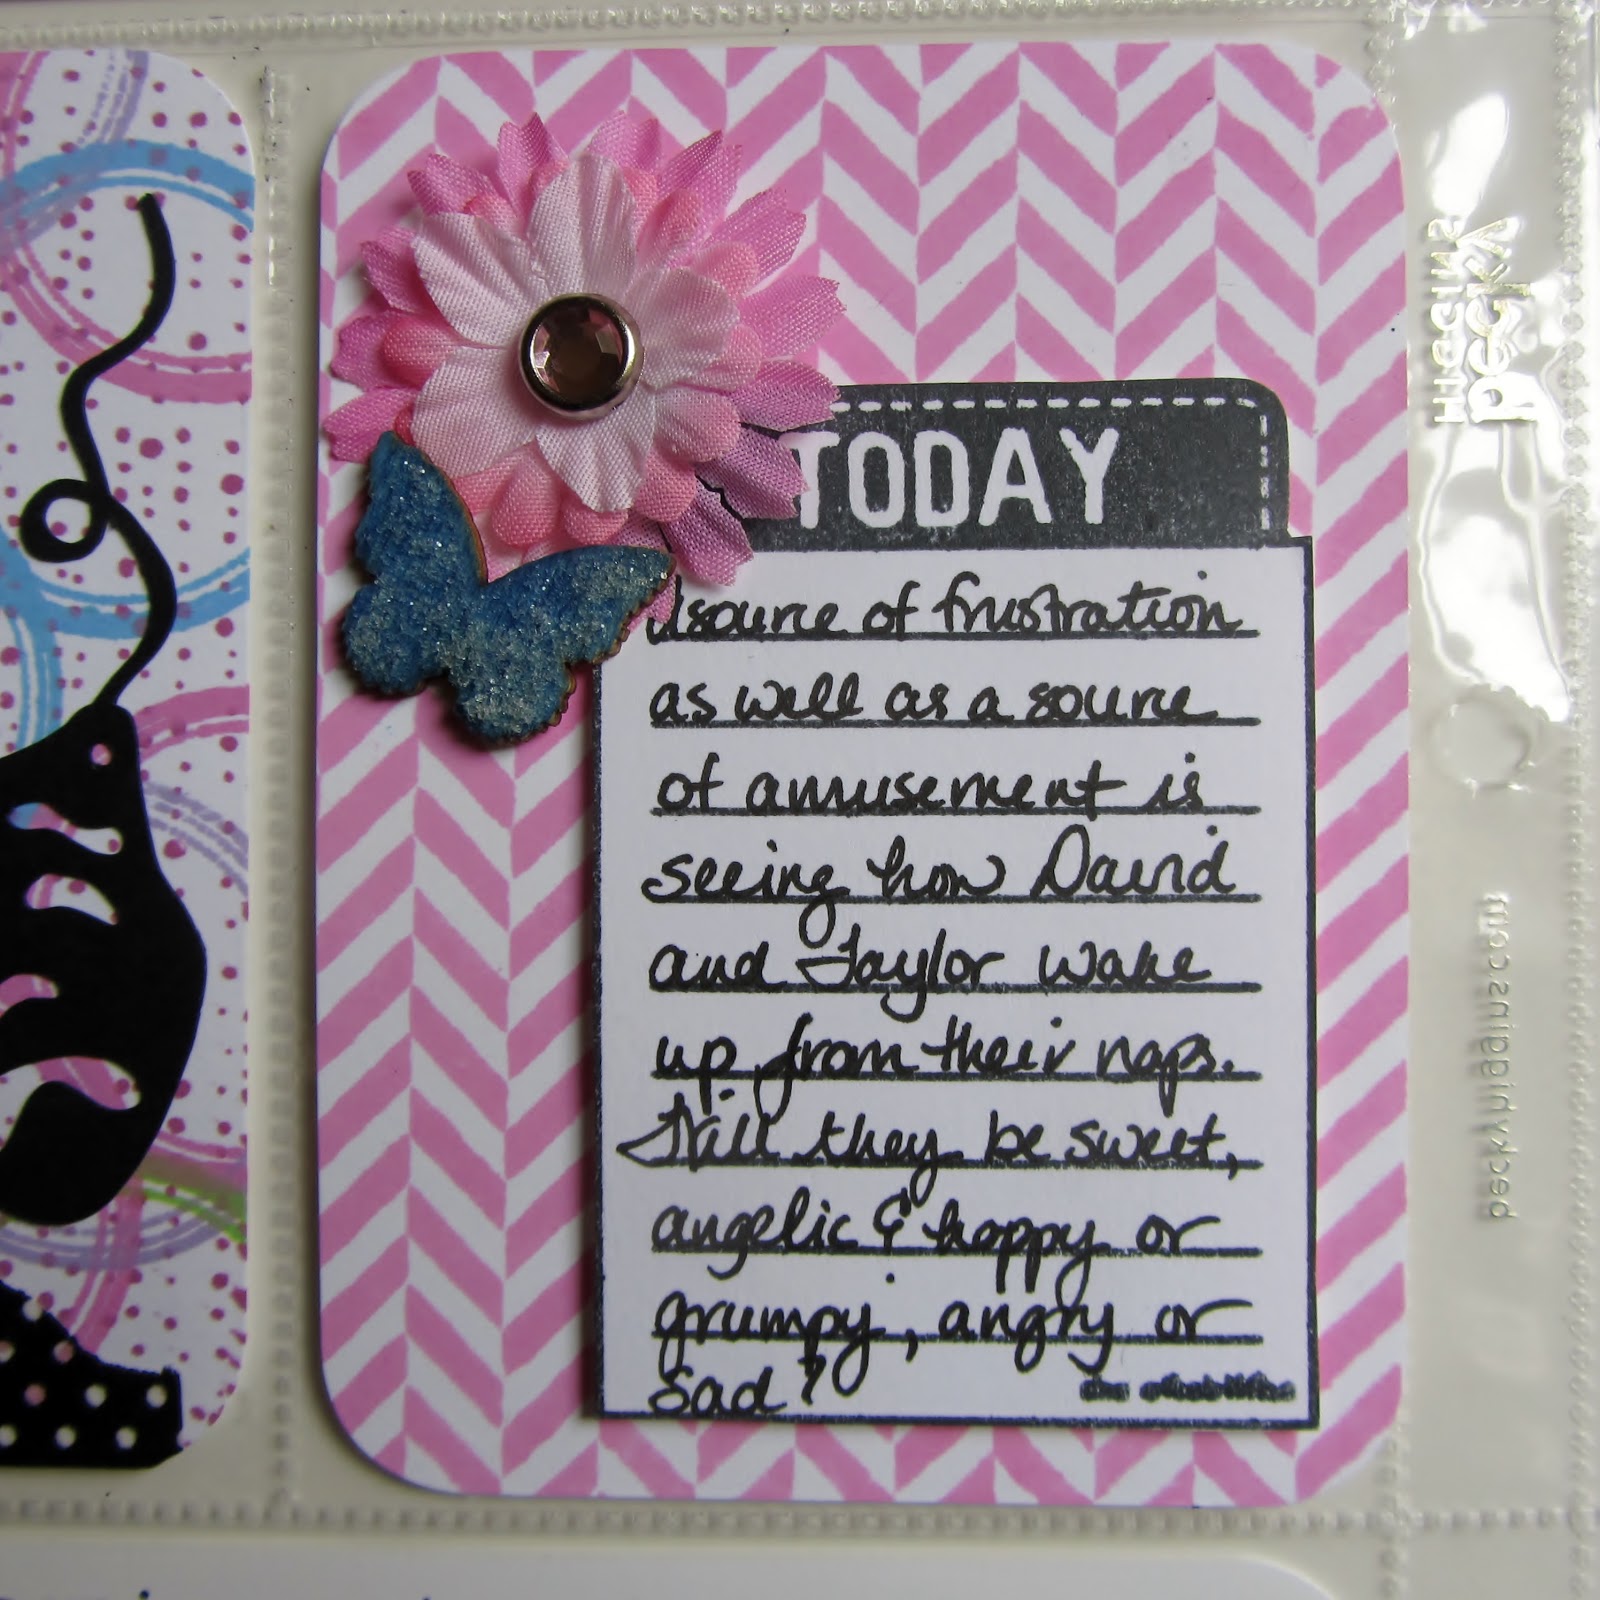
 The card below was stamped with the Tweeds background stamp such a cool stamp!) and another stamp was used for the journaling box.  I added a little flower and inked and Stickled butterfly to the card to 'oomph' it up a bit.

My friend, Donna Gibson, who is on the Creative Team for Becky Higgins' Project Life shared this very cool idea a week or so ago where she scrapbooked her adorable grandson's video and you can see it HERE. So very cute!  Now, how do you do that, you ask?  Well...it is ridiculously easy....you basically upload your video to a sharing site....like Youtube...get the link and then get a QR code for it.  What does QR code stand for?  Quick Response.  I did not know that but once again Google and Wikipedia to the rescue.
Anyway, I did my own of my very adorable grandson who is singing happy birthday to me.  The photo of him is a screenshot from the video and did not turn out well but things like that don't bother me so much anymore.  You know?
Here is my QR code and how it was printed out:

Is that not the coolest thing ever?  You can actually scrapbook your video now!  Wow!  Technology is amazing!

Here is a listing of the Hero Arts supplies I used:
Stamps:
Tape Your Message
Today
Newspaper Background
Tiny Ink Spots Background
Tweed Background

Inks:
Green Hills
Cornflower
Soft Purple
Bubble Gum

 Sea Layering Papers

And I am entering this in the Hero Arts Stamp Your Story Contest which you can see HERE.

And lastly....a very Happy Mother's Day to all of you mothers out there and if you still have your mother, please give her a hug....my mom is no longer here and I miss her every day!

Happy Crafting!

Monday, April 22, 2013

Project Life: Week 14 and Playing Catch Up!

After my huge craft room redo which you can see HERE, HERE, and HERE I am now trying to play catch up especially with my Project Life as I am a few weeks behind.  So yesterday I worked on Week 14 which was Easter week.  I've already done a full two page spread on Easter which you can see HERE so I just focused on the rest of the week for Week 14.

I chose to do very quickly this week....I used journaling cards and chipboard stickers from Recollections (Michaels brand).  I stapled a bit of rickrack on one card but that was about it for frou frou.  But I'm really happy with the end result as I can say "DONE!" and put it in my book!

Here is the left side:

Lots of pictures of the kiddos this past week.  Thanks to my daughter and Dropbox!

And the right side:


And I got my son's photos of his outing to the Atlanta Braves' first game of the season through Dropbox, too!  It is so helpful to me in aiding me to document my family life.  Yay, Dropbox!

I couldn't resist the moustache on my little fluffy girl:


Well, I'm off today to spend time with a very dear friend.  We will be heading to a winery for wine and cheese tasting.  Fun day.  Camera is ready!

And after my scrapbooking last night, my room stayed neat!  :)

Happy Crafting!!!

Friday, April 5, 2013

Friendship Card and Project Life: Week 13

I was a busy little crafting gal yesterday finishing up Project Life for Week 13, doing and insert page for Easter as well as another 2 page Easter spread.  Got that?  AND I made two cards with the Simon Says Stamp April Card Kit.   That is major output for me....I'm more of a 1 thing a week sort of person! LOL!

Here is one of the cards I made:
The colors of the little tulips are rather subtle but it does look a lot more vibrant in real life.  :)  The tulips were cut with a Memory Box die.  The black strip along the bottom is Washi tape.....all papers are from the April Simon Says Stamp Kit. 
Here is a bit of a closeup of the tulips which I topped with some Stampin' Up Dazzling Details.
This is a different look for me because I usually go BOLD but I like the combo of bold and subtle here.

And now onto Project Life.  Here is the right side of the layout shared yesterday.  Again I used Recollections cards that I had gotten at Micheal's for not much more than a "song and a dance"!

The card on the right (shown below) was cut from a file purchased in the Silhouette Online store.

It started off wet and dark here this morning but the sun is starting to peek through and we are supposed to have an absolutely awesome weekend!

Happy Crafting!

Thursday, April 4, 2013

Project Life: Week 13 (Left Side)

I've had a very uncrafty last couple of days but they were good ones nonetheless!  My good friend was here from Florida for nearly a week and then we celebrated Easter at my house on Sunday.  My kids were here, my grandkids were here as well as a few more guests.  It was a great day despite it being a bit wet for an outdoor egg hunt.

Anyway, I got back into my craft room last night and worked on my Project Life for Week 13 which was March 24-March 30.  Here is the left side:

The papers I used this week were from Michael's own brand: Recollections.  I love the bright colors and they work great for Project Life at a loooooow price!  I used templates from The LilyPad for the photo collages.  How about the photo(s) on the bottom right.  I let my 3 1/3 year old grandson have at it (is that a southern expression?) with my camera on occasion and he does a wonderful job taking photos.  I decided to include those this week....our little budding photographer!

I added a few K and Company daisies to a filler card and added a wood veneer butterfly (Recollections but I think they are made by Studio Calico) that I inked with some Hero Arts Neon ink.  I also added some Stampin' Up Dazzling Details to the centers of the flowers and the butterfly and then stitched a flight trail for the little butterfly.
 I used one of the 3x4 inch slots for my "week" card.  I cut out the word "week" and offset it with my Silhouette.  I cannot remember what font I used but it did begin with a "C".  LOL!  The numbers are metal and are by Tim Holtz....and picked up ON CLEARANCE (read: very low price) at Michael's. 
 I added a wooden bird also inked with Hero Arts Neon ink to my "A Little Birdie Told Me...." card. 
Now....off to do the left side!

It's rainy here in Atlanta today... a perfect day to stay inside and craft!

Happy Crafting to You!

Tuesday, February 26, 2013

I Have You in My Heart

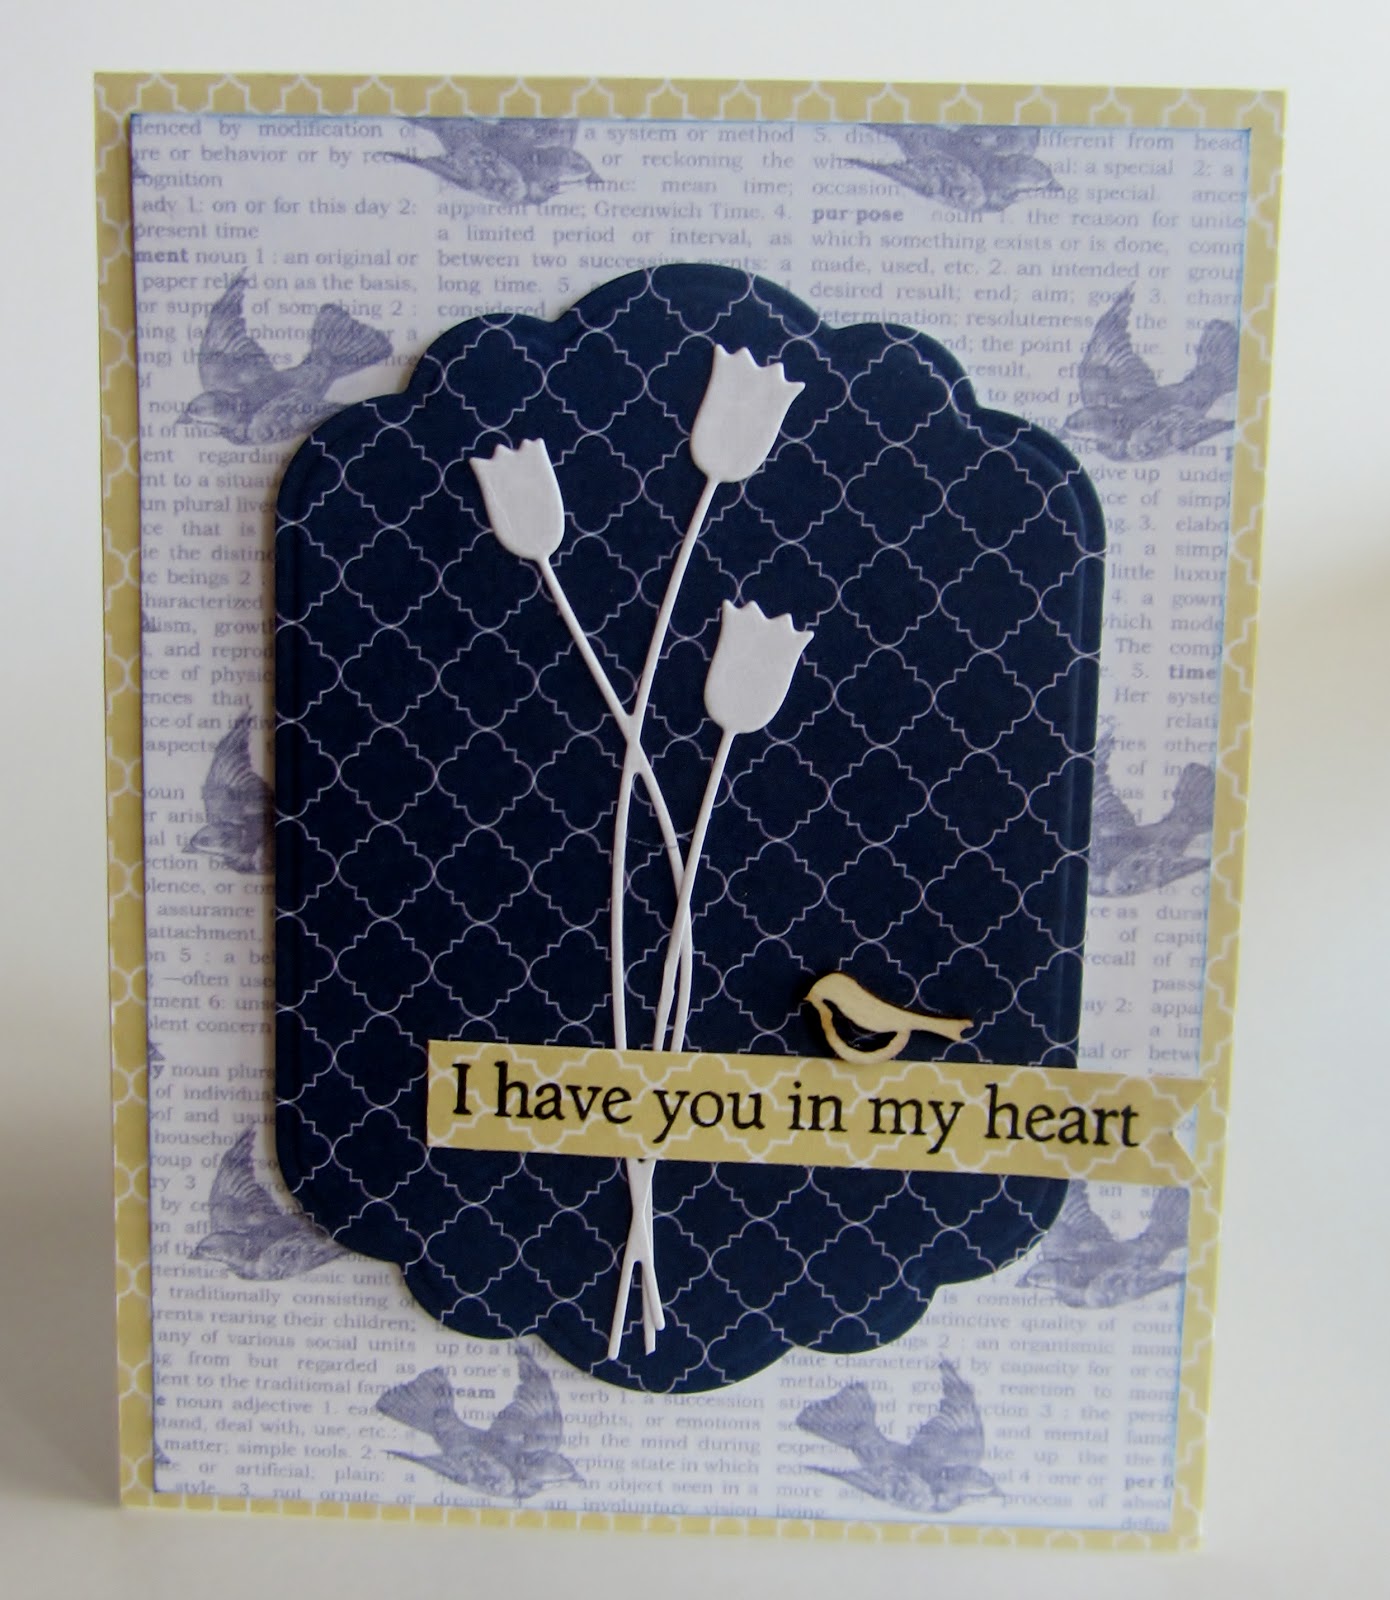
Sadly I had need of another sympathy card so made this one today with some We R Memory Keeper papers, a Memory Box tulip die cut, a spellbinder die and a little wood veneer bird by Recollections.  The sentiment is from a Hero Arts clear stamp set.

I hope it brings the recipient some comfort knowing I'm thinking of her.


On a brighter note I was in Michael's yesterday and they now have, packaged under their brand Recollections, little wooden veneer pieces that are exactly like Studio Calico but a little less expensive.

And always...Happy Crafting!


Tuesday, February 5, 2013

Project Life: Week 5

I am just moving right along with my Project Life and still enjoying it and so happy with the result.  It is certainly a different type of scrapbooking but it is sort of freeing....I really don't worry about paper colors matching photos or making sure I have enough photos of an event, etc.  It really has been a lot of fun.  Five weeks down and FORTY SEVEN to go!

Here are my layouts for Week 5....first the left side:

Very simple this week....I used some little cards that I picked up at Michael's when they were 40% off.  They are Michael's own brand, Recollections, and I thought they were such fun with such bright and happy colors!  I added a little Washi tape here and there...and some trim....and the Week 5 frame in the bottom right was cut on my Silhouette from some shapes and text I welded together.  I love the way the chevron border worked when I welded it onto the frame.  Ahhh....the possibilities are endless!
 And here is the right side:
 I love those blurry little pictures on the lower left that show my little grandangels in constant motion!  And they are!!!  They were just running around the living room having a giggling grand old time!  I also love the photo of David in the top right with the pancake that's bigger than his head!
 I used a little notecard from Michael's for the journaling above and some Hero Arts stamps for "you & me" which were embossed with some black pigment ink and some clear embossing powder.  I added a couple of buttons although I don't recall what brand they are. 
The journaling box on the left (above) was just a few assorted papers and some KI stamps I picked up at Archiver's the other day which will lend themselves wonderfully to Project Life.  I used some Hero Arts Neon inks and some Washi tape, too. 
I did do an insert page of a big event which I'll share tomorrow!

Happy Crafting!
Saturday, January 26, 2013

Valentine Wishes

Here is a little Valentine Card made with a "LOVE" stamp cut from the Silhouette store.  It cut so well on this printed paper called "Love Note" by Fancy Pants....love this little paper pad!
This card worked up very quickly....I used some Papertrey Ink ribbon for a little tie at the bottom.  Very simple and really very fast.  Including the cutting....less than 10 minutes, I'd say.  (Read: more like 20.)
Don't you just love those love stamps? 
Also I wanted to share my insert page for my Project Life album.  Last week we celebrated my son's birthday and I had a few pages I wanted to use so I inserted an 8 1/2 by 11-ish We R Memory Keepers page protector.  It has slots for a large photo across the top which I just mounted to some printed paper and then two 4x6's.
Here it is with some white paper behind so you can see it.  Not a great photo but you get the idea.
And here is the reverse side:
And how it looks without the white paper behind it inserted in Week 3:
And here is a little closeup of the journaling box.  I used some Recollection puffy dimensional stickers to dress it up a bit:
And that's it for today!  Off to play some tennis!

And hopefully some....

HAPPY CRAFTING!

later....

Tuesday, January 15, 2013

Christmas-y Layouts

I actually pretty much have all my 2012 Christmas layouts done.  But of course that doesn't account for the previous 11 months of 2012! LOL!  I freed myself up from scrapbooking chronologically many years ago so I don't stress about that anymore.

I took my scrapbook to my daughter's the other day and my grandson, David, had the best time looking at and talking about the layouts.  I got such great joy having him do that.  Just tickled this ol' Omie's heart!

Here are a few simple layouts done with some printed papers I got at a huge after Christmas Michael's sale.  I basically just slapped some photos down and added a few little touches.  They were pretty quick to complete and I'm glad they are done and now can be shared!


 and the companion side using a 6 slot We R Memory Keepers page insert.

And here they are side by side:
And here's another 2 page spread:

And the side by side:

And that's it for today!

Happy Crafting!