Wednesday, January 27, 2016

Reinventing the Wheel...

Sometimes you learn how to do something....and then if you're like me you don't practice enough and *whoooooosh* that newfound knowledge escapes to some place unknown where all that newfound knowledge goes!

Several months back I bought a PixScan mat and googled and read and googled and read and googled and read how to do cut out stamped images with my Silhouette.  I thought..."what great technology"....I need that knowledge.  Well, I got the knowledge and then as I said previously....*whoosh*...it was gone. It might be laying around somewhere but it certainly couldn't be found in my brain!

So I had some time the other day to try to find the knowledge again (which I did) and I thought..."now how am I going to remember it?"  It certainly won't stay in my brain as there is no room to hold onto newfound knowledge.  My brain is already overflowing with more important things like "did I turn the coffee pot off", "is today trash day?", "where is my (fill in the blank)?", etc.

I thought to myself that if I wrote myself a tutorial on my very own blog I can access what worked for me in the future (and, of course 'future' means anytime after this particular second!

I know you all know what I'm talking about!

(Now, if you do not have a Silhouette or have absolutely NO interest in this technology you can just skip on down to the end and see a couple of cards I made.  And thanks for looking!)

Here is my tutorial:

1. Your Silhouette software must be calibrated to the source that captured your original image.  In my case, it is my iPhone and I have already done that.  But if it gets out of calibration then look HERE for how to calibrate. Once your phone is calibrated you shouldn't have to do it again.  Shouldn't have to....but then again, who knows?  Anyway, mine was still calibrated just fine after the previous attempt.

2. Stamp your images on your paper in whatever ink you desire to use, keeping in mind what you will use to color them (watercolor pencils or brushes, Copics, etc).  Of course, you can go ahead and color prior to cutting if you wish but I hate the idea of spending a lot of time coloring to have my cuts not be quite right.

3.  Then place your stamped images on your Pix Scan mat making sure that it is within the black outlined rectangle and take a picture "straight on" of the images.
By the way....these oh-so-cute images are from My Favorite Things "Things With Wings" stamp set.
4. Next you go to your handy dandy computer and pull up your Silhouette software (I use Designer Edition but any will do).
5. Go to File in the top left....click on it and then find Open PixScan Image and click on it.
6.  Over on the right of your screen you will see a window open up (the previous image you had imported will also show up but disregard that) and click on "Import Pixscan Image from File".

7. Find your image on you computer....I had mine in my Dropbox folder and click on it.
8. Then your little window on the right of your computer screen will looks something like this and you will see some blue and white lines in motion where it says "Loading Image".
....and the image you are importing will also show up.  Cool!

9. Then on the main part of the working surface of the software your image will show up....like this:
  10. OK....now you need to start telling Silhouette what you want to cut.  So the first thing is to go to your Trace window which is the square highlighted in the blue.  The Trace window will pop open with some options.  You will need to select your Trace Area so click on that and then go to your image and click on what you want to trace.


11.  I wanted to trace everything of course so highlighted the whole kit and caboodle!
Once you have your traced area the way you want it.  (There are tips to tracing but I will not go over them here.  Check this link out HERE if you want some basic info on tracing.)

12.  Select the part of the image you want to trace.  In my case I wanted the Trace Outer Edge option.


13. Now you will have cut lines right on the edges of your images.  I wanted to cut with a white edge so I needed to add in another step.  I think cutting with an offset is probably a little more forgiving but I will make a note to myself to try to cut on the image at some point!

14. So now I go back to the top of the screen and click on the Offset Window.
 The following window will open.  Make sure your images are selected and then click on "Offset".
( IMPORTANT!: One thing to remember at this point is that you still have cut lines on your image and at some point you will need to drag all of those off the cutting page. You most likely will not want to cut out the image with the offset and then on the image itself!)

16. You will then have red cut lines around your image.  You will need to use the slider bar or arrows above to increase or decrease the amount of the offset.  I found that for me 0.040 worked perfectly for me. 

 17. At this point you may need to clean up your image as some things may be identified for cut which you do not want cut.  For example....in the little bird above were some extra "cuts" inside the wings I didn't want cut.  I simply went to the top of my computer screen and clicked on Object and then Release Compound Path and then was able to delete those little bits of junk I didn't want cut.

17.  Here is my totally cleaned up image ready for cut (the original cut lines have been moved off the screen....you just can't see them here.)
 18. Then you simply load your mat and set your cut settings the way you want.  I used Neenah heavy cardstock so used coverstock as my choice and actually even engaged double cut.

19.  This is what I ended up with:


So what does one do after cutting out 427 pieces?  Why make 50 2 cards, of course!
Here is the first one colored with a variety of water color pencils.


This one was colored with Zig Clean Color Real Brushes.


I used Distress Inks to create the backgrounds and some stitched dies from Simon Says Stamp.

You can see how nicely the PixScan technology worked!


Sunday, January 10, 2016

And Onto 2016!

Wishing all of you A VERY Happy New year! I'm hoping that 2016 is a wonderful year of creativity and happiness for all!

I had a very busy 2015! I was lucky to do some serious traveling and saw all parts of the world.  Many of you know I did an Around the World trip in June and July....we traveled to 8 countries and went over 25,000 miles! It was definitely a dream of a lifetime....I doubt we'll ever be able to duplicate that unless we win the Powerball Lottery! HAHA! 

We did end the year with another incredible trip...we went to London, England for about 5 days and then to southern Germany for about 10 days or so. I was born in Germany to a German mother so going back always feels a bit like home.  I had a bucket list item to see Germany during the Christmas season....I had wanted to go to the Christkindl Markts which are common in Germany during the Lenten season.  And I was not disappointed!  We had a fabulous time flying into Frankfurt and touring Mainz (on the Rhein), Heidelberg, Karlsruhe (the city in which I was born and also on the Rhein River), Munich and Nürnberg. Nürnberg is the site of one of the oldest and most well known Christkindl Markets and it did not disappoint.  I had visited there as a teen with my parents and it had always been on my bucket list to return.  I got to check that off my list!

With all the travel and preparations for Christmas I got very behind on crafting! Yes, I've done some but just haven't made the time for sharing.

I hope to do a bit better blogging in 2016.  No promises but I do enjoy sharing so hope to be a bit more successful!

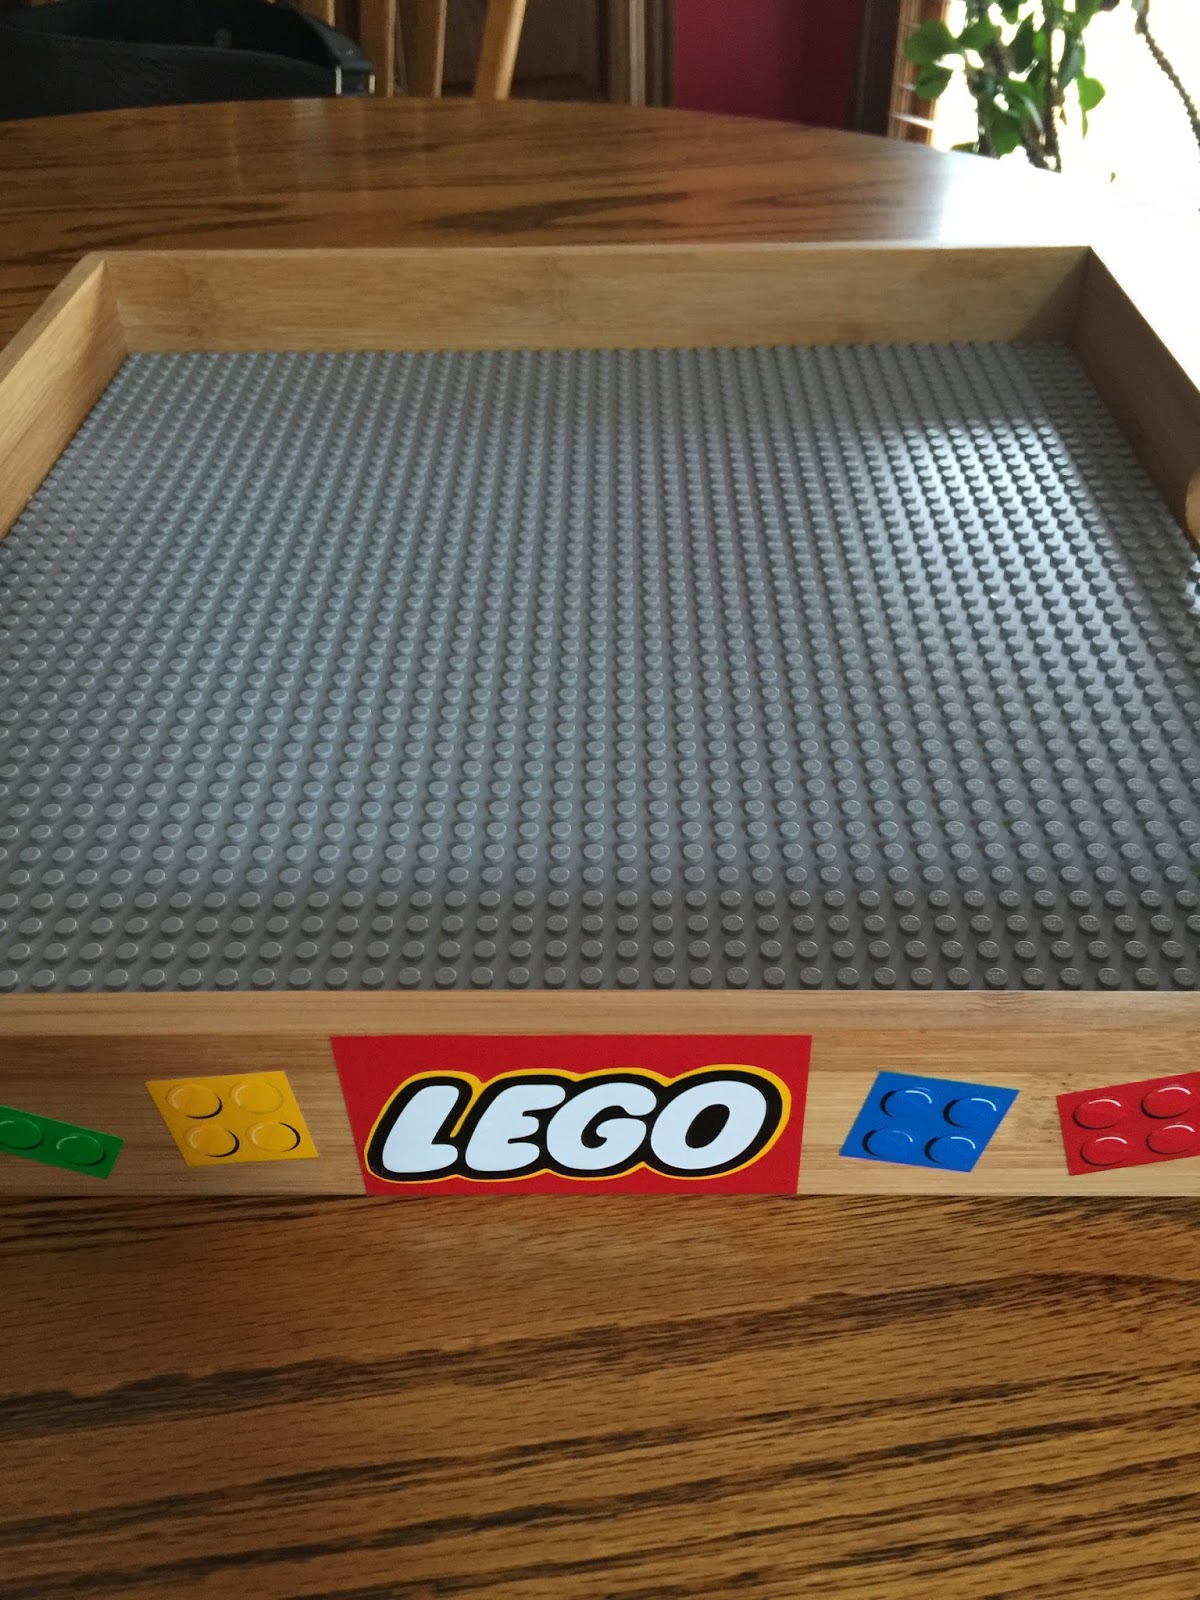
My very good friend, Cyndi, shared with me a project she recently completed for her grandchildren.  She had taken a 16 inch bamboo tray and purchased a 15 inch Lego baseplate which she glued inside the tray.  This makes a very nice little tray for Lego building...and since the tray has sides around it...maybe little pieces will not fall off the table as much.  I don't know about you but the placement of a Lego on the ground is directly proportional to where you will step in bare feet! LOL!

So I decided to CASE her design (Copy And Steal Everything) and make my own for my grandchildren.  The tray was purchased at Walmart and I got the baseplate on Amazon.  The plate was glued in with some E6000 adhesive (good. strong stuff).

I used my Silhouette to cut out a Lego logo as well as some Lego blocks in vinyl.  The logo was found online and the blocks were files purchased in the Silhouette online store.  The little Legos took a little while to create as there were each 4 layers of vinyl!  But it was fun to do and although not perfect...I think my grandchildren will enjoy.

So here are the pictures of the finished Lego tray:

Happy Crafting and Happy New Year!

Monday, November 9, 2015

Hello You!

When I was at the very impressive Impressive Ideas grand opening the other day I came across an interactive die by My Favorite Things Die-Namics.  It is called the Interactive Trio card and when cut on your handy dandy die cutting machine makes a little 3 window panel...but instead of having full cut outs of the "panes" it creates a score line so you really get a cute little flap.

So cool!

I spent way too much time making this card but it was very fun to do.  I CASEd (copy and steal everything) one by Stephanie Klauck at MFT but mine is a bit different...mostly because I didn't have all the stamps she used in her card.

Here is mine:

I used Things With Wings stamps by My Favorite Things


as well as the Scripty Sayings sentiment, "hello you", by Lawn Fawn.

 I stamped the sentiment with VersaFine ink and then heat embossed it with clear embossing powder (a favorite technique!).  The butterfly and ladybug were colored with Copics and the little flowers were colored with Wink of Stella Pens.  I also added a layer of Clear Wink of Stella to the butterfly and ladybug.  Can't have enough shine now, can you?!

So when you open the little flaps you see a little scene with oh-so-cute owls. I didn't have a tree stamp that would work (yes, I have tree stamps but none that would work for this scene) so I drew the little tree limb.

I love the little owls...they are actually two separate stamps...and they are looking at each other.  Too cute!

I used some Distress Ink to sponge around them to get a bit of a sky look....and I added Wink of Stella to nearly everything!

Lastly, layered the scene and windows on top of a piece of green cardstock and mounted onto white Neenah for a finished A2 sized card.

This took a while to do...but I'm not giving up on it...want to play with these little windows and flaps again soon! Maybe today! ;)

Happy Crafting!

Sunday, November 8, 2015

Happy Birthday Shaker Card

Shaker cards have seen a resurgence in popularity in the last year or so.  I can remember making them (and shaker embellishments for scrapbooking) many years ago.  We mostly filled the shaker cards with punched images whereas now the trend seems to be filling with sequins or beads or other glittery things...but the shaker part remains virtually the same. 

I always enjoyed them but haven't made one in a few years, I think.  They are always fun to make and fun to receive.

Yesterday was the Grand Opening for Impressive Ideas...a favorite stamp store in the metro Atlanta area.  Over Memorial Day weekend the former location burned to the ground.  We were all devastated....it was like losing a friend.  But the owners vowed to get it back up and running as soon as they could and they did it! They opened less than 6 months after the fire and moved into an even bigger and better space.  It looks absolutely awesome and before I knew it I had several must have items in my basket!

One of those items was a Die-Namics Birthday Celebration die which is a round birthday sentiment and PERFECT for making a shaker card.  It cut beautifully....and was really so easy to make.  I love the stitched circle. I also used a stitches die from Lawn Fawn to do the stitched edges on the top and bottom of the front. I quickly made 3 using some birthday paper from Paper Studio.

Here is the first one I did:

It was so fast I quickly (read: in less than an hour) whipped out 2 more!

I think they are festive and fun and I already have two ready to go in tomorrow's mail.  I figure I just about paid for the die! LOL...You know...an American Greetings birthday card like this would run $4 or so....so 3 at $4 means I saved $12! HAHA!  Only a few more to go and the die will have paid for itself!
Seriously!  That's my justification and I'm sticking to it!

Happy Crafting!


Friday, November 6, 2015

Share Handmade Kindness

Well, my goodness, my attempts to start blogging again have met with a huge F in effort! I have been creating...just not sharing. Some of the things I've made are NOT shareable (LOL!...U G L Y!) but I do have a few things that have been fun and have worked out (and yes.I.copied.most.of.them from the superstars!).

But today I wanted to bring up the campaign Jennifer McGuire is spearheading at her blog which is "Share Handmade Kindness".  We all need a bit more kindness in the world, don't we?  With handmade gifts we can share that kindness and, perhaps, bring a smile to someone's face.

You can read about the campaign and challenge HERE.

I have been sending out a few cards lately and have had more fun decorating the envelopes than making the cards.  I've done some watercolor washes ala' Kristina Werner which have been well received.

And then I decided to decorate this envelope with a little scene done with some older Hero Arts stamps I have.  My friend, Amy, moved into a new house recently and I wanted to send her a congratulations card.

So here it is:

I blurred her address for obvious reasons.  Can't have ya'all stalking her!

Anyway, a little fancy hand lettering made it even more fun.

I used the Zig Clean Brush Pens which I recently purchased and absolutely love.  They are so much fun and so easy to work with and I am a huge fan of the watercolor look!

We have had so much rain lately that I slipped this envelope into a clear envelope for mailing.  I certainly didn't want my work to wash out!

And that is it for today...a little kindness is on its way to Amy!

Happy Crafting and spread the kindness!

And I am linking this to Jennifer's blog HERE.

Friday, October 2, 2015

Where in the World Has Susan Been?!

It has been over 3 months since my last blog post.  Wowza...time does pass when one is having fun...it also just passes when one is extremely busy...and it does also pass when one needs to get some mojo back! HAHA!

So...what has been happening with me?  Well, the biggest thing that took me away from blogging was an AROUND THE WORLD trip my husband and I went on mid June.  It was a 6 week trip that literally took us around the world. It was an absolutely amazing experience...definitely once in a lifetime sort of thing.

I blogged my entire trip on a nifty little travel app and it is available for you to view HERELots of fun stories and pictures.  If you do any traveling I certainly recommend the app, too...it's called Travel Pod and is free through iTunes...I'm not sure if there is a droid version but most likely there is.

We left Atlanta mid June 17 and headed towards Rio de Janiero, Brazil.
Then to Paris, France.
On to Bangkok Thailand.
A few days in Singapore.
More time in Hong Kong.
Back to Bangkok, Thailand.
To Seoul, Korea.
Over to Tokyo, Japan.
And lastly to Sydney, Australia before heading to Los Angeles (a 14 hour flight) and ultimately back to Atlanta.

Not including North America....we made 4 continents and 8 major cities.  What a trip!

Amazing trip...

We got back home and not long after we went to the beach for a week for our annual family vacation. It was also wonderful...kids and grandkids...it was a fun time to all be together.

So needless to say...my craft room has been a bit neglected.  I just didn't make the time to do much crafting! But I've started working on a few things since I got back. so thought I'd share a few simple cards today.

Here we go both done with the Simon Says Stamp Card Kit for the Month for July:


I stamped the little wave onto Vellum with Versamark Ink and heat embossed it with white powder and then cut it out.  I did the same with the little sailboat and colored it in with some Tim Holtz Distress Markers.  Simple and easy...and flat! LOL!

The second card was done with the same stamp set which is so darned cute! I love the sailing theme!
So very summery!
I distressed the edges of the background paper.  I also stamped the life saver image and then scanned it and cut it out with my Silhouette. More on the PixScan cuts later.
The mat was done with a Simon Says Stamp stitched metal die.

So....I am BACK! Hoping all is well for you...and thanks to those of you who encouraged me to get back on the blogging wagon!

Happy Crafting!


Monday, June 15, 2015

Crafting Innovators: The Crafty Lemon

A very special friend of mine (one of my daughter's BFF from high school) is quite the crafty person. Amanda (yes, she shares the same name my daughter has...and yes, that has created some confusion over the years! HA!) has left her job recently in corporate America to pursue her passion and dream.  A year or so ago she founded a craft club in her neighborhood where the neighbor kids could come for crafting and to also learn about other things (like nutrition) in a fun way.

Amanda has created a line of natural health and beauty products which funds her craft club(s).Her venture is called The Crafty Lemon and you can see it HERE  and shop HERE.  Cool idea! Amanda sells a great line of lip balms made with good and wholesome ingredients.  Why would you put icky chemicals on your lips like some of the big name lip balm companies when you can use natural and organic products.  A. NO. Brainer.

Anyway she dropped by today to give me a sample which I'm going to take on an upcoming trip!  I just tried it out and my lips feel like silk! SMOOCH!

And, Amanda...being the crafty thing she is cut this packaging with her Silhouette:
 It perfectly holds the lip balm and she has successfully used it as a mailer!
There are three sides to it...here are the other two:

When opened the lip balm was wrapped in matching blue tissue paper.
Once opened you see the lip balm.  The label has art work which was done by kids of the craft club.
Isn't that cute?
I think what Amanda is trying to do is awesome.  She would like to set up chapters in other neighborhoods...she wants many children to have the opportunity to craft and express themselves through creativity.

This is all so wonderful I thought I needed to share!

Happy Crafting!