Showing posts with label We R Memory Keepers. Show all posts

Sunday, September 28, 2014

More Birthday Fun!

I am in need of a few more birthday cards for October.  Lots of people getting older.  Not me.  HAHA!

Here is another card made with the Paper Smooches Birthday Posse set.  I colored the turtle with a few Copic Markers and then put some glitter sheen over him and, lastly, added a googly eye.

I used some embossed paper from We R Memory Keepers.  It reminded me of the turtle shell. 
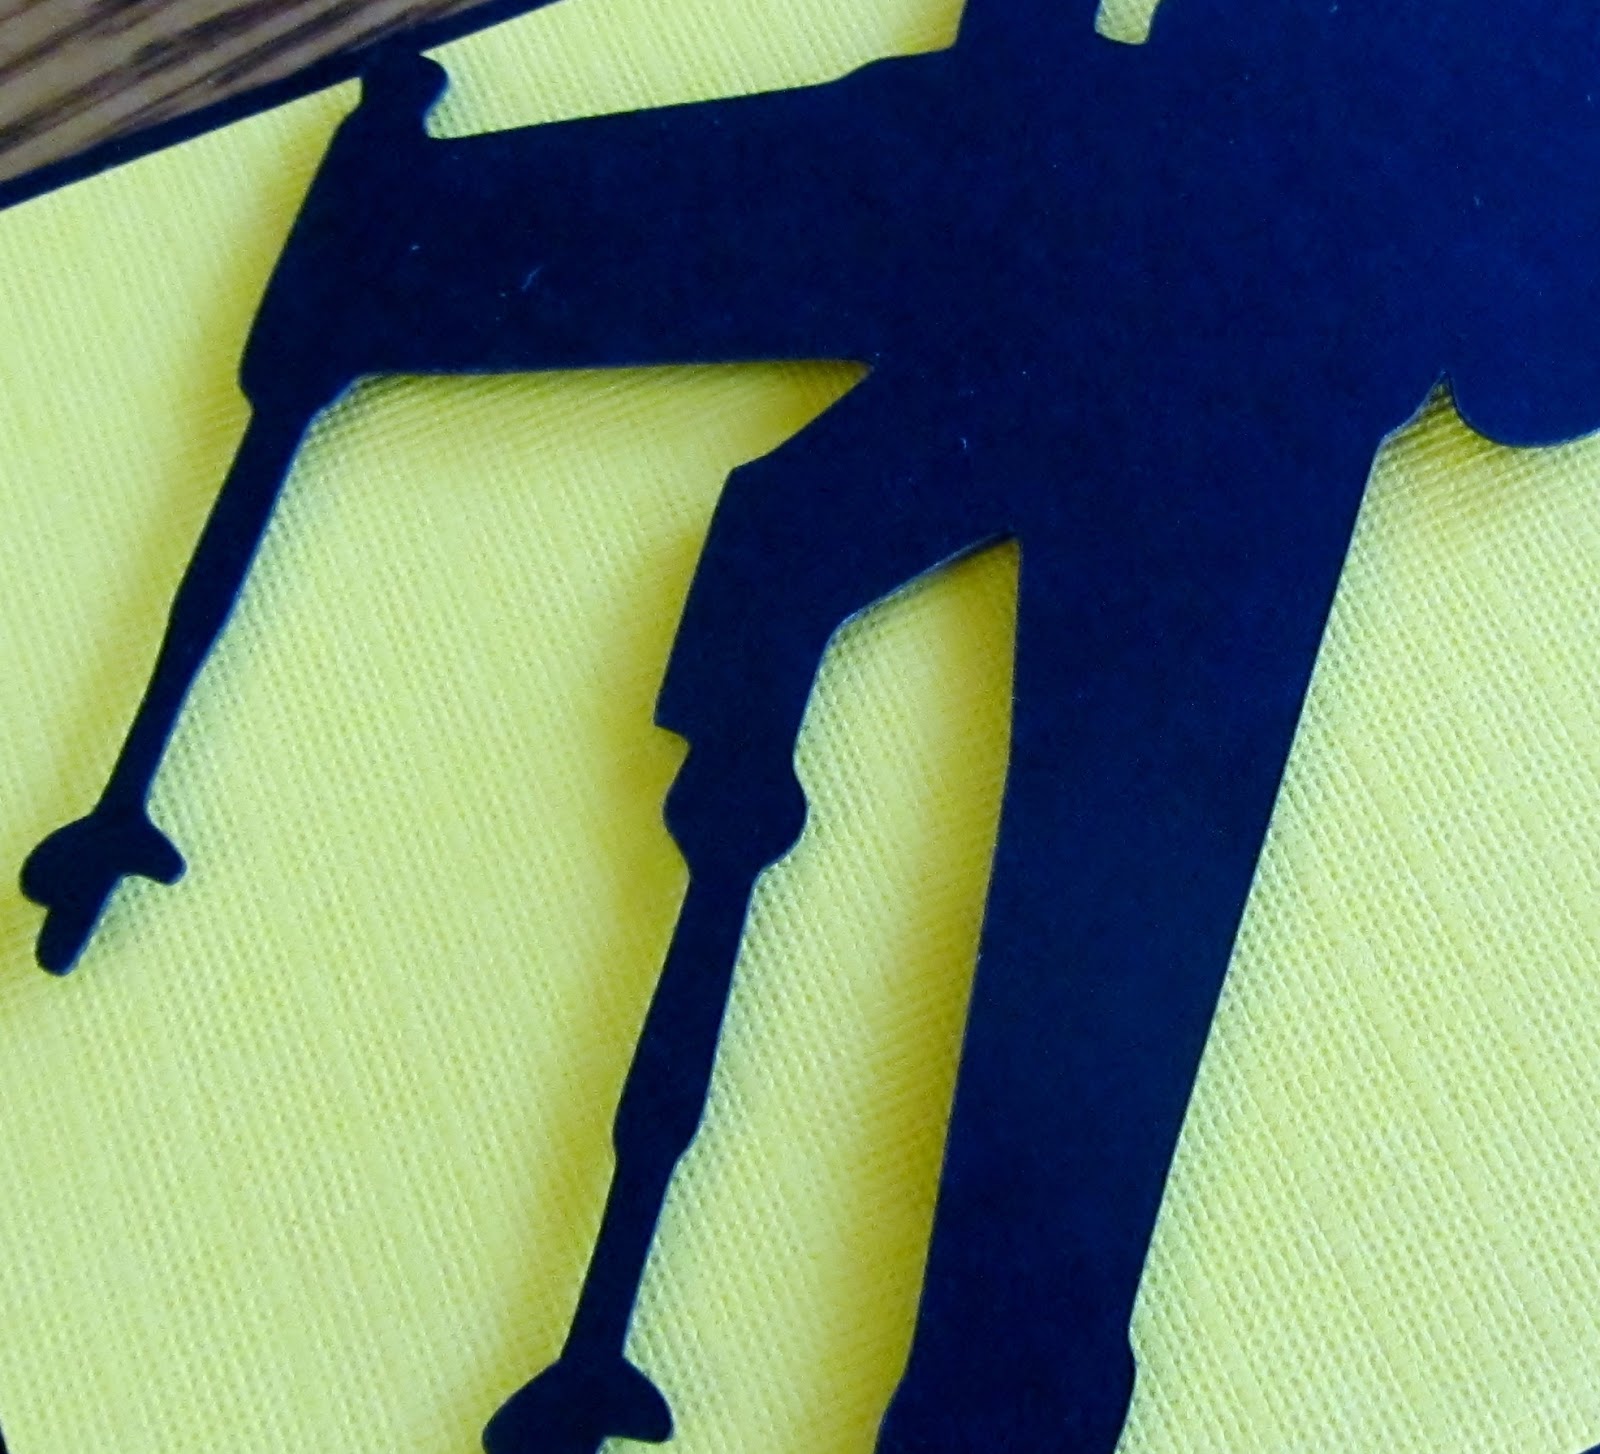
Here's a closeup of the little cute guy:

And that's it for today...I'm on the run!  Hoping to get some crafting in later!

Happy Sunday, Happy Crafting and Keep Creating!

Wednesday, August 13, 2014

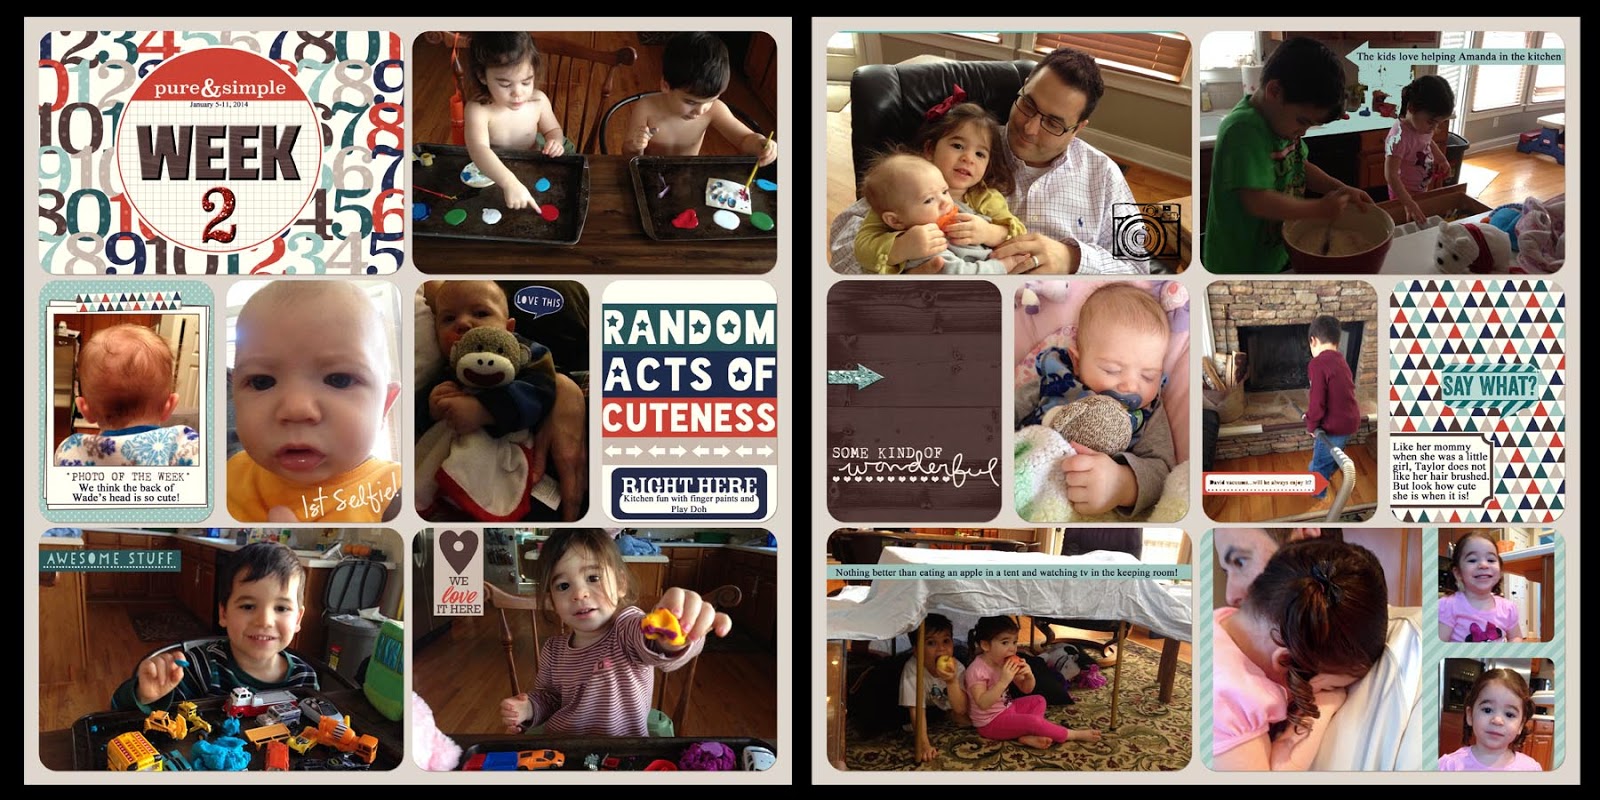
You're So Cool and Project Life Week 2

I have been sitting with laptop in hand working on my digital Project Life for 2014.  I am loving doing it but I do miss the feel of paper and the mess of glue and glitter and paper scraps everywhere!  (sort of...)  I'm going to try to make some time for some actual scissor, glue and paper crafting sometime soon but today is a fun day with the grand kids so we will see how much energy I have after my time with them! (usually it's not much!)

For the paper crafters I do have a card to share....but first I want to share Week 2 of my Project Life for 2014.

I used to January kit from Traci Reed and a template or two from Lily Pad for my photos.  It still takes me several hours to do these pages but it is something I can do while watching the Atlanta Braves on TV (or the Military History channel....what is it with men and the History Channel?  I mean...I like history as much as the next...but do I really have to watch re-enactments of the Battle of the Bulge again and again and again??  Of course, if it's not the History Channel then it is National Geographic and I have to endure yet another Gazelle getting eaten by a lion.  Really??? LOL!).

I diverted...sorry....

Anyway, Project Life is moving right along....

And now onto PAPER.  Here is the card I promised I'd share....made from elements from the Simon Says Stamp Card kit for August which is sadly out of stock.  The cute stamp set shown below is still available HERE.


And here is my card:
I colored the ice cream and hearts with Copics and then put Wink of Stella clear glitter over it at the end.  I also die cut a circle with some We R Memory Keepers paper backed burlap.  It cut so easily!

The sentiment "you're so cool" was stamped with Versamark and then heat embossed with white embossing powder.  Of course, you knew that.

Here is a closeup:

and that's it for today....hope you all have a wonderful day...and Happy Crafting!

Saturday, January 11, 2014

Project Life: Week 50

Well, it is happening...I'm getting close to the end of the year!  (And already behind for PL 2014!....lol!)

Here is my left side:
I used We R Memory Keepers cards for this weeks' layouts.

Here is the right side:

That's my future daughter in law and me in the middle right photo at the P!NK concert.  She looked adorable in her mohawk...I looked ridiculous in my 'fro...but we sure had a good time.  I snagged that photo of P!NK from a photo on the Great World Wide Web.  She was amazing...so acrobatic and physical...such an incredibly physical performance....and she never missed a not.  That girl has some pipes on her!  We had a great time at her concert and even made the jumbotron in our wigs.  Our 15 "seconds" of fame.  LOL!
I cut "P!NK" with my Silhouette Cameo.
And added a little ribbon to my journaling card:
And that's it for Week 50.  2 more weeks to go! ...well 2 more weeks and half a week as the 31st was in the middle of the week.  Oy Vey!

Happy Crafting!

Saturday, August 24, 2013

Project Life: Week 33

Amazingly....I am caught up.  I keep saying that for me it is just so important to stay caught up on Project Life.  Otherwise I will be Project Lifeless.  It just becomes too overwhelming to me to get behind. 

My big beef with Project Life is selecting and editing photos.  That is just so time consuming.  Project Life is supposed to be about simplifying scrapbooking but this is the part that is complicated and tedious for me.  In fact....I really dislike this part.  I wish there were a professional photo selector out there.  I'd hire in a minute!

But once the photos are printed out in the size I want it's easy goings and so much fun!

Anywhoooo...here is my left side:
I used some We R Memory Keepers papers and embellishments.  I had quite a few photos so embellies were kept to a minimum.  Fewer embellies....less $$$!
The "Week 33" text was done with Paper Smooches stamps and some plain ol' blank ink!

Here is the right side:


Very eclectic themed photos...certainly a snapshot of our lives this past week!

Isn't it funny that when you get things all completed and printed up and then you post to your blog you notice goofs?  Like that the top right photo is the same as the one in the middle of the photo collage.  Oh well...I bet you wouldn't have noticed! LOL!  It is staying.  I'm not redoing this! 

Project Life has also freed me from the thinking that my photos need to be perfect.  101% of the photos my daughter takes of my grand-kids is with her iPhone.  It's great to always have a phone handy but the shutter does not always trip as quickly as is needed to catch a toddler's likeness so I do get a lot of blurry or over saturated photos that are beyond fixing up!  But I don't much mind that now...it's about documenting what they do....and when the little ones see these pictures they don't much care if it's in focus or if their skin is washed out.  They just see, with delight, photos of themselves doing some fun and interesting things!  Right?  Life is art and art is life but it doesn't necessarily mean it's going to be a da Vinci or Picasso! ;)

I think I'm justifying....lol!

Happy Crafting and thanks for stopping by!


Wednesday, August 21, 2013

Project Life: Week 32

Well, hellooooooo....

My Tuesday morning tennis team (and not my Sunday afternoon or Thursday night teams.  LOL...yes, summer tennis is busy here in Atlanta!) played in the City Championships yesterday.  Unfortunately the good guys were beat out by the bad guys.  LOL!  Not really....the other team was not made up of bad guys.  They were actually very nice ladies and just outplayed my team.  So hats off to them...but hats off to my team for making it all the way to the championship!  We are finalists and our team came in second out of 20 teams.  Not too shabby. 

And once we get over the loss...which usually takes me about 24 hours...we realize that there is another match just around the corner.  We start practice for our fall season next week!

We did decorate our table a little bit and I used my Silhouette to make the little signs on the front of the table:
One of my teammates made cake pops with donut holes that looked like tennis balls.  I should have gotten a close up picture of them but she had them in those flower pots you can see on the table.  Too cute!

Anyway....I was captain for that team.  A usual season runs 7 weeks but since we went through our regular season PLUS 3 rounds of playoffs and then the city final matches it was a very long season.  I am glad for the season to be OVER!!!

On to Project Life...
Here is the left side for WEEK 32  (August 4-10, 2013):  
 I used some cards made by We R Memory Keepers....not much extra embellishing. 

I added some stickers to the 4x6 card to make a "week" card.  Easy and fast!

And here is the right side:
I used several templates once again to get more photos onto my pages.  This can be a bit time consuming but it is a great way to use less than stellar photos because they print out small.

And that is it for today.

I'm actually up to date....I have Week 33 ready to go!

Happy Crafting!

Wednesday, May 15, 2013

Back to a Card or Two...

As I've been working on my Project Life I've also found a little time to whip out a card or two.  And my challenge has been to use WHAT I HAVE HERE! LOL! What a novel idea.  USE what I have rather than adding to the collection!

I have been receiving the Simon Says Stamp Card Kit of the Month.  I love it.  The value is great....the stamp set that is included is wonderful...and I love the little things that are included with the papers for card making.  It has been a really fun challenge for me.  So....since I have a few boxes stacked up I decided to go back and, beginning with January, use up the rest of the supplies so I can toss the box.

Here is January Card Kit if you don't recall what it looked like:

Ribbon, tickets, these great Kraft colored round stickers, canvas buttons, tons of paper and more! 
I've made a couple of cards already but made a few more the other night.

The first one I actually did a little cross stitching with my We R Memory Keepers Sew Easy and some embroidery floss that was included in the kit.  I will sew on paper but I will throw a shirt out before I will sew a button back on!

The sentiment is hard to read in the picture so here is a closeup:
"Each moment of my life that intersects with me makes me happy."  I love that sentiment.

And here is the other card...made with one of the cute Tim Holtz tickets that came with the kit

That's it for today...hoping to make a few tonight with February's fabulous kit!

I'm entering the second card in the A Blog Named Hero: Challenge #24: Clean Up Your Act HERE.

Happy Crafting!

Saturday, March 23, 2013

We R Memory Keepers Envelope Punch Board

Sometimes a new product come out that makes you think....wowie....this is a great idea!  Sometimes the ideas translate to good useful products...and sometimes not.  I saw a video recently on the new We R Memory Keepers Envelope Punch Board and thought if it worked well...it might be a tool to have.

I love tools.

I like drills and hammers and screw drivers with the best of 'em...but what I really like are good scrapbooking tools.  Things that make paper crafting fun and maybe a bit less complicated.

And that's exactly what I found with the WRMK Envelope Punch Board.  It was inexpensive (retails for about $20) and is an all in one piece that makes envelopes easily and very quickly.

So what does it look like?....here it is:
It measures about 10 1/2 by 7 inches....smaller than a standard sheet of paper.  The board comes with a measuring guide across the top, a punch (the big blue oval thing at the top and center), a grid and over on the right is a little blue thing which is actually a scoring tool and bone folder.

The grid gives you the card size you can make an envelope for, the measurements of the paper to use, and also a number where you will start your process once your paper is cut to the correct size.  In fact, one thing that is great about this unlike using a regular scoreboard is that once you measure where you paper lays on the board that is the last measurement you have to make!  So easy!

Here's how it works... (and you will notice that WRMK has done a great job putting the directions front and center...well, front and left right on the board!...really if you just follow those instructions it is EASY PEASY!)
But....since I want to blog this... :)
For example, suppose you want to make a gift card sized envelope (for a card 2x3 1/2).  You would first cut your paper to 5x5 using your favorite paper trimmer.  Look where the bone folder is pointing below and you will see the score line will be at 2 inches.
In the photo above you can see I have placed the left edge of the paper at the 2 inch mark as directed on the grid.)  At this point I punched the blue oval thingy to start my envelope...just press down and punch!
And then I scored from the punch down to the edge of the board at a diagonal.  You can see the score line here:

Then....this is the non measuring part....you turn the paper one quarter of a turn counter clockwise like this and line your score line up with the Score Guide as shown below:
and of course, you punch at that point, too.  You continue doing this until you have all four score lines and punches and you will end up with a piece of paper like this (hard to see some of the score lines...but they are there...trust me:
At this point you can turn your punch board around and corner round the sharp corners like this:

After you've done this you fold on your score lines...add some adhesive and end up with this:
...which would also be called "the perfect envelope"!
Here area  few of various sizes I tried:
Now....I used the board for the first time today.  It is so easy to use....no big learning curve here...even a cave man could do it!  In fact...on the third try I decided to time myself.  From start to finish (including the time it took to cut the paper to the desired size) it only took me....drum roll, please......

are you ready for this???.....

ONE MINUTE AND 30 SECONDS! NO JOKE!!! I am totally serious on that!  Amazing!

Would I recommend it?  Certainly!  I think it will be a great addition...I can use it to mail cards (if I ever decided to mail any of the cards I am hoarding...)...I could use it for scrapbooking...I think this will be a wonderful and versatile tool.

Run and get one!!!

Happy Crafting!

Wednesday, February 27, 2013

Project Life: Week 8 Insert Page

I had so many photos I wanted to include in my Project Life last week that I did another insert page.  I ordered the Becky Higgins Design G Photo Pocket Pages which are a unique 10x12 inches.
I only did one journaling block....the rest are pictures!  Here is the front side:

I used the same We R Memory Keepers papers as I did for the regular pages so there would be some continuity.  I also used a fabulous Simon Says Stamp exclusive die for the "you" and a stamp sentiment that went with it.  Those children are always the best part of my day...well, the two of them and my morning coffee!
And here is the reverse side:

I love the insert pages....it just adds a little bit of fun and surprise to the album.

Happy Crafting!


Tuesday, February 26, 2013

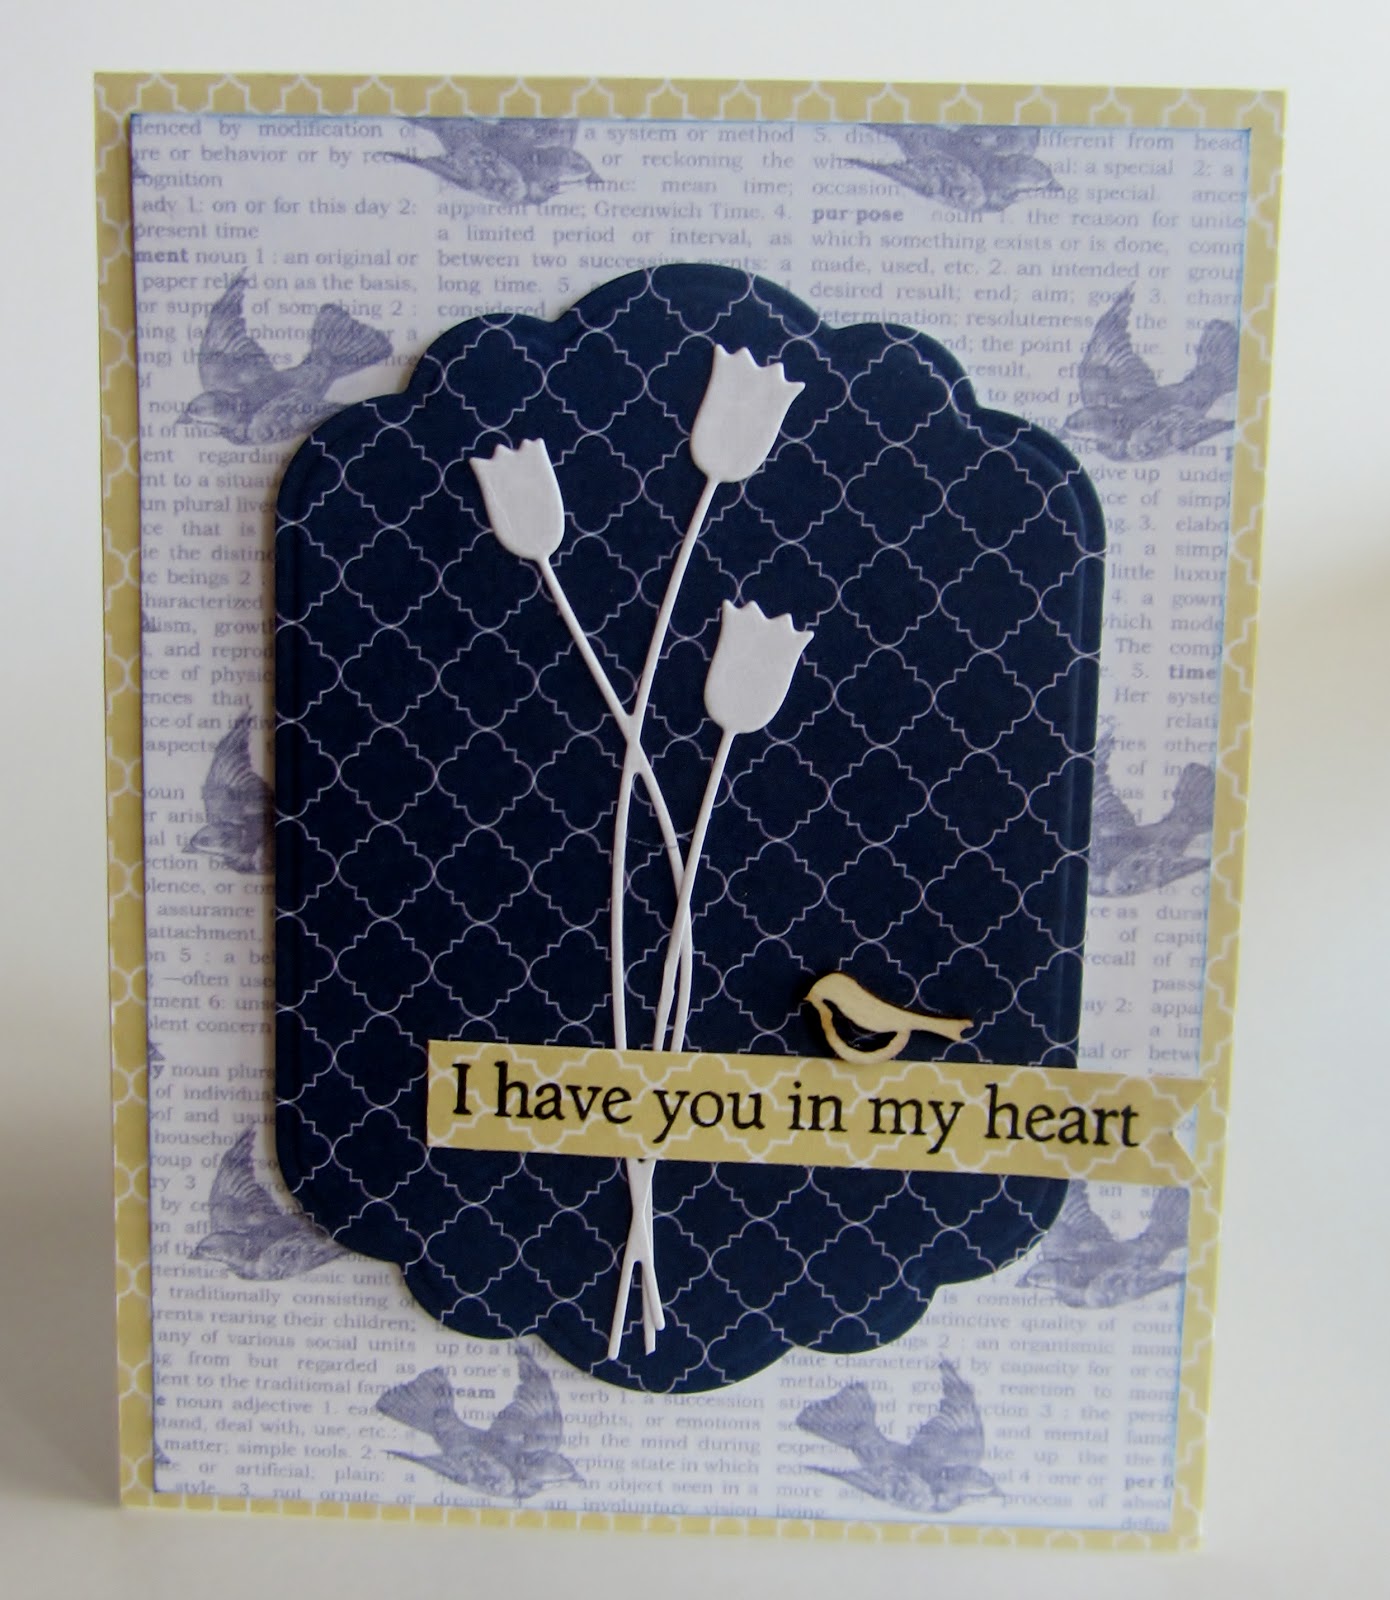
I Have You in My Heart

Sadly I had need of another sympathy card so made this one today with some We R Memory Keeper papers, a Memory Box tulip die cut, a spellbinder die and a little wood veneer bird by Recollections.  The sentiment is from a Hero Arts clear stamp set.

I hope it brings the recipient some comfort knowing I'm thinking of her.


On a brighter note I was in Michael's yesterday and they now have, packaged under their brand Recollections, little wooden veneer pieces that are exactly like Studio Calico but a little less expensive.

And always...Happy Crafting!


Monday, February 25, 2013

Project Life: Week 8

Woohoo...Week 8 done!
My grandkids were here visiting last week and, as a result, I took a ton of pictures...so the most difficult or time consuming part for me was figuring out which pictures to use.  I am bound by no rules, I tell myself....I do not have to do a 2 page spread for each week....I can do more if it so behooves me (how many chances do you get to say "behoove"?!).  But it did take me a while to go through my photos and then get them printed in the sizes I want.  More about that later...
Anyway, here we go with pages for (drum roll, please....) WEEK 8 starting with the left side:
I used Thickers and a Memory Box die for my "Week" card.  The papers are from My Mind's Eye On the Boardwalk and Anthologie.  Simple and fast and I loved the beachy colors!
Here is the right side:
Same papers....I did use a little Studio Calico wood word bubble which is just oh so cute and how I felt about that great German restaurant we went to!  JAWOHL!
I also used a little stamp set from KI Memories for the little glasses.  I just made a shadow with the reverse side of the stamp and then stamped the words and cut it out.  I added a bit of Glossy Accents to the lenses.  To make them look real.  Yeah, right! LOL!
Isn't my little puppy cute?  She was all happy because we had just pulled into the park....all kinds of great smells at the park! LOL!

Since I am using Design A from Becky Higgins for my main layouts I have 4 4x6 and 4 3/4 inch slots to fill on each page.  Sometimes I get the photos printed out in wallet sizes.  So, what I've done is I created a template in Photoshop Elements for a 2 photo 4x6 print.  That way I get my two photos at a one photo price....instead of printing each separately and paying for a full photo.  Get it?
My template looks like this (nothing special here):
And I also created a template for a 3 photo 4x6 print like this:
I reuse these again and again!
I even did a 5x7 3 photo template which looks like the one above except it is sized for a 5x7 print.
I just open Photoshop Elements and plop my photos in to the slots and mask out the parts I don't want.  Make sense?  No?  Basically by having the templates which I can reuse I save a good bit of time and maybe a few cents here and there!
I had so many photos from last week that I am also doing an insert page.  My page protectors will be here on Wednesday so will post that page(s) later in the week.
And my planning sheet which you can see HERE has come in very handily!  It's available for download (there is a link there) if you need it.
I'm all about shortcuts!

Happy Crafting!


Monday, October 29, 2012

Halloween!

I love Halloween! I think it's a great holiday for young and old alike.  We took the little ones to a Trunk and Treat yesterday where some folks decorated the trunks of their cars or vehicles and gave out candy to the children.  David loved it and Taylor "got" that whole idea quickly and really seemed to enjoy taking her little pumpkin bucket around and filling it up!
I made a few Halloween cards and here is one with a Tim Holtz stamp and Authentique paper.  I love these blueprint stamps he's done.  This set came with four stamps and is sold online at Archivers Annex for $21.99 but I found this set at Overstock.com which has the larger stamps PLUS the fall ones for just $23.99.  And if you go through my favorite rebate place, EBATES you can get a 5% cash back!  If you're not an Ebates member check it out HERE.
OK, so I got all excited about that buy but I already have all those stamps! LOL!
Anyway, here is the card:
 I love that spooky bat.  Looks like something Dr. Frankenstein would be drawing...
I used a Martha Stewart border punch and added a little sparkly Stickles and a few gems and just a tad of inking.  I used a We R Memory Keepers Corner Chomper, as well. That's it!  (And Cyndi....I almost got to the point where the Stickles were dry before I touched it!)
This card with a $20 bill inside it brought a huge smile to my son's face.  LOL!

Happy Crafting!  And may those of you along the east coast with Frankenstorm bearing down on you....I hope and pray you stay safe!

Monday, October 22, 2012

Splish-Splash!

Hello All!  As I mentioned in yesterday's post I cropped the weekend away with some of my friends.  We had a great time and I got a lot done....for me....World's Slowest Scrapper!
I am using the We R Memory Keepers slotted page protectors for many of my pages.  I thought it would make it so much simpler to scrap but it still takes some planning and you still have to embellish...you just use smaller sheets of paper! LOL!  Anyway, I had this photo of the Splash Fountain at the pool my kids go to and found a cute one in the Silhouette Store to cut.
Here it is outside the page protector so you can see it without glare:
 I thought I was so smart cutting this and it was so cute....and then I saw the 30 or so water drops that would have to be hand adhered!  What I did was put the cut out piece over the fountain which was already adhered and then I could more easily position the tiny pieces.  I'm so smart! HAHA!
I used a little Glossy Accents on the drops and the puddle and it just turned out so cute!  Papers are from a collection by Close to My Heart.
And here is the reverse side:
Simple and fun but for me NOT fAsT!  HAHA!

Happy Crafting!

Sunday, October 21, 2012

May the Force Be With You!

I just got back from a scrapbooking crop at a friend's lake house. There were 10 of us cropping, laughing, telling stories, eating, sharing, sleeping (not much), etc.  Lots of fun with a great group of ladies!

I almost did not take my Silhouette because I didn't think I'd have much space to set it up.  My plan was to figure out what I needed at home...precut before the crop and take those diecuts with me.  Oh, yeah...right....  Pre plan?  It's not in my vocabulary when it comes to scrapping.  So at the last minute I grabbed it up as well as my laptop and hauled it with.  Boy, am I glad I did!  I used that thing over and over and over again!!!

Of course when I got to the lake I realized I didn't have my Silhouette mat with me.  Oh great....
But I had read that Cricut mats work just fine in the Cameo so my lifesaver, Christine, gave me one.  It worked perfectly....there was a little adjustment for me on loading my paper because the Cricut mat is a little longer but that was pretty easy to take care of.

This layout I'm sharing today is nothing spectacular in terms of scrapbooking "art".  It's of two little boys with their Star Wars Light Sabers.  But I just love the expression on their faces...especially David's.  He just loved doing whatever his older cousin, J.P.,  was doing! I had to scrap it!


But what I am proud of is that my Silhouette came in very handy!  I downloaded a Star Wars font for free from DaFont.com which you can see HERE.  Easy peasy...the Silhouette does a fabulous job of cutting True Type Fonts.  I also did a little offset to create a shadow.  Pretty cool, huh?

Well, I only had 2 little pictures for this layout so what was I going to do on the bottom?  Well, I searched online for some Star Wars figures and came across some jpg files of these ships.  I was able to import them into Silhouette Studio and trace them for cutting.  Worked easily and quickly!


The Star Wars fans in the family will love it!

And May the Force Be With You...and may you get lots of crafting in!