Showing posts with label Birthday. Show all posts

Friday, June 5, 2015

Another Happy Birthday Card!

My daughter celebrated her birthday this week.  I'm not even going to mention how old she is! It's scary....but I do keep reminding myself I had her when I was 12 so I can't be as old as it must look to others! LOL!

Anyway, I made this card with the Simon Says Stamp Card Kit for June which I adore! It has the really coolest little metal die with it that says "Smile" and is inside a circle.  So very wonderful!  I used it to make a little shaker element.  The stitched circle is also from Simon Says Stamp.

Here is the card kit which, of course, is already sold out...but individual elements like the cute die and stamp set are still available:
I also love the pretty and cheerful Doodlebug papers.

Here is my card:
 Such a fun and happy card, I think.  I love those bright colors!

Here is a closer look to the shaker part:

And that's it for today!
Hope everyone enjoys beautiful sunshine today...can take time to SMILE and keep on crafting!

Sunday, April 26, 2015

A Very Ombre' Birthday!

I treated myself to some time in my craft room yesterday after doing some much needed housework! Yep, I let it slide... LOL! But yesterday was dreary here...not a great day to be outside so a perfect day (not!...is there ever a perfect day) to do housework! Dusting, vacuuming, bathroom cleaning...ugh.  Actually, it's not really ugh to me.  Once I get going the OCD in me kicks in and I actually enjoy it (to a certain extent).  I plug in my iPod...and since I was home alone I could sing at the top of my lungs...Tom Petty, the Beatles, Katy Perry, OutKast, the Eagles, Usher, ...LOL...yep, my music tastes are eclectic!
Anyway, I lucked into finding the new Hero Arts Ombre' inks at Hobby Lobby.  Yay for that and yay for 40% off coupons. So many of my favorite online vendors have been sold out of them so this was a huge find for me as I'd been eying them since they came out.
I used the stamp set from the Simon Says Stamp Card Kit for April.    
What a great birthday set!
I used the Ombre' inks to stamp the balloons...added some string with a black pen and some washi tape.  And that big bold sentiment was embossed with Zing gold embossing powder.  And no...I did not burn anything!

 You can see the embossing better here:

I enjoyed using the inks and I think they are a little more vibrant than they show up in the photos.  I like the variations and gradients you get with them.  Fun to use!

I added a little washi tape that was included with the kit and used a Corner Chomper to add a little more interest to the corners...and that was it!

Happy Crafting!

Wednesday, January 21, 2015

Let's Celebrate!

Today is my son's 28th birthday.  I am happy for him that he is having a birthday...but I'm sad for me because it just means one thing.  I'm old! HaHa!  And Lord knows...through his teenage years he aged me prematurely! ;)

I do love that "kid", though. We met him and his bride of nearly 9 months on Saturday for a lovely dinner at a fabulous Atlanta restaurant called Ray's on the River. It is a wonderful location with fabulous food and great service and lots of $$$$.  You think a kid who survived on McDonalds for about 10 years of his life so that he could get the danged Happy Meal toy would be happy to eat at McDonald's now.  Nope...his tastes have changed! LOL! Just kidding...I actually picked the restaurant...he had never been there but really enjoyed it.

Here is my son with his wife:


 And I made this card for him which was mailed so he'd get a little surprise in the mail, too...since I won't see him today. 


It was inspired by copied from Lucy Abrams and you can see her card HERE if you want to see how closely I copied it.  Oh, c'mon...you went and peeked, didn't you?  LOL! Actually I did change mine a (teensy) bit...I used a postage stamp mat cut with a Simon Says Stamp die and also used twine on my card.  I used that wonderful Ranger Ink Platinum embossing powder that I ooohed and ahhhed over in an earlier post.  Cool stuff.
Anyway, my son won't know that I copied shamelessly.  He won't even much notice the card...he will mostly just look to see if there is money in it! Ha!
Happy Birthday, Jeremy!!!

Happy Crafting!

Wednesday, November 19, 2014

Project Life, 2014: Week 22 Birthday Party!

Week 22 which covered the last week of May for me posed another one of those scrapbooking dilemmas! I had too many photos for just a simple two page spread. We had a big event that week...Taylor's 3rd birthday party! I just had to do a 2 page layout totally devoted to that...so that's exactly what I did.

I used Party Pop by Melissa Bennett which has been retired. I've had it in my digital stash...don't even remember if I've used it before.

But I thought this kit with the bright neon type colors were perfect for the photos I had.

Taylor's party was at Chuck E. Cheese. My kids loved Chuck E. Cheese when they were small and now my grandchildren are continuing the tradition.  I hadn't been in many years and was quite impressed with it. Very clean, very efficient, and the staff members were all wonderful with the kids. Plus...they have COOL stuff to do! LOL! I never did get a chance to play Whack a Mole! HA!

Here is my two page spread:

 Get a load of her silly face!

Here is the left side up a bit closer for you to see:

We had lots of cutie pie kids at the party!
Here is the right side:

And that, my friends, is it for today!

Happy Crafting and Keep Creating!

Sunday, September 21, 2014

Happy Birthday, David!

Five years ago today my life changed forever with the birth of my grandson, David.
I just adore that little guy.  We have a great bond and I know as he grows up he'll have less time for his "Omie" (that's me) but I hope he will remember some good and special times we've had together.


Today he is having his birthday party at that awful place that kids love and parents don't Chuck E. Cheese.  LOL!  Actually I don't really mind it as much now as when my own kids were small.  It seems a little cleaner and more secure and it is fun watching the kids have a great time.

I decided to make a total Silhouette card for him and I found this cute card file at the Silhouette Online Store.  It's by Snapdragon Snippets and is Design ID #63814 for the Silhouette users out there.

 It's a bifold card.
You can see what I mean a bit better here:
 and here:
 I used some Paper Trey Ink and Echo Park papers as well as some American Crafts Cardstock I had on hand.
The Silhouette did a wonderful job with the many layers of cuts.  I kept a little cup nearby to put all the pieces in as I cut them so as not to lose any little pieces like I usually do.
I added some sequin stars adhered with Glossy Accents.
 The "5" was cut out five times (it's a metal die from My Favorite Things Die-Namics) I cut it out 5 times and adhered them together to give a bit more dimension.

I was amazed at how well the sentiment cut out.  The Silhouette rarely disappoints me.  

It was a fun break from stamping for me.  Something a bit different for me, as well.

I hope you like it, too!

Happy Crafting and HAPPY BIRTHDAY, DAVID!
  

Saturday, June 7, 2014

Happy Birthday, Amanda!

We had a week of birthdays....my granddaughter, Taylor's, was on Monday and her mother...my wonderful daughter, Amanda's was on Tuesday.
She turned 29+.  LOL!

Here we are 34 years ago:
We didn't realize it at the time but the film in my 35mm camera was not loaded properly...and in those days we didn't take many photos anyway because processing was so expensive!  Anyway, we only got a few polaroids at the hospital.  Here we are on our way home.  I look dazed.  I was.  Amanda weighed 9 1/2 lbs.  She was 3 days early.  I am short...5 feet tall.  Yep, there were 30 babies in the nursery at Tallahassee Memorial Hospital in Tallahasee, FL on June 3 and she was the biggest of 'em all.  Back 34 years ago a 9 1/2 lb baby was considered a very large baby.  Nowadays those big 'uns are more the norm, I guess.
Anyway, since I am in my watercolor mode I made her this card:
 I used distress inks on water color paper and made a gradient type thing...the colors here are not "true" as there really was a little more color variation in the actual paper card.  I added a little wooden heart I also used distress ink on...and here is another disclaimer....it matched the paper better than it looks here in the photo.  I promise!


I

Oh, and after I posted my card that I made for Taylor's birthday I thought it looked so plain online so I went back and added some sequins to spiff it up a bit.  Here's the card I posted the other day:
 And here it is with a bit more flash!

What a fun week with lots of birthdays and birthday cake! Yum!

Happy Crafting!

Thursday, February 27, 2014

Happy Birthday with a Touch of Acetate

I love Shari Carroll.  She used to work for Hero Arts and you know how I love Hero Arts.  Her design style has always been so appealing to me and I have never ONE time seen a card she made and said "Ewwwwww!".  She recently went to work for Simon Says Stamp which is way cool...because not only can she work with Hero Arts things, I assume,  but also with all the great products Simon Says Stamp has to offer.  A win-win situation for me!

She recently posted a card on the Simon Says Stamp Blog which you can see HERE.  I love this card with the die cut sentiment and the touch of acetate.  I thought...well, I can do this. Sort of....when I made mine I was out of town and only had some supplies with me.  But the good news is that I used up some more paper scraps I had from some old Simon Says Stamp card kits.

Yay me.   I used what I had on hand.

Yay me.

Here is my card:

 I was most happy to use up that flair I had....it had been sitting around and I was wondering what I'd ever do with it!  Yay me.
The top layer with the acetate is adhere with some foam tape to give a bit more dimension and lift it off the patterned paper behind it.
I love the look of white on white...and I love that wood grained paper from Simon Says Stamp.  The "happy birthday" sentiment is also cut with exclusive Simon Says Stamp dies.  I do love the die cuts that Shari used but again I used what I had on hand.  And my hand does not own those.  Poor me.

The word "celebrate" was stamped with a Paper Smooches stamp.

It was fun to do...and a big thanks to Shari Carroll for always wonderful inspiration!

Happy Crafting!

Sunday, September 15, 2013

Over the Hill

I have talked about struggling with MANLY cards.  I just don't love making 'em.  Give me a flower or something frilly any day over man stuff! LOL!

But I was asked to make a card for a friend's friend who is turning 30 and so I thought...well, heck...I will give it a try and was really happy with my effort.  Maybe there is hope for me, after all!

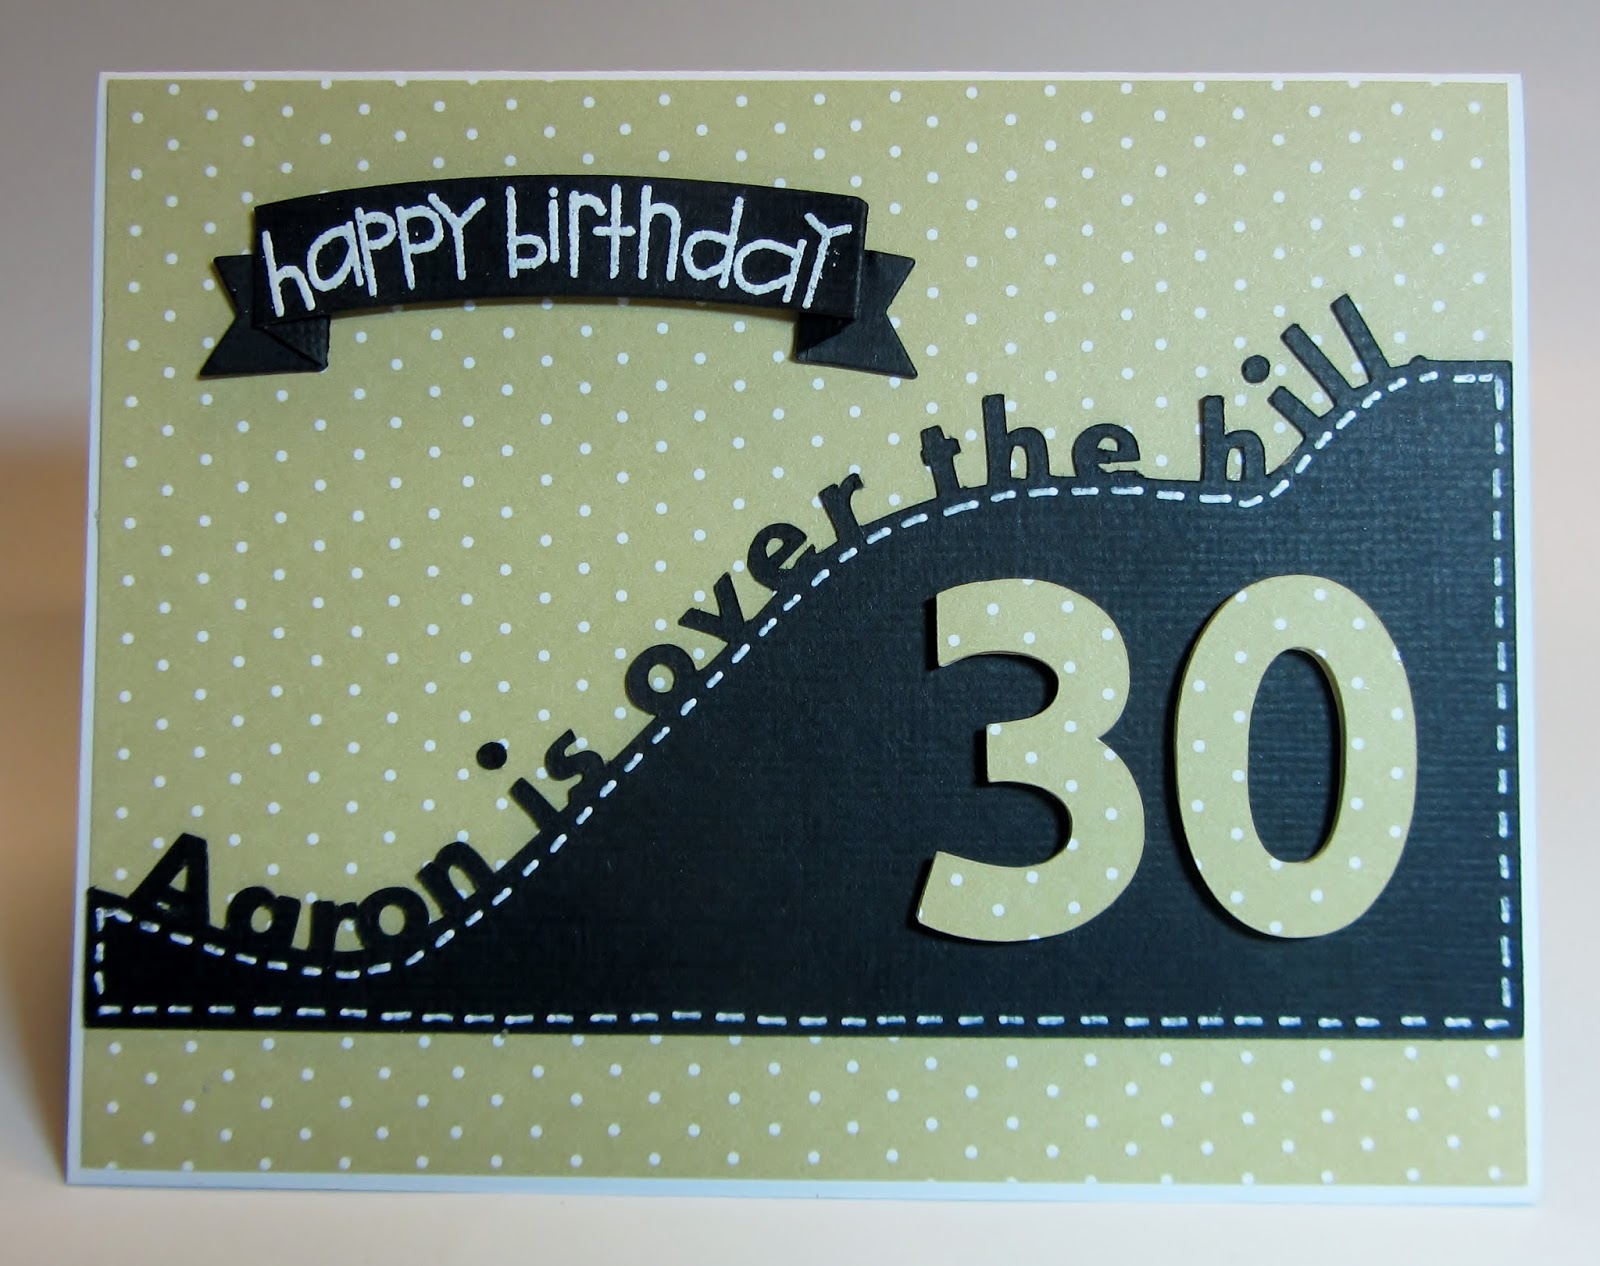
I did the over the hill part with my Silhouette Cameo.  How I did it is this:
1.  I created a rectangle approximately 5 1/4 inches wide.
2.  I clicked on edit points and then adjusted the top line of the rectangle to make it look like a hill.  I'm not the greatest at editing points so it did take me a while to get it smooth looking.
3.  I made a copy of my new shape.
4.  I created the text using the font Aharoni.
5.  I dragged it to my new "hill" and let the text wrap on the path and adjusted the spacing out, as needed. 
6.  I then brought my saved shape over and slid it in place making sure my text overlapped the hill slightly.
7.  I selected the whole kit and caboodle and then clicked on the weld button and had a new shape!

It sounds easy but since I didn't know what the heck I was doing it did take me a little while!

I added some gel pen stitching around and then created the banner with a Simon Says Stamp die...heat embossed it with some Zing powder and a Paper Smooches stamp which I was able to curve a little bit.

I cut out the "30" twice with my good pal, Cameo, and then glued them in place...popping the top layer up.

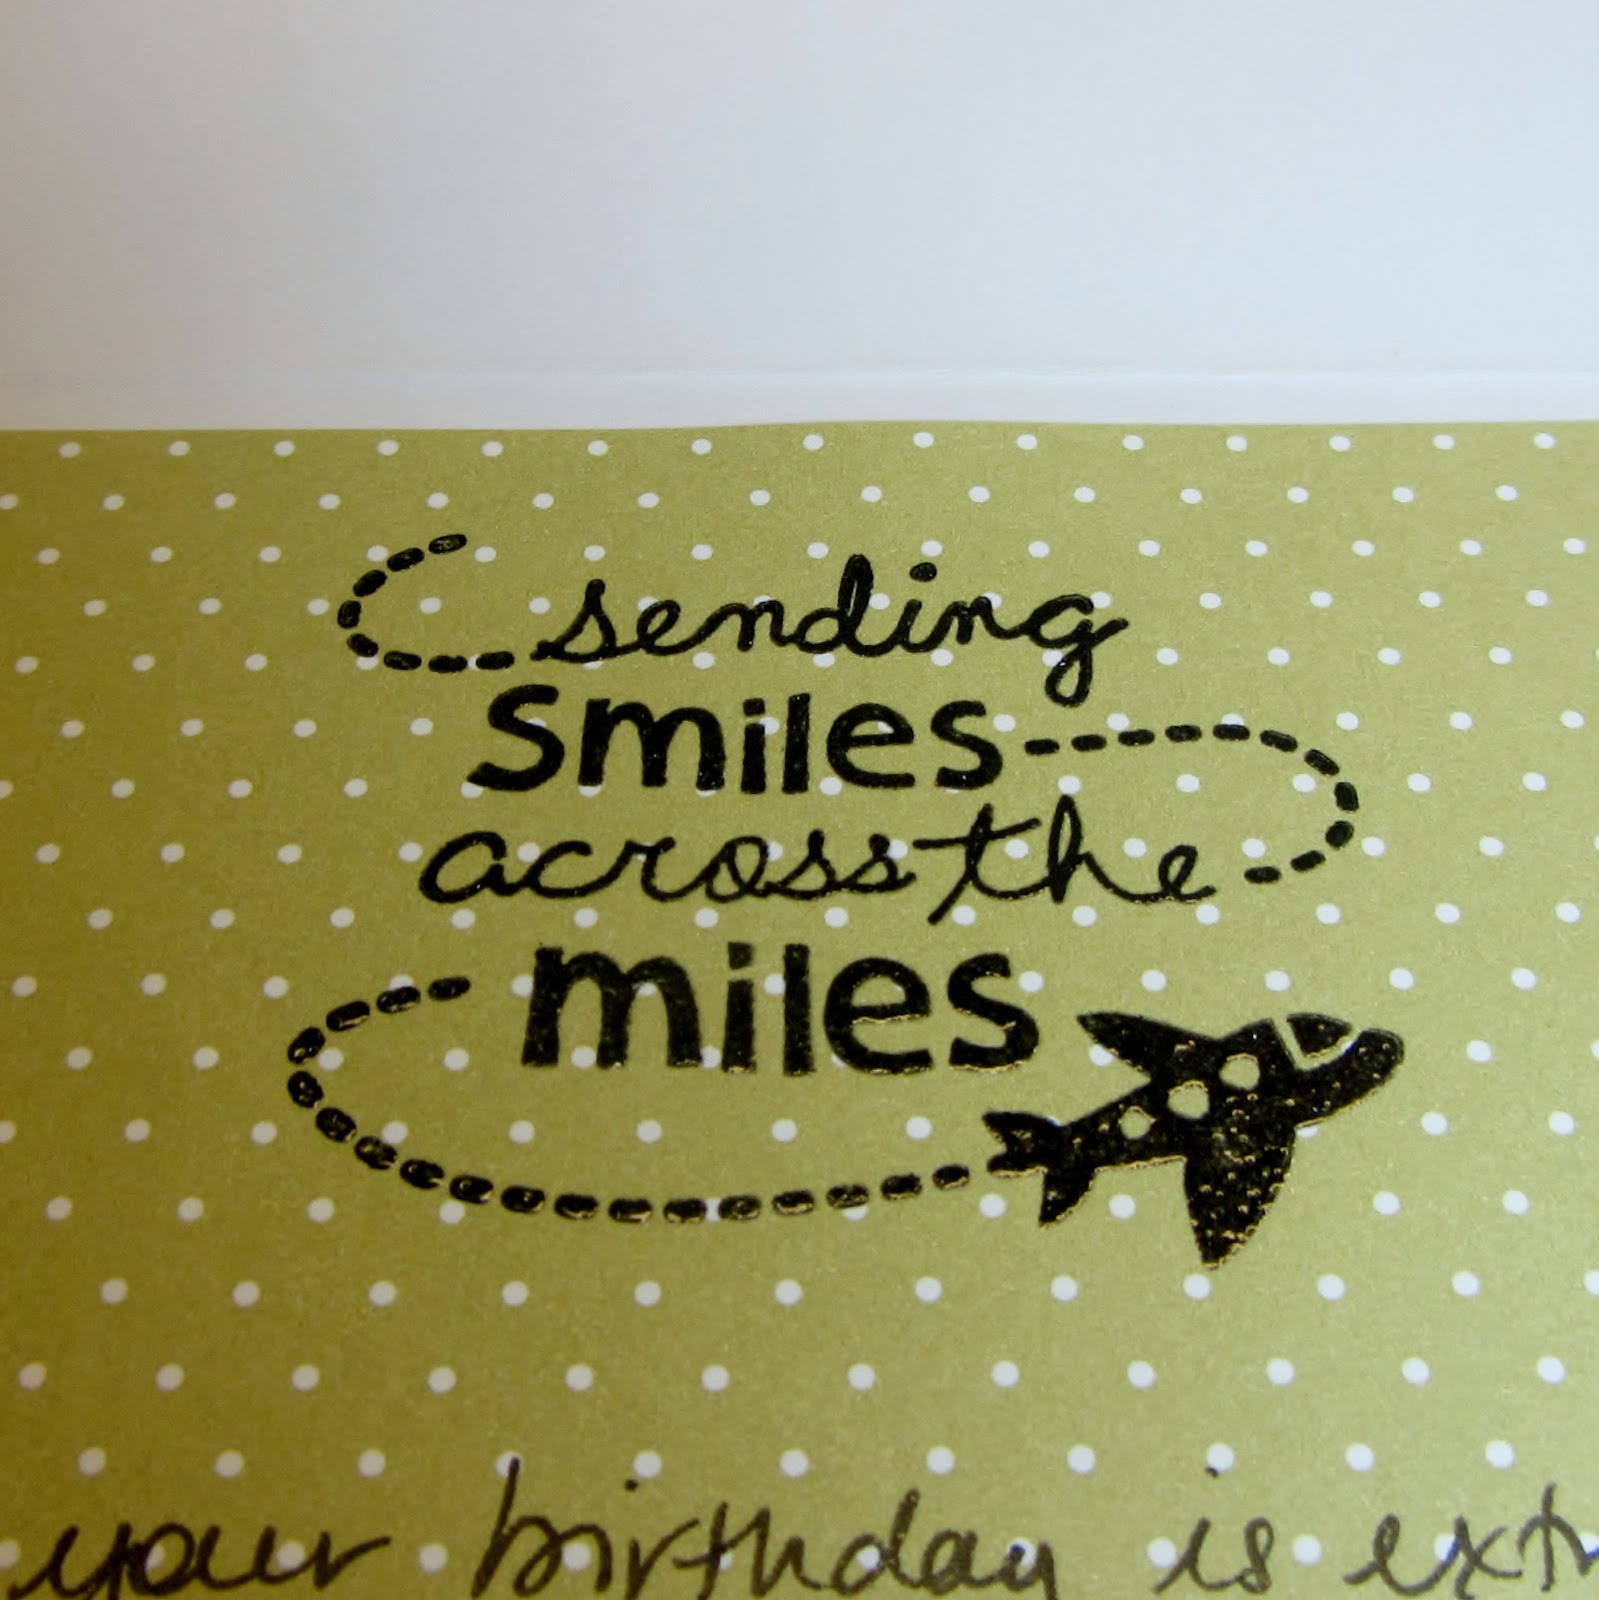
Here is the inside of the card embossed with some clear embossing powder and with a Lawn Fawn stamp:
I decorated the envelope a bit with a Simon Says Stamp set called Envelope Sentiments.  What a great set this is:
And here is the back flap:
T

The paper I used is from Papertrey Ink and the black cardstock (which cuts well in the Silhouette) is American Crafts.

And that is it for today!

I entered this in the Welding Challenge at the Silhouette Blog HERE.
Happy Sunday and happy crafting!!!


Sunday, July 14, 2013

Happy Birthday!

I'm trying to get a few birthday cards made to actually send and not hoard.

That's the plan....anyway.

This card was made with the Simon Says Stamp Card Kit of the Month for July.  It came with a really cute little birthday themed stamp set although the cutie pie cupcake could be used for other themes, as well, of course!

That little polka dotted circle is actually a stamp, too.  Too cute.
I used all Hero Arts Inks.


I popped the cupcake up on some foam tape.
There is actually some definition to the icing which doesn't show here.  Sorry.  It is what it is!

The little star has some Glossy Accents on it.

One of my tennis teams finished its season today and I was undefeated for 5 of 5 matches played.  That's pretty good for this ol' gal.  It was a fun season and I played some with a new partner which worked out pretty well.  She is the hard hitting, gobble up the ball kind of player and I am touch and placement.  A good complement.

I played another league match the other night and got my rear end handed to me!  LOL!  You do win some and you do lose some.  The girls we played the other night were way better and waaaay younger (youth does have an edge in tennis) and I don't think I would ever beat them unless they got injured and had to withdraw.  And I wouldn't want that! They were nice, they were good and they deserved to win.  Fun, though.

Well, I think I will go work on Project Life for a while!

Happy Crafting!


Friday, September 21, 2012

David's Day!

Three years ago today my life changed.  I had a great life...no complaints there...didn't really think it could get better but then my daughter and son in law gave me the greatest gift ever....my grandson, David!  And less than 2 years later they did it again with their baby girl, Taylor.  I am one lucky Omie!

Today David turns 3.  He is wise beyond his years....of course we think he is brilliant! He is all boy, of course....loves anything that has wheels and an engine!  His new areas of interest are spaceships, rockets and astronauts.  So that's what he is getting from Omie today....a Fisher Price shuttle and a few astronauts and aliens!

I made a little card with some designs from the Silhouette store....it's really a very simple card...not too much glitz and finery as he won't care.  He will just love the astronaut, though!

Then I wrapped his gift in some white paper and cut some additional images to spruce up the wrapping a bit.  I cut out his name with the Arial font with my Silhouette.

Here you go:


Happy Birthday, David....and happy crafting to you!

Sunday, September 2, 2012

Papercrafting Can Be Hazardous to Your Health!

I made this lovely card:
Just as I finished it up and was oh so proud of it I noticed some ugly spots of ick right next to the sentiment.  See?  Oh no!!!  I've done that before...finished up something and touched it to ink!  Aaarghhhh....but this time....no....it wasn't ink....It was BLOOD!  I had nicked my finger with my scissors and didn't realize I was bleeding!!! I was soooo mad at myself.  Ruined card!  All that work! LOL!!!
So yes....paper crafting can be hazardous to your health!  Beware!
Luckily I did this card with an image from the Silhouette store and I was able to duplicate it pretty easily.
I used some watercolor paper and the summer series Tim Holtz Ranger Inks as well as some water on a wide paintbrush and dabbed color on the paper.  Then I just adhered the Silhouette cut image over the watercolor paper and stamped a sentiment with a Papertrey ink stamp.  Very Clean and Simple in my opinion.

Here is a closer look:

 And here is another version where I put foam tape between the watercolor image and the die cut:

I love this idea....I love this card.  I could improve on it but I love the technique.  And of course I stole borrowed this idea from something I saw on Pinterest.  Here is the link to the original post I pinned.
I am going to a wedding celebration today and so I made a card for the bride and groom similar to one I made recently and shared HERE.
Here is my new version....the diecut is from the Silhouette store.  The sentiment is Papertrey ink and was embossed on a little banner cut with a Die-Namics die.

Update:  I entered this in Simple Salutations Anything Goes HERE!

Now...what to wear to the wedding celebration?  I know one accessory I'll have....a big old bandaid on my finger!!!

Happy Crafting and Happy Labor Day!