Showing posts with label Embossing. Show all posts

Thursday, February 4, 2016

Watercolor Washes and Color Blending

So, if you wanted to do a watercolor wash and make a gradient or blend colors you would think you could just slap some water and some color on your paper.  That's what I would have thought.  But I have learned in my Watercolor Card making class at www.onlinecardclasses.com that is much more complicated.  The instructors all have different techniques to get similar results and some of the colors I've seen blended are just absolutely gorgeous.

I decided to give it a whirl.  I used two colors I had on hand. Winsor and Newton Rose Madder and Cobalt Blue.  They are in teensy weensy tubes and cost an arm and a leg but that's a whole 'nother story!  I decided that I would start with the red color and then add some blue to it to make a violet and then blend it out to blue.

I worked at it a few times and I know I have a lot more practice to do!  When you are working with watercolors it is important to make sure your water to  pigment ration among your colors is consistent.  That sounds easy enough. Not. For. Me.  HAHA! But I am rapidly learning what does NOT work and other than wasting a bit of paint and a bit of paper...well, I just chalk it up to practice will eventually make perfect something passable!

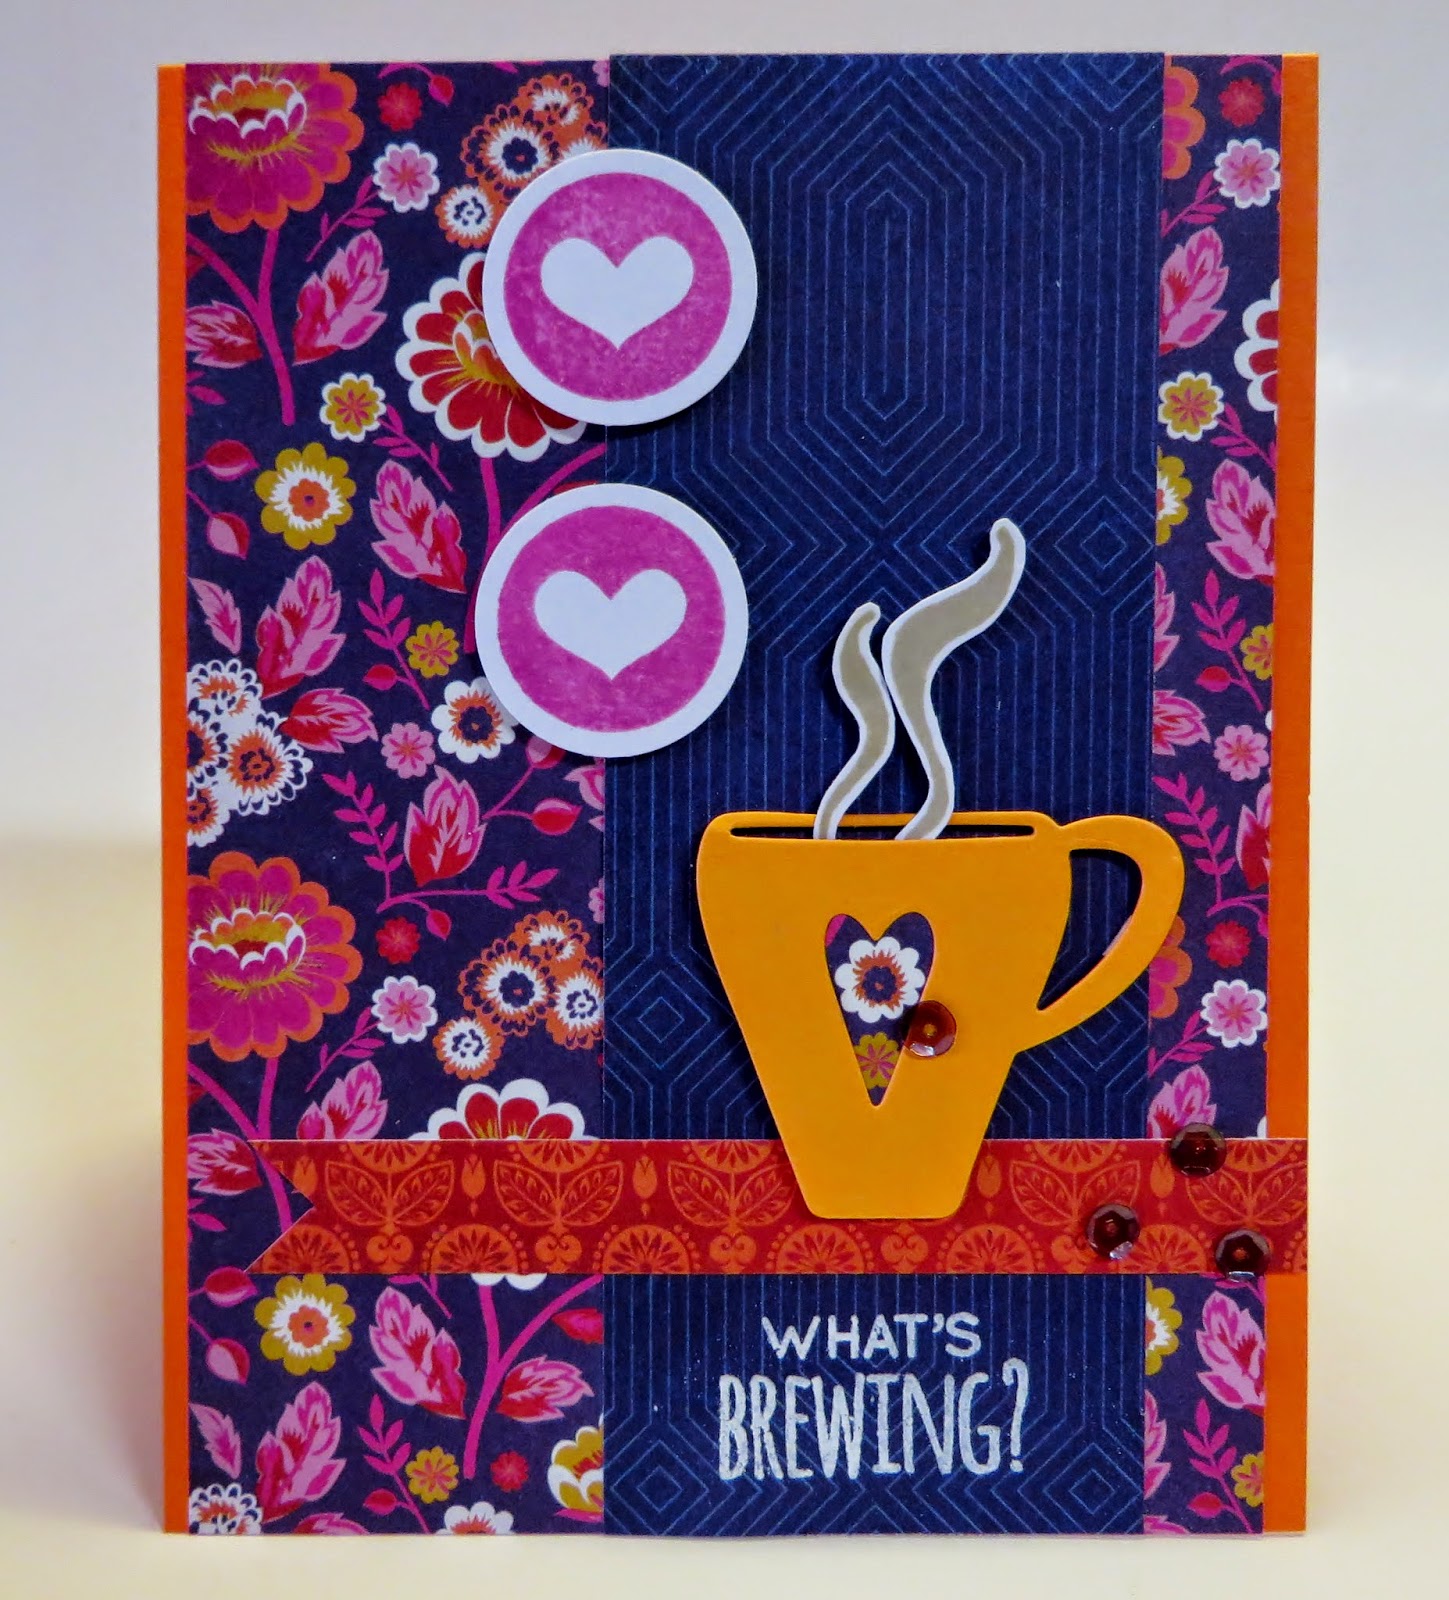
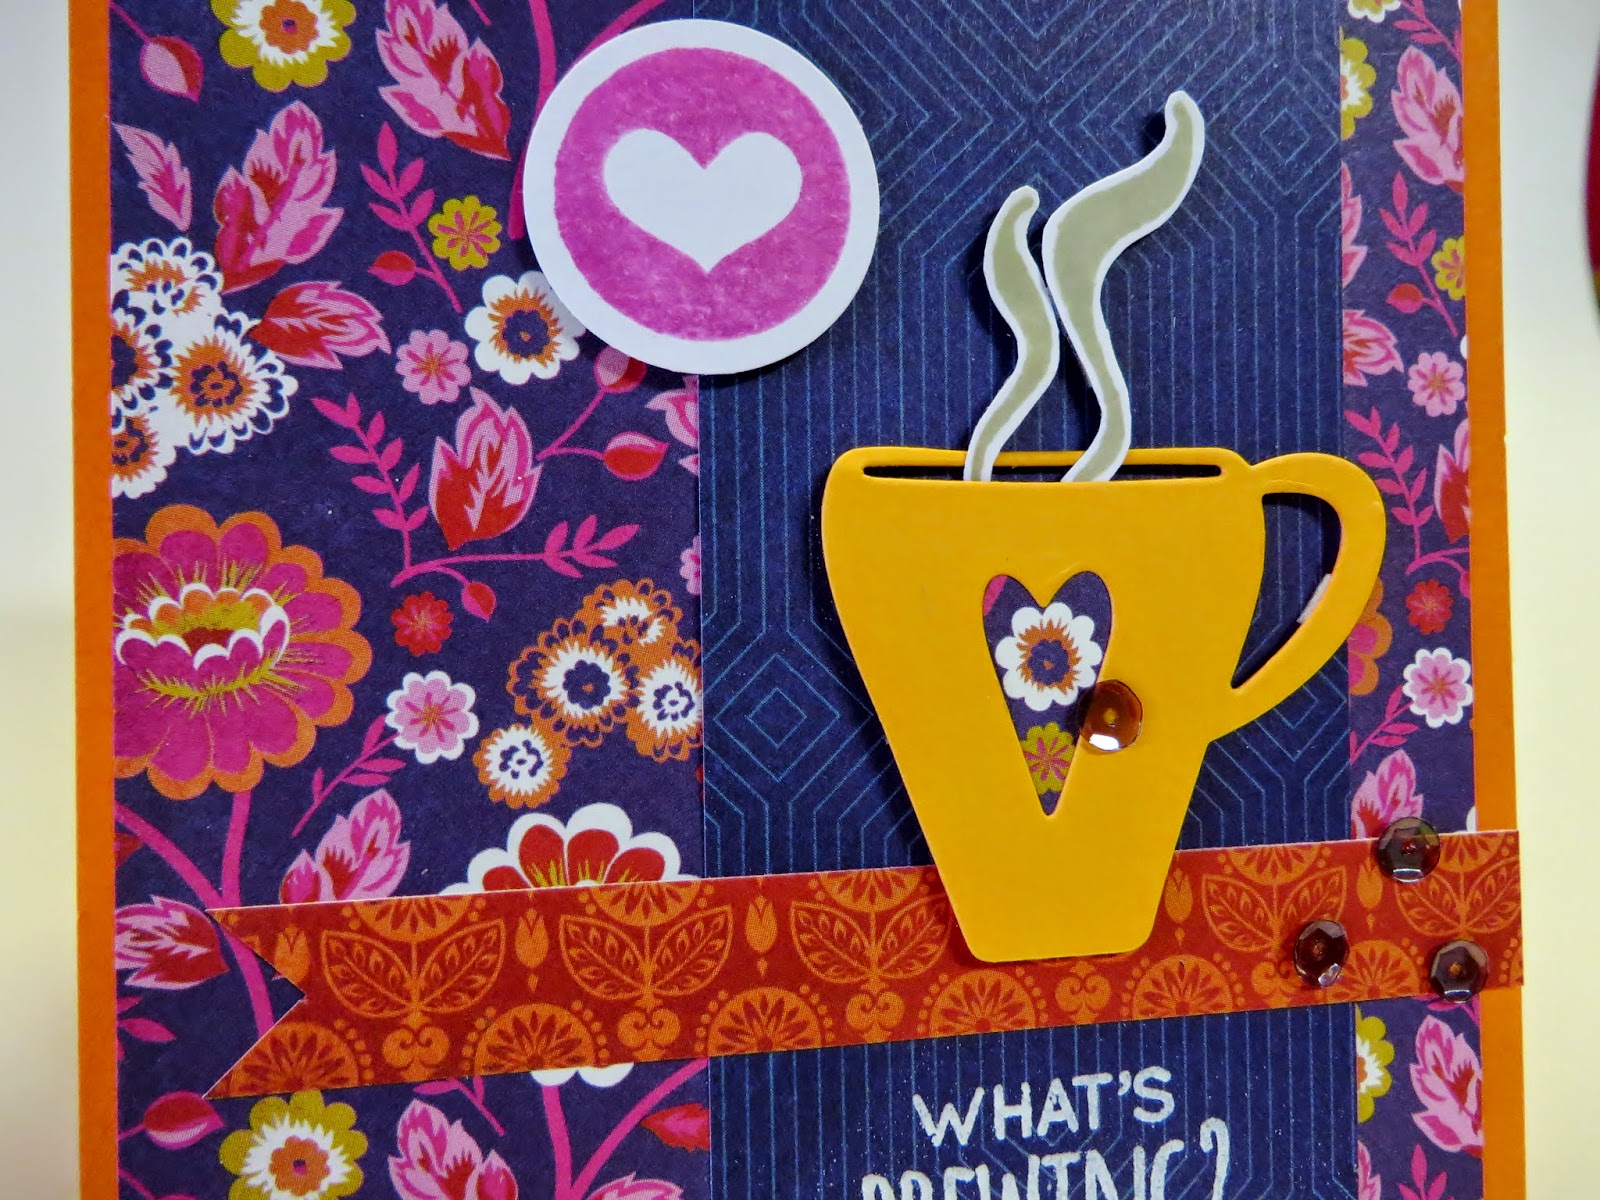
After my color wash had dried and I had my background I used some Altenew stamps and heat embossed them in white.  I added a few sequins and that was it.  I don't have access to all my playthings right now so I'm just trying to make do with what I have on hand.

All in all...are these cards that I've made from what I learned in the Watercolor class my favorite of all time? NO! They probably aren't even in the middle...but I will tell you that it has been so much fun and is so interesting...and I love playing around with brushes, water and pigments.  I really am learning a lot.  I just need to make the transition from brain to fingers!

Here is my card:


Monday, November 9, 2015

Hello You!

When I was at the very impressive Impressive Ideas grand opening the other day I came across an interactive die by My Favorite Things Die-Namics.  It is called the Interactive Trio card and when cut on your handy dandy die cutting machine makes a little 3 window panel...but instead of having full cut outs of the "panes" it creates a score line so you really get a cute little flap.

So cool!

I spent way too much time making this card but it was very fun to do.  I CASEd (copy and steal everything) one by Stephanie Klauck at MFT but mine is a bit different...mostly because I didn't have all the stamps she used in her card.

Here is mine:

I used Things With Wings stamps by My Favorite Things


as well as the Scripty Sayings sentiment, "hello you", by Lawn Fawn.

 I stamped the sentiment with VersaFine ink and then heat embossed it with clear embossing powder (a favorite technique!).  The butterfly and ladybug were colored with Copics and the little flowers were colored with Wink of Stella Pens.  I also added a layer of Clear Wink of Stella to the butterfly and ladybug.  Can't have enough shine now, can you?!

So when you open the little flaps you see a little scene with oh-so-cute owls. I didn't have a tree stamp that would work (yes, I have tree stamps but none that would work for this scene) so I drew the little tree limb.

I love the little owls...they are actually two separate stamps...and they are looking at each other.  Too cute!

I used some Distress Ink to sponge around them to get a bit of a sky look....and I added Wink of Stella to nearly everything!

Lastly, layered the scene and windows on top of a piece of green cardstock and mounted onto white Neenah for a finished A2 sized card.

This took a while to do...but I'm not giving up on it...want to play with these little windows and flaps again soon! Maybe today! ;)

Happy Crafting!

Friday, October 2, 2015

Where in the World Has Susan Been?!

It has been over 3 months since my last blog post.  Wowza...time does pass when one is having fun...it also just passes when one is extremely busy...and it does also pass when one needs to get some mojo back! HAHA!

So...what has been happening with me?  Well, the biggest thing that took me away from blogging was an AROUND THE WORLD trip my husband and I went on mid June.  It was a 6 week trip that literally took us around the world. It was an absolutely amazing experience...definitely once in a lifetime sort of thing.

I blogged my entire trip on a nifty little travel app and it is available for you to view HERELots of fun stories and pictures.  If you do any traveling I certainly recommend the app, too...it's called Travel Pod and is free through iTunes...I'm not sure if there is a droid version but most likely there is.

We left Atlanta mid June 17 and headed towards Rio de Janiero, Brazil.
Then to Paris, France.
On to Bangkok Thailand.
A few days in Singapore.
More time in Hong Kong.
Back to Bangkok, Thailand.
To Seoul, Korea.
Over to Tokyo, Japan.
And lastly to Sydney, Australia before heading to Los Angeles (a 14 hour flight) and ultimately back to Atlanta.

Not including North America....we made 4 continents and 8 major cities.  What a trip!

Amazing trip...

We got back home and not long after we went to the beach for a week for our annual family vacation. It was also wonderful...kids and grandkids...it was a fun time to all be together.

So needless to say...my craft room has been a bit neglected.  I just didn't make the time to do much crafting! But I've started working on a few things since I got back. so thought I'd share a few simple cards today.

Here we go both done with the Simon Says Stamp Card Kit for the Month for July:


I stamped the little wave onto Vellum with Versamark Ink and heat embossed it with white powder and then cut it out.  I did the same with the little sailboat and colored it in with some Tim Holtz Distress Markers.  Simple and easy...and flat! LOL!

The second card was done with the same stamp set which is so darned cute! I love the sailing theme!
So very summery!
I distressed the edges of the background paper.  I also stamped the life saver image and then scanned it and cut it out with my Silhouette. More on the PixScan cuts later.
The mat was done with a Simon Says Stamp stitched metal die.

So....I am BACK! Hoping all is well for you...and thanks to those of you who encouraged me to get back on the blogging wagon!

Happy Crafting!


Saturday, June 13, 2015

A Blast from the Past

As I was cleaning up some scraps of paper the other day I came across this embossed vellum card front which took me back to a time long gone.  This era was the "Susan Loves Embossing Era" and was pre-Cuttlebug, Big Shot, Vagabond, Caliber Eras (almost back to the Ice Age!).  This era was characterized by brass embossing templates, styluses and light boxes and all of the embossing was done by hand.  And way back when...my favorite place for the brass plates and embossing supplies was Lasting Impressions.  Oh, how I loved those templates.

Now I know that these templates can be used in our fancy schmancy embossing machines but I just haven't done that yet.  I'll have to try because, of course, I never got rid of my beloved templates.

By the way...way back when Lasting Impressions also had computer software where you could print out a design and then put it on your light box and emboss.  That's exactly what I did here on the card front I mentioned above:
 I printed out the design on vellum and then put it on my light box and did the embossing.  You can't see it here much but it is embossed.  So it was fun for me to use something I made a very long time ago....I was sort of happy to come across this!

Happy Crafting!

Thursday, May 14, 2015

Happy Birthday to You!

Can it be???! A second post for today?  I felt sort of guilty about just posting about Evernote and how great the program is for keeping track of your stash so I decided to actually post a recent card I made. Evernote is great...but that whole post was sort of blah...so here's to a little non-blah, I hope.

I recently bought the Kuretake Gansai Tambi watercolors. I had seen so many of my favorite bloggers using them that I just had to get a set of my own.  They had been on my wish list for a long time so I finally bit the bullet and picked them up off Amazon.  How wonderful and vibrant they are! I have enjoyed playing with them a bit recently.

I made this card using the fabulous (and older) Secret Garden set from Stampin' Up.  I also used a die from Lawn Fawn for the sentiment.  Before coloring in the flower I heat embossed the stamped image with white embossing powder.


I swear the watercoloring looks better with prettier shading in real life.  Trust me! It couldn't be that I don't know what I'm doing...LOL!

Happy  Crafting!


Wednesday, April 29, 2015

Birthdays Keep Rolling!

I got into a "thing" making birthday cards the other day using the stamp set included with the Simon Says Stamp Card Kit for April.  I make a lot of cards but don't seem to have enough birthday cards on hand and am always struggling to make a card at the last minute. So now I have a bit of a stash! :) I like having a stash. Really.  Now I just need to remember to go to my stash and actually USE them!

And not hoard them.

Anyway, here is the card I wanted to share today:
This was inspired (ok, copied) by a card from Shari Carroll.  Mine is a bit different.  I used different colored inks. LOL! 
I did use the incredible MISTI to line up my stamps so that I could easily duplicate the card and yes, 3 were whipped up in no time at all.
The blue and yellow inks are Memento Luxe.  The Make a Wish sentiment was stamped with VersaMark and embossed with Zing gold embossing powder.
I love the Bazzill kraft cardstock with the gold foil on it.
Fabulous card kit.  It's a keeper!

Happy Crafting!

Monday, April 27, 2015

More Birthday Cards with SSS

This is a shameless copy of a card by Laura Basson for Simon Says Stamp using the stamp set from the April Simon Says Stamp Card Kit.  I love how she slits her cards to reveal something fun or interesting underneath. 
Here is my version:
I used Memento Luxe pigment inks...oooh la la...so bright and fun.....and the sentiment was inked with VersaFine onyx ink and embossed with clear embossing powder to make it a bit shiny.

I used MISTI to stamp the sentiment since I made several cards.

Easy and fun!

And that's it for today...a quick post here!
Happy Crafting!!!


Sunday, April 26, 2015

A Very Ombre' Birthday!

I treated myself to some time in my craft room yesterday after doing some much needed housework! Yep, I let it slide... LOL! But yesterday was dreary here...not a great day to be outside so a perfect day (not!...is there ever a perfect day) to do housework! Dusting, vacuuming, bathroom cleaning...ugh.  Actually, it's not really ugh to me.  Once I get going the OCD in me kicks in and I actually enjoy it (to a certain extent).  I plug in my iPod...and since I was home alone I could sing at the top of my lungs...Tom Petty, the Beatles, Katy Perry, OutKast, the Eagles, Usher, ...LOL...yep, my music tastes are eclectic!
Anyway, I lucked into finding the new Hero Arts Ombre' inks at Hobby Lobby.  Yay for that and yay for 40% off coupons. So many of my favorite online vendors have been sold out of them so this was a huge find for me as I'd been eying them since they came out.
I used the stamp set from the Simon Says Stamp Card Kit for April.    
What a great birthday set!
I used the Ombre' inks to stamp the balloons...added some string with a black pen and some washi tape.  And that big bold sentiment was embossed with Zing gold embossing powder.  And no...I did not burn anything!

 You can see the embossing better here:

I enjoyed using the inks and I think they are a little more vibrant than they show up in the photos.  I like the variations and gradients you get with them.  Fun to use!

I added a little washi tape that was included with the kit and used a Corner Chomper to add a little more interest to the corners...and that was it!

Happy Crafting!

Sunday, April 19, 2015

Beyond the Sea....

I have been oh-so-lucky to spend part of my winter at the beach for the last three years.  I have a wonderful friend who has a house in Laguna Beach, FL just west of Panama City Beach. Oh, how I love the white sands and emerald green water of the Gulf. It is truly a happy place for me and I love being down there in the winter. It's not tropical in the Florida Panhandle in the winter...it's not sunning yourself on the beach kind of weather but I love the cool crisp air and the sound of the waves. And the winter sunsets are so spectacular! Happy. Place.

Anyway, I always make a few cards for my friend as a little additional thank you and they are done with a beachy or ocean theme.  This is what I came up with for this year:
I made several different versions before setting on this one....I tried different backgrounds...different ways to do the little sea turtle...etc.  But was pretty happy with this fun and cheerful card when it all came together.
I used Lawn Fawn's Critters Under the Sea for the turtle and coral. They were colored with Copics and cut out to adhere to the little water scene which was done with Ranger Distress Inks and blending tools.  I used a die from Paper Smooches called Stitched Flourishes to do the little flourish behind the turtle...I thought it made it look like there was movement and of course, there is...the turtle is swimming! LOL! And the little turtle was popped up on some foam tape to give a tad of dimension.  Since these will be mailed, I presume, I didn't want too much bulk.
I used some circle dies from Lifestyle Crafts and cut the scalloped circle from a Spellbinder die onto some orange paper which I embossed with a Cuttlebug embossing folder called "Tiny Bubbles".
I used a sentiment from an old stamp set that a friend gave me.  There is no name on the set so I don't know who the manufacturer is and Google did not help me! I set the stamp up on my friend, MISTI which made stamping the image in the very same place (since I made multiple cards!) very easy!
I brushed some clear Wink of Stella glitter shimmer over the turtle and the coral and added some glossy accents for "bubbles".
I think my friend will like them.  I would love to receive one of these! :)
They make me want to head south and back to the beach!
And that is it for today...it is wet and gloomy here in Atlanta. We have had so much rain recently but it certainly has helped with all of the pollen!

Happy Crafting!

Wednesday, January 21, 2015

Let's Celebrate!

Today is my son's 28th birthday.  I am happy for him that he is having a birthday...but I'm sad for me because it just means one thing.  I'm old! HaHa!  And Lord knows...through his teenage years he aged me prematurely! ;)

I do love that "kid", though. We met him and his bride of nearly 9 months on Saturday for a lovely dinner at a fabulous Atlanta restaurant called Ray's on the River. It is a wonderful location with fabulous food and great service and lots of $$$$.  You think a kid who survived on McDonalds for about 10 years of his life so that he could get the danged Happy Meal toy would be happy to eat at McDonald's now.  Nope...his tastes have changed! LOL! Just kidding...I actually picked the restaurant...he had never been there but really enjoyed it.

Here is my son with his wife:


 And I made this card for him which was mailed so he'd get a little surprise in the mail, too...since I won't see him today. 


It was inspired by copied from Lucy Abrams and you can see her card HERE if you want to see how closely I copied it.  Oh, c'mon...you went and peeked, didn't you?  LOL! Actually I did change mine a (teensy) bit...I used a postage stamp mat cut with a Simon Says Stamp die and also used twine on my card.  I used that wonderful Ranger Ink Platinum embossing powder that I ooohed and ahhhed over in an earlier post.  Cool stuff.
Anyway, my son won't know that I copied shamelessly.  He won't even much notice the card...he will mostly just look to see if there is money in it! Ha!
Happy Birthday, Jeremy!!!

Happy Crafting!

Sunday, January 18, 2015

I don't know what got into me but I was on a card making frenzy today! I made over a dozen cards.  Yep, they were all pretty simple...but that is probably a world's record for me!!! It was so fun and I had a great time playing in my happy space.

The two cards I'm sharing today were made with the December card kit from Simon Says Stamp.  How much I loved these colors and the fun paper patterns and die cuts that were included!

Here was a snowman popped up on some foam tape.


Kind of a whacky looking snowman but I loved him! and the Geotag was just a fun touch, you know?

And here is another one:

 I thought the "slides" were so cute!.  I took a few patterned papers and made a few banners and embossed thanks on one of them
Lots of layers but easy to do!

Happy Crafting!

Saturday, January 17, 2015

It's Your Day!

This card was inspired by a card made by Kathy Racoosin with the December, 2014 card kit from Simon Says Stamp.
Here is the kit with the items it came with:

Oh, how I loved this kit.  It came with two really fabulous embossing powders....my favorite is the Ranger Liquid Platinum.  What a great embossing powder this is! And my friends know that I LOVE to fire (heheheheh) up that heat gun and EMBOSS! My nickname with some of my friends is "Crispy Chick" because I have been know to crisp (read: burn) some things up in the past with said heat gun! :)
I figured this kit was a great deal...the embossing powders retail for $4.99 a piece and the Distress Embossing Ink retails for $2.99.  that's nearly $13 right there....but with the stamp set and the papers and sequins I only paid $19.99.  Such a great value, I think!
The bad news is that this kit is no longer in stock and kits beginning in January saw a price increase.  I think they are still a great value, though and I am one happy customer!  And my grandkids like the lollipops they always include! 
LOL!
Anyway, the Liquid Platinum embossing powder is very fine and goes on beautifully...and has just the right amount of sheen to it.
Here is my card:
I used my Silhouette to cut the 1 1/2-ish inch circle in the navy cardstock after I'd embossed it with those messy and stitched circles.  None of the assorted punch circles I had were the right size or went in deep enough into my paper...I didn't want the circle right on the edge. 
Here is a closer-up look:


I made this for my son (I always talk about how difficult man-ish cards are for me but I thought this fit the bill!).  His birthday is in the next few days.

I also made another gift box with some papers I had on hand.  Same box as in yesterday's post but instead of cutting out some flower petals which would have been decidedly NON-Man-ish I opted for some other embellishments I had on hand.


I just love these little gift card boxes.   Here it is opened with a gift card...or two.

And that's it for today...I do hope you all are finding a little time for some creativity of your own!

Happy Crafting!

Monday, January 12, 2015

Zipping By...!

I just don't know where the time goes.  I must waste a lot of it!  I just don't feel like I have had much extra time the last 4 or 5 days....it's crazy!  But I certainly don't have much to show for how "busy" I've been! LOL!
I did get a new phone and that, seriously, took 2 days and lots of waiting around.  Shouldn't have been that way but it was! But that finally all got taken care of and I'm loving a phone with more than an hour of battery life! ;)
So here are two more cards with the Simon Says Stamp Card kit of the month for January, 2014.  Love those purples and blues....
Lots of little layers here....you can see a little closer here:
I love the little tickets and the snowflakes.
Simple card....just the bonus diecuts and some foam tape.

And here is another one done with lots of embossing.
I did the embossing around the edges to look like snow on a window.  Yeah, right.  I inked the edges with pigment ink so when I went to emboss the sentiment the powder stuck to it.  LOL...so I just added more ink and more powder.  It was fun. What can I say?
I finished it off with a couple of sequins.  This card is one of those that looks better in real life....trust me.

I'm entering the top one in the Simon Says Stamp 

Wednesday, January 7, 2015

First Cards of the Year!

I finally made myself a bit of time to go in my craft room to work on a few cards last night.  I had such a good time and cranked out a half dozen in NO time at all.

I skipped over the December, 2014 Simon Says Stamp Card Kit which still sits in its box downstairs...love that kit but wanted to make some thank you cards and the January Card kit for 2015 has a very nice little thank you theme going.

Here is the kit:

Now, 100 lucky subscribers were randomly selected to receive this in lieu of the little stamps above:
Well, guess who was lucky enough to get this? Moi, of course!
So, I got to work making some fun and simple cards with this fun stamp set and the pretty Bo Bunny papers and dies included.
Here is the first one I made:

 Very simple with a little embossing of the "winter wishes" sentiment.  I also used a Paper Smooches shadow stamp at the bottom just to give the cups a little "grounding".

I stamped a simple thank you sentiment for the inside.

I am entering this in the Simon Says Stamp Wednesday Challenge (Something New) HERE.  The Bo Bunny papers, dies and the new SSS stamp set were new to me!

Happy Crafting!


Sunday, December 21, 2014

4 DAYS AND COUNTING!

The next few days will be busy for most of you, I'm sure!  Since I was having that horrid foot surgery last week I got most everything done before I knew I'd be laid up a bit.
Well, imagine my surprise...only 5 days post surgery and I am hoofing it!  Ok, well, maybe that's a slight exaggeration but I am moving around quite well and actually was able to get to my craft room yesterday for day of fun! :)

I had seen these 3 dimensional shadow box cards on the Lori Whitlock blog and decided to buy a file to try out.  Oh my goodness...it cut so well and was so much fun to put together.  They fold flat for mailing and then you just sort of "square" it back out to the frame shape.  I made this one for my son and daughter in law as they are celebrating their first Christmas as a married couple and I thought the 2 little red birds were just perfect.


It is constructed of 6 layers.  I cut all from 8 1/2 by 11 sheets of heavy cardstock.
Here you can see the layers a bit better...

The little snowflake was done with some Stampin' Up glitter.

And the Peace Love Joy sentiment was stamped with a Hero Arts stamp and with Memento pigment ink and embossed with clear embossing powder.

I love this card...it was such much fun and I'm hoping it goes through the mail well!

Happy Crafting and Happy Holidays!

Sunday, November 9, 2014

You're the Best!

Today I am sharing another card I made with the Simon Says Stamp October Card kit. Being a big coffee lover....I just adored the coffee/tea themed set. It came with the cutest little metal die of a cup with the sweetest little heart cut out.
Vickie of Clips N Cuts was my inspiration for this card...she made her cups look like they had a tea bag in one of them but I decided I wanted to cut out the "steam" coming out of the cups instead. But I did use her idea of making the cups into little shakers filled with sequins.
So cute!

The paper is Basic Grey....I loved those little foxes.  I heat embossed the sentiment with some white embossing powder and used a sentiment from the stamp set that came with the kit: "What's Brewing".  I stamped the "steam with" some dark brown ink and the put some clear embossing powder over it to give it a little more gloss.
Here is a bit of a closeup:
Aren't those cups adorable?

I am off to a friend's house today for a crafty play-date.  I am thinking I will just take my laptop and work on digital crafting, though.  Less to pack, you know?  Then again it might be fun to cut, paste and get a bit inky.  Decisions...decisions!!!

But first....another cup of coffee!!!

Happy Crafting and Keep Creating!


Tuesday, October 28, 2014

What's Brewing?

I've been a bit behind on my card making because I have spent soooo much time working on Project Life but that's ok.  Crafting is crafting...whether it's done digitally or with paper and scissors.  Anyway, it was fun to get into my craft room and actually drag out that paper trimmer.

I made a couple of cards with the Simon Says Stamp Card Kit for October.  I know I have gone on and on about these kits but I just love them.  The price is great and they are generally packed with goodies.  And I love the challenge of being presented with a box of stuff and using my own ideas to come up with something.  These kits are different from most card kits in that they are simply a box of coordinating supplies...you will get an idea sheet...but it's not a kit that tells you to take paper A and glue it to paper B and stick embellishment C on it.  I like that...although sometimes I do like the take paper A and glue it to paper B approach.

Anyway...here is the fun kit for October which can be purchased HERE:

The stamp set is coffee or tea themed...to cute!

Here is the card I made for using a card by Shari Carroll as inspiration.  Her design...my choice of papers...
:)
The kit came with a little metal die for the cup.  I love it!  I hope Simon Says Stamp continues to include their dies in the kits!  Do you hear me, Simon Says Stamp???  ;)


I am sending this to an elderly aunt who is having a birthday soon.  She loves her coffee so I thought she'd enjoy the card and a note from me.

And that's it for today...

Happy Crafting and Keep Creating!

Thursday, September 25, 2014

Happy Baath-day!

Well, hello, blogland!

Hope things are well with all of you!  I had a great day today...my tennis team took 5 out of 5 points and we played the second place team.  So woohoo!  Yay, us!  I did play with a new partner today which can always be a bit "iffy" but we played great together and prevailed against some very able opponents.  OK, Atlanta has a huge tennis league...tennis is big here and probably 90% of the people you play are nice and considerate opponents.  But every now and then you run into someone who is rude and obviously thinks this "social" tennis is way more than it is.  It's not like we win prize money or anything like that.  If you make it through your regular season in first place you get a freakin' plastic tag to put on your bag that says you are a division winner.  Probably a nickel's worth goes into that plastic.  I mean, c'mon!

Anyway, today we played a woman who was just so rude to us as well as her own partner.  Terrible.  Too bad for her...SHE LOST! LOL!!!  HAHA! She thought she was "all that" but SHE LOST!

OK, enough of my rantings but she was just such a good example of very poor sportsmanship!

On to birthdays.  Someone special to me is having a birthday later in the week and I made this cute little Paper Smooches card with a window for her:

 I used some My Mind's Eye papers.  The circle dies were cut from My Favorite Things Blueprint 16 as was the little mat for the sentiment.
I colored the little lamb with some Copic markers after stamping it with black Versafine ink and throwing some clear embossing powder on it and heat embossing it with my new Stampin' Up Heat tool.  Love that tool...paper warp is less than my old one, I think.  I added some googly eyes and some sheen with my Wink of Stella clear pen and slapped some foam tape on it to give it some dimension.

Here you can see the inside of the card:


And that's it for today!

Happy Crafting!!!

Wednesday, September 3, 2014

With Sympathy

I came across this die cut the other day that I must have cut a while back.  So long ago that I don't even remember.  I think this is from my days of Cricut-ing...before I made the switch to Silhouette-ing.  What I'm saying is that I think this may have been cut on my Cricut.  Don't know.  Not important.

I backed it with some black and then adhered it to a white cardstock base.

I added a few pearls and a heat embossed sentiment and left it as is.  I think it's suitable for a sympathy card.

And that's it for today.

Happy Crafting and Keep Creating.


Thursday, August 7, 2014

I Scream You Scream...

We All Scream For Ice Cream!
My dad taught me that saying when I was a little girl.  I thought it was so clever then and I'm still loving it.  And when the Simon Says Stamp Card kit for August included that sentiment I thought "HOW FUN!".

Here is the card kit for August...it's just too cool! LOL!

Check the stamp set out with the cute little frozen treats!


Love those bright colors...this is just a very happy kit!

I cut my sentiment apart so I could have a wider space between the top part and the bottom.  The ice cream cone was done heat embossed with white embossing powder and colored in with some water colors.  I added some Wink of Stella to the cone for a little more sheen!
 See how shiny it is?  Too fun!


 I think sometimes the card correlates with exactly how fun it is creating it.  I had fun stealing it from
Yana Smakula HERE although I now see that I took some liberty with her creation and made it my own.   Yana is Ukranian.  I love the "international-ness" of our craft and art.

That's it for today...I hope you are getting ready for lots more from this great kit because I got on a roll with it!

Happy Crafting and keep Creating!!!