Showing posts with label Papertrey Ink. Show all posts

Sunday, September 21, 2014

Happy Birthday, David!

Five years ago today my life changed forever with the birth of my grandson, David.
I just adore that little guy.  We have a great bond and I know as he grows up he'll have less time for his "Omie" (that's me) but I hope he will remember some good and special times we've had together.


Today he is having his birthday party at that awful place that kids love and parents don't Chuck E. Cheese.  LOL!  Actually I don't really mind it as much now as when my own kids were small.  It seems a little cleaner and more secure and it is fun watching the kids have a great time.

I decided to make a total Silhouette card for him and I found this cute card file at the Silhouette Online Store.  It's by Snapdragon Snippets and is Design ID #63814 for the Silhouette users out there.

 It's a bifold card.
You can see what I mean a bit better here:
 and here:
 I used some Paper Trey Ink and Echo Park papers as well as some American Crafts Cardstock I had on hand.
The Silhouette did a wonderful job with the many layers of cuts.  I kept a little cup nearby to put all the pieces in as I cut them so as not to lose any little pieces like I usually do.
I added some sequin stars adhered with Glossy Accents.
 The "5" was cut out five times (it's a metal die from My Favorite Things Die-Namics) I cut it out 5 times and adhered them together to give a bit more dimension.

I was amazed at how well the sentiment cut out.  The Silhouette rarely disappoints me.  

It was a fun break from stamping for me.  Something a bit different for me, as well.

I hope you like it, too!

Happy Crafting and HAPPY BIRTHDAY, DAVID!
  

Thursday, June 12, 2014

Happy Father's Day

Father's Day is right around the corner.  Although my own father, whom I adored, has been gone a long time I am surrounded by really great dads.  My son in law is a wonderful and very involved father to his 3 little ones.  I think he gets a little overwhelmed with them sometimes but he plugs through it!  He is a hands on, diaper changing, story reading, juice fixing, fort building, tickling, rough housing, baseball coach,  "you can ride on my back" sort of dad.  When he walks in and sees Taylor he always says "Hello, Beautiful!" to her.  So sweet.  He loves his children and his family and I know his kids will grow up with a great role model. Here he is with 2 of his 3.  :)


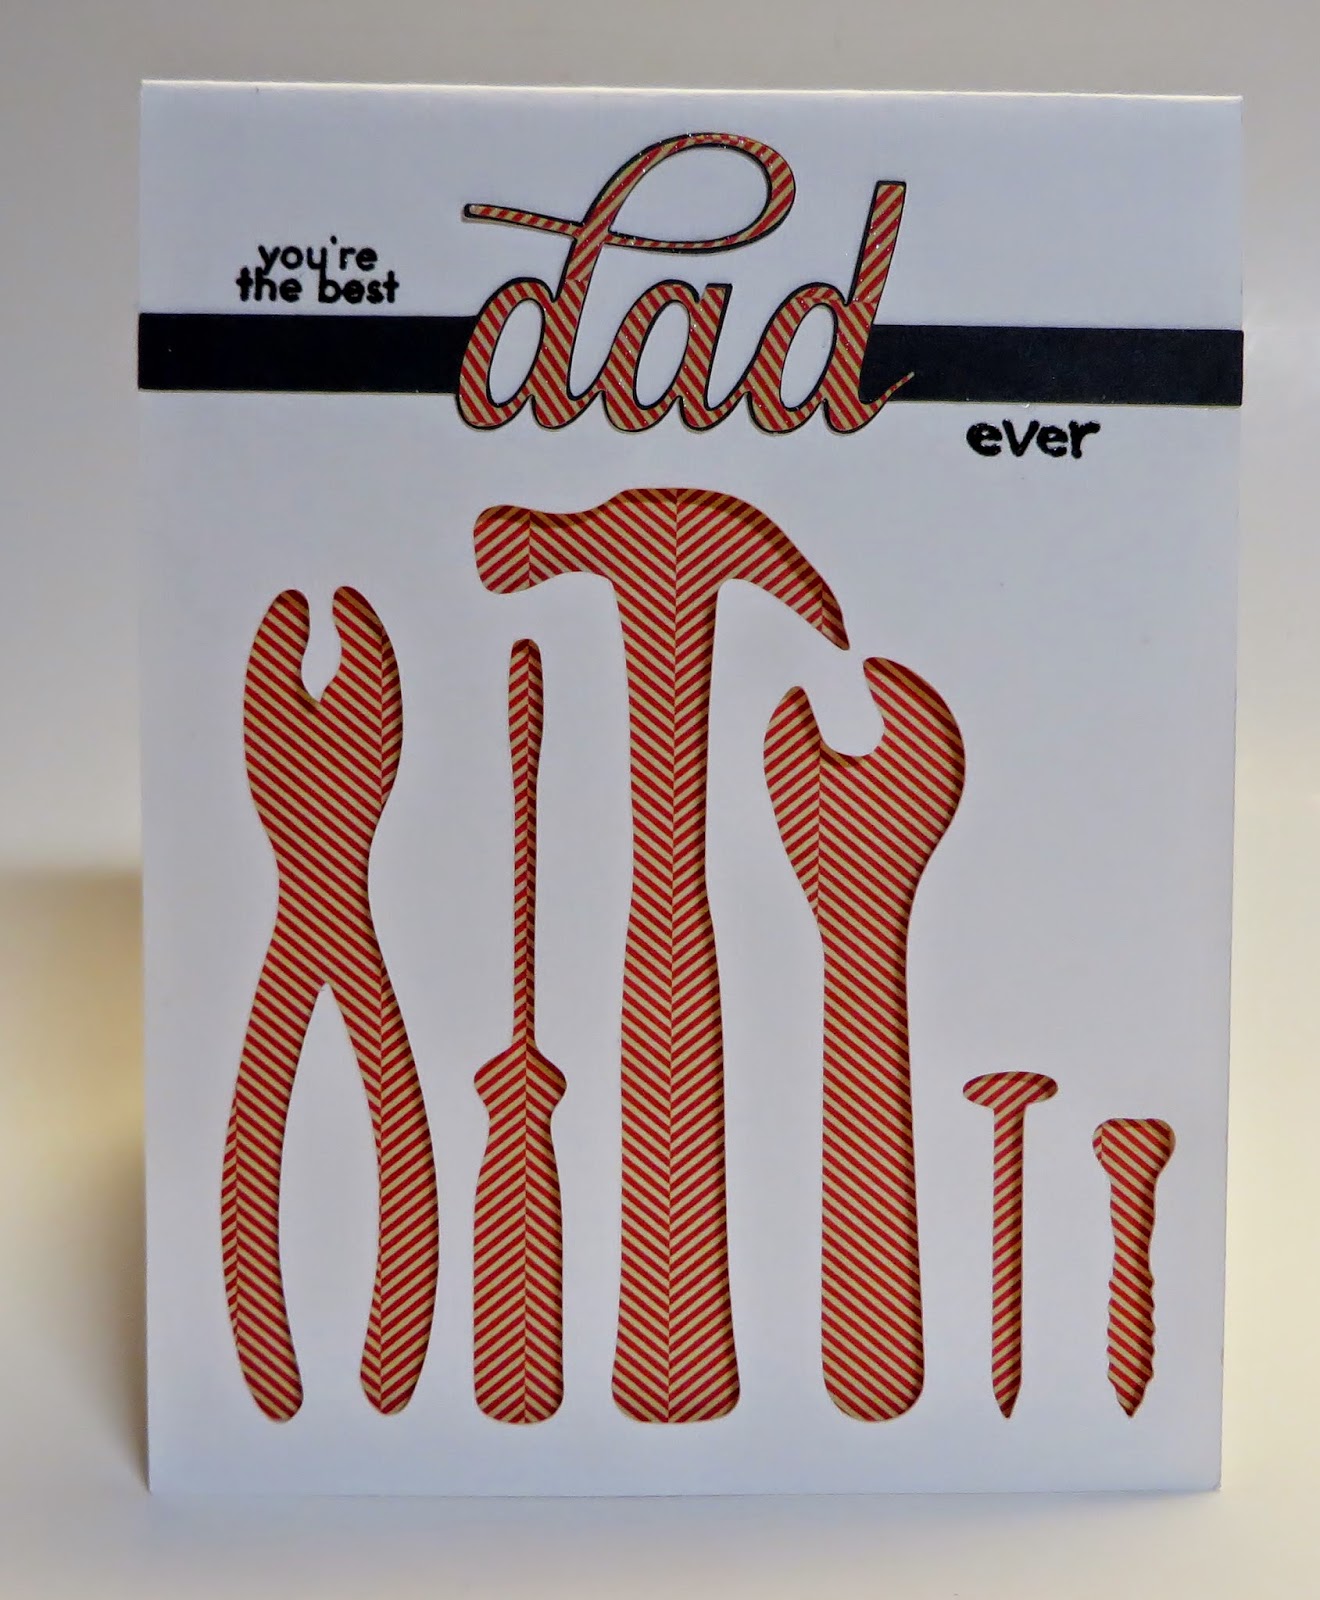
I made this card using a cut file from the Silhouette store which was designed by Jennifer Lane (Jenni Cripps).  She does some amazing stuff!

Simple card here....just cut the front out and backed it with some foam adhesive and some printed paper.  The word "dad" has a little Wink of Stella clear on it to give a bit of a sheen.  I stamped "You're the best" with a Papertrey Ink stamp and "Ever" is a Penny Black stamp.  I heat embossed with some clear embossing powder over some black versafine ink.

And here it is:


I love how simple this is....and I love the tools.  They cut so well!

Happy Crafting and Keep Creating!

Sunday, September 15, 2013

Over the Hill

I have talked about struggling with MANLY cards.  I just don't love making 'em.  Give me a flower or something frilly any day over man stuff! LOL!

But I was asked to make a card for a friend's friend who is turning 30 and so I thought...well, heck...I will give it a try and was really happy with my effort.  Maybe there is hope for me, after all!

I did the over the hill part with my Silhouette Cameo.  How I did it is this:
1.  I created a rectangle approximately 5 1/4 inches wide.
2.  I clicked on edit points and then adjusted the top line of the rectangle to make it look like a hill.  I'm not the greatest at editing points so it did take me a while to get it smooth looking.
3.  I made a copy of my new shape.
4.  I created the text using the font Aharoni.
5.  I dragged it to my new "hill" and let the text wrap on the path and adjusted the spacing out, as needed. 
6.  I then brought my saved shape over and slid it in place making sure my text overlapped the hill slightly.
7.  I selected the whole kit and caboodle and then clicked on the weld button and had a new shape!

It sounds easy but since I didn't know what the heck I was doing it did take me a little while!

I added some gel pen stitching around and then created the banner with a Simon Says Stamp die...heat embossed it with some Zing powder and a Paper Smooches stamp which I was able to curve a little bit.

I cut out the "30" twice with my good pal, Cameo, and then glued them in place...popping the top layer up.

Here is the inside of the card embossed with some clear embossing powder and with a Lawn Fawn stamp:
I decorated the envelope a bit with a Simon Says Stamp set called Envelope Sentiments.  What a great set this is:
And here is the back flap:
T

The paper I used is from Papertrey Ink and the black cardstock (which cuts well in the Silhouette) is American Crafts.

And that is it for today!

I entered this in the Welding Challenge at the Silhouette Blog HERE.
Happy Sunday and happy crafting!!!


Tuesday, July 16, 2013

Project Life: Week 28

I am rocking Project Life.  Yep, I'll toot my own horn.  I finished week 28 the other night and in case you aren't keeping up with things....Week 28 was just last week.  Yep.  Right.  For me Week 28 includes the dates of July 7-July 13.

My definition of "rocking" Project Life means I'm done.  Award winning photography?  Uh, no...
Award winning layouts.  Uh, no...

Last week I approached my pictures with the idea of "I have a lot going on so I need to get these pages done quickly".  That is something that has worked so well for me with this Project Life format.  I can be as creative as I want to be and hand make every thing.  Or not.

This was a "not" week.

That's ok.  I still rock.

Here is the left side:


I used some cards by Recollections (Michaels brand) and some little feltie embellisments from My Little Yellow Bicycle.

The word "week" was cut out with a Memory Box alpha and some Papertrey Ink felt.  The number stickers are some from my stash and are probably quite old!


And here is the right side:
The picture of my friend, Kim was actually taken the Saturday before but it's my Project Life and I can make up the rules as I go.  ;)

I got quite a few pictures of the venue where we will be having our rehearsal dinner so I wanted to include those.

And I love photos of my grandkids sweet little hands!

Here's another journaling card with a little feltie.  Too cute and so simple.


Like I said.... I rock.  (At least in my own grandmother of a mind!)

Happy Crafting!


Sunday, June 2, 2013

More Fun with Paper Smooches!

I love the Paper Smooches line of stamps....they have also come out with some metal dies....gotta get my hands on some of those, too! :)

Here is another card I made with the Cyber Cafe stamp set.  This is not my design at all....total copy but it was so cute and fast that I quickly made up two.  I did use a Darice embossing folder to emboss the card base....added a little Papertrey Ink cardstock and then just stamped on some white Neenah with various brown and neutral colored inks.  FLAT!  Like I said....I seem to have a need to  bulk up my cards.  I always think if you want flat you should just buy a commercial card! LOL!  But I am getting to where I can actually put up with the flat card!  It does look sort of classy.  I guess there is hope for me yet!

Hope you are all having a fun Sunday!  Today is my granddaughter's second birthday.  I can't believe 2 years have gone by.  Before you will know it she and her older brother will have a younger brother or sister!  Wow! 

Happy crafting!

Saturday, January 19, 2013

Happy Birthday, Little Boy!

My little boy will be 26 years old on Monday.  I remember the day he was born...that night we had a big snowstorm in Atlanta which dumped over 7 inches of snow and the city was at a standstill.  Many of the nurses attending to me had to take double shifts as their replacements couldn't get to work.  They were all still great, though.  And I was glad I was in a nice warm place with a cuddly newborn!

So for my little boy I made this money holder card for him. What do you give a 26 year old? Why gift cards and/or money, of course!

Here is the all Silhouette card with a couple of cuts from the Silhouette store made with DCWV papers and some Kraft cardstock:


I added a  little Papertrey Ink ribbon and that was it.

Happy Crafting!


Sunday, December 23, 2012

Happy Birthday, Cyndi!

Today is a dear friend's birthday....one of my besties...CYNDI!  Or as we are all going to start calling her "Bink" which is what her nearly 2 year old granddaughter calls her.

I love my Bink.  She's the best.

Anyway, I gave her a coupla little scrapbooky things for her birthday and made her this simple but elegant card.
 No whoopdedoo technique here....some simple embossing on white cardstock.  I used Papertrey ink cardstock and ribbon and that was it.
I love the way it turned out....will need to make a few more of these, I think! Simple but very pretty!

Happy Birthday, Bink!

Friday, December 21, 2012

Mr. Penguin Says Thank You!

I made a few Christmas cards but pretty much just sent out a Costco photo card which I'll share in a day or two.  I used to make 50-75 cards but then I realized I really enjoyed getting photo cards especially from people I don't see often.  Once I had grandchildren I thought the photo cards were such much fun to brag with send.

I don't know why I'm telling you about that except to say that I still have some cute Christmas-y or wintery stamps that I wanted to use and decided....well, hey....I can make you some thank you cards!

I brought out this little Winter Penguin set from Papertrey Ink that I picked up last year and thought would be so cute on a simple little card.  I do have the matching dies.  And I find by using my Stampamajig (why did it take me so long to get one of those handy dandy tools?!) it's pretty easy to line things up.

Ditto for the snowflakes!  I made my background with some Distress Ink and used some Frisket film to make my little snow banks.  Nothing better than taking a simple white sheet up paper and making your own background.
Here's a closeup albeit a bit blurry!  Sorry about that!  As you can see I blinged it up by adding gems to the snowflakes and for the penguin's eyes.  The sentiment is also from Papertrey Ink.
Christmas is just around the corner.  My 3 year old grandson is oh-so-ready!

Happy Crafting!

Friday, November 30, 2012

Simple, Simple Bo Bimple!

Well, today is the LAST day of November....I really think we should have 31 days in each month.  I just don't like when we get ripped off a day, you know?  Less time to do the things we need to do!  Anyway, tomorrow we begin December and in just a few short weeks we will be celebrating Christmas and then the New Year! YIKES!

Things seem to go by in a whirlwind at this time of the year and sometimes you need to just step back and take a breath and slow things down so as to enjoy the moments.  Between decorating, baking, attending parties and events....well, it is so easy to get caught up and feel stressed and rushed.  Ain't gonna do it!!!

So to get myself into a calm and peaceful crafting mood (?) I made this very simple but oh so pretty (at least it's my calm and peaceful taste!) card.  I used a Memory Box die called Country Landscape, a Cuttlebug embossing folder and paper.  The sentiment is Hero Arts and was stamped with some Jenni Bowlin ink. The white paper is from Simon Says Stamps and the blue paper is Papertrey Ink.  That was about it except for some simple penwork.  It's mostly flat and unadorned....just a little foam tape behind the diecut....but that is it....SIMPLE!


But I like....

Well, off to event number one tonight!

Happy Crafting!

Tuesday, October 16, 2012

Sympathy Card

The cards most challenging for me are cards for boys and men and sympathy cards.  I don't know why cards for boys and men are so tough...I get why sympathy cards are difficult.  There is a fine line between tasteful and over done, I think.
I made this card last night for someone who recently lost her mother and it came together pretty quickly.  I had seen new Cuttlebug embossing folders at Joann's that had a border strip with them.  I bought a couple and was wanting to use one so decided on this chevron which is called "Charles".  I don't know if chevrons translate to sympathy cards well but I liked the way this ended up.
 I used Papertrey ink paper, ink, and the die and stamp are from Mat Stack 3.  The sentiment is a Hero Arts sentiment which fit perfectly in the little space!  The butterfly is an EK Success punch.
 Not a great photo below but I was hoping  you could see the embossing.  I love this combo of the larger embossing folder and the smaller design on the strip.
And that's it for today.....
Happy Crafting!

I entered this in the following challenge:
Simon Says Stamp and Show: Challenge: Your Favorite (my favorites are dies with coordinating stamps)

Friday, October 12, 2012

Make a Wish!

I got about 15 minutes of mojo going today and made this card:
Someone special in our lives is having a birthday next week and I made this card for her.  I used Penny Black stamps and embossed with Zing white embossing powder.  The blue paper and ribbon is Papertrey Ink.  The scalloped punch is a Fiskars punch but did you really need to know that?  Probably not. 
I do love this stamp set though...it comes with lots of little circle thingies and some sentiments as well.  So pretty and there is something about a dandelion that makes you want to make a wish!
I used the Swiss Dots embossing folder for a little more texture.  And oh yes.... I guess you can see I corner rounded 3 of the 4 corners.  Whoopie!  LOL...I just get such a kick when people give so much detail on how they make things.  "I took white paper from Walmart and cut it down to 4.73560 inches by 5.0286750 inches and used my Fiskars punch purchased in 2000 to cut a 1.84692 circle"  LOL!
Of course, sometimes people create these great things and don't give you any clue how they made it! LOL!  I don't know which is worse!


And that my friends, is it for today!

Happy Crafting!

Friday, October 5, 2012

And Yet Another Thank You Card...

Here is another card I made with my Silhouette.  The image is an iris and is a cut file by Hero Arts and purchased in the Silhouette store.  I thought it looked pretty against some purple Bazzill cardstock. I added some pearls and a little Stampin' Up ribbon and la dee da......a card!  The little sentiment is from Papertrey Ink's Mixed Messages set and I cut the label out with an EK Success punch and then just added some Glossy Accents to make it stand out a bit more.
And that was it.  La Dee Da!  (Disclaimer: the ribbon looks bluish here but it really is more purple than blue or else I have a serious case of color blindness! :))

Wow...Friday already!  Where does the time go?  Hoping to get a little crafting in today.

And a Happy Crafting and Happy Friday to you!

Thursday, October 4, 2012

Thank You, Thank You, Thank You!

I am blessed with wonderful friends.  We are together through thick and thin and that is for sure. We have all had some very "thin" days but are still always there for each other regardless of what is going on in our own lives.  Like I said...I'm very lucky and I cherish my friends.  Enough said.

I needed a few thank you cards for a few of my besties and made this one with the same background I used the other day.  It's a Hero Arts cut from the Silhouette Store and is called Fun Stripe.  I just love this cut and it looks great against solid cardstock.

The stamped image was done with Spellbinders Labels 20 and the coordinating stamps from Justrite Stampers.  I used Papertrey Ink Blueberry Sky paper and ink.


I added a few pearls to glam it up a bit and that was it.

Happy Crafting!

Wednesday, September 26, 2012

The Best Things Come in Small Packages

That's what they say anyway....the best things come in small packages.  Being a small person I've used that to my benefit many times.
I don't know if that's true....my Silhouette came in a big box...my Big Shot came in a pretty big box...I guess size is relative though and those boxes were small next to...say...an elephant.

Anyway, I do like small things....and when I was at a local stamp store the other day (Impressive Ideas) I picked up this Memory Box die called Wildflower Patch which was quite teensy and proceeded to put it in my basket.  The teensy sizes of the flowers was just so appealing to me.  I like teensy!

I ran them through my die cut machine and they cut beautifully and they are just so darned cute!  I colored them with Copics and adhered them to a small 3x3 card and used a Papertrey Ink sentiment on it.  Perfect for a teensy eensy gift box! :)

Not much too it....but so cute and tiny.  Clean and crisp.  You know?

Happy Crafting!

Tuesday, September 25, 2012

You Are So Thoughtful!

I had a little time in my room yesterday....Hubby was on fixing things and putzing around the house mode and I certainly didn't want to do anything to thwart his progress!  Plus I didn't really want to help! LOL!  So under the guise of "I have some things I need to do downstairs"....I went and played while he worked.  :)

Here is a card I made using some Papertrey Ink products....a Flower Fusion set, some PTI felt and cardstock.

 I also used the fabulous new Tim Holtz embossing diffusers that my friend Melissa at Created by Sunshine Honeybee gave me recently.  They are pretty fun....the set comes with 3 diffusers....I used the circle one.  You can see how it did not emboss in a circle in the center....which then becomes a great place to stamp! 
I plopped a big ole pearl in the center....
I used a little lace that I'd gotten at Hobby Lobby. 


Simple but turned out well, I think.  I also stamped on the felt which was easy and worked better than I thought it would.  I just used Memento Ink....nothing special....but it did give a little more dimension to the flower.

Thanks, Melissa, YOU are so thoughtful! :)

I entering this in the following challenge:
Simon Says Stamp Challenge: Simon Says....Emboss!

Happy Crafting!


Tuesday, September 18, 2012

Congratulations!

A friend of mine commissioned me to make a card for her college freshman daughter who pledged the Sigma Kappa sorority at Auburn, University.
The sorority "things" (don't know what they are called) are doves, pearls and hearts so I incorporated all of those into this card:
 The dove was cut on my Silhouette Cameo with a design from the Silhouette Store.  Isn't she pretty?  Love the swirly layer which cut so nicely!  I used some Bazzill cardstock as well as some purple cardstock from a huge pack I had been hanging onto following a baby shower for a friend several years ago.  I don't use purples all that much, I guess....because that pack has just been sitting here!
The backgrounds were embossed with a Cuttlebug embossing folder run through my Big Shot.  The hearts were punched out with a Martha Stewart punch.
I found the Greek font at DAFONT and it is called "Ancient Geek" (not Greek, mind you!) and cut them out with offset to create a nice backing.  The banner was from cut with a Die-Namic die and stamped with a Papertrey Ink stamp.  I added some pearls and a purple pearl for the little doves eye.
Oh, and the border was cut with a Papertrey ink edger die (which I LOVE!).
 I adhered some of the pieces with foam tape to give more dimension.
And I also decorated an envelope....with the young lady's name as well as  few more hearts....and....
 ...Sigma Kappa symbols on the back.
That's it for today!
I entered this in the following challenge:
Use it Tuesday: Challenge #39: Anything Goes! (what have you been hoarding?  I've hoarded that purple paper pack!)

Happy Crafting!!!

Thursday, September 6, 2012

More Copic Coloring

I love the cute little Mimi stamps from Penny Black.  They make me think of my little granddaughter, Taylor.  Although she's not quite as "big" as Mimi is....I can see a lot of Taylor's sweetness in cute little Mimi.
This is a wood block stamp....I don't usually buy woodblocks anymore because of the storage space they require but I couldn't resist this cute one.
After stamping with Memento Tuxedo Black ink on Neenah Solar Crest cardstock I colored with lots of different Copics.
 I actually stamped her and then cut her out.  I don't know why....probably could have saved myself that step but initially I was going to mount her on some colored paper.  That just didn't look right so I went back to putting this cute little gal on white to make her stand out.  I cut the mat out with a Spellbinders die.  The printed paper is from Imaginisce and I also used an embossing border from Cuttlebug.
I added a little Scattered Straw Stickles on the little bluebirds beaks and the flower centers. The sentiment was From Papertrey Ink's Fillable Frames #6.  The rickrack border was cut with a Papertrey Ink die.
And 4 hours later she was done!  OK, she didn't really take that long!  LOL!  And every second spent was total fun! :)
I heart Copics.
I hate Copics.
It's a love/hate relationship.  A definite learning curve which I am still at the bottom of! LOL!

I'm entering this in the following challenges:
Simon Says Stamp Challenge: Simon Says Put a Stamp on It
Perfect Sentiments Challenge: PSC48: All Creatures Great and Small
Simple Salutations Challenge 10: Animal

Happy Crafting!

Friday, August 31, 2012

A Teensy Bit of Mojo....

....ok, so I wrote earlier how my Mojo had up and disappeared!  Once it's gone it sure is hard to locate!  :)
So, I went in my craft room today to play with a few of my toys and to see if I could locate some creativity.  I'm not sure I was all that successful except I did get a card made!
This is a new Spellbinders and Hampton Arts set....clear stamps with coordinating Spellbinder dies.


 I embossed some plain white cardstock with a Cuttlebug embossing folder.  I stamped the cupcakes image with some Memento ink and then colored it with Copics and adhered it to the card base with some foam tape.  FUN! I also added a little rickrack that I made with a Papertrey Ink die.
I finished with some Glossy Accent and that was it!
4 hours later.....

Not really....this didn't take all that long....and I also stamped and cut out a whole bunch of images to keep on hand for the next birthday card in need of making!

Happy Crafting!


Friday, August 17, 2012

RATTOONS!

When I was actively doing speech therapy with preschoolers a few years back I had a precious little boy named Ryan who could NOT get the "k" sound.  All "k's" came out as "t's".  Hence a "car" was a "tar", a "cat" was a "tat" and a "raccoon" was a "rattoon".  He loved to play "rattoons" with me.  He was very imaginative in his play and his rattoons had magic powers and were always stronger than the poor little rattoons he gave me to play with.

I miss little Ryan but I am happy to say that after a LOT of hard work....that little guy FINALLY picked up the "k" sound....and is now a happy little all boy 3rd grader.

Here's my Rattoon...er, Raccoon card:


Raccoons2Love is the new stamp of the month set from the Stamps of Life.  It's a cute little set.  My friend Melissa at Created by Sunshine Honeybee has a plethora of "favorites"....she has favorite wild animals, favorite domestic animals, favorite Snoopy characters, favorite Disney characters, etc.  I'm not a favorite sort of gal but I do kind of like raccoons especially when they take me back to days of Rattoons in the Jungle! :)

Here is the card I made using Papertrey Ink cards stock, a whole lot of embossing folders (3...count 'em), some dye inks from various sources, PTI ribbon, a DieNamic die for the little pennant and I think that's about it!  Whoops...oh, the frame behind the raccoon is also a PTI die.  And I used PTI cardstock and some Kraft cardstock I had purchased at Joann's.  The racoon and tree stump were stamped on Neenah Solar Crest with Memento ink and I colored the raccoon and the trunk with Copics.

Don't you love the way I "man-tied" that ribbon? 

 I popped ol' Rattoon Boy up on some foam dots.
 And here is the sentiment for the inside:
And that's my wish for you....that your day is just a little wild!

Update:  I entered this in the following challenges:
A Blog Named Hero: Challenge 10: A Krafty Crafter 
Paper Pretties Monday PPMC 52: Anything Goes 
Fresh Brewed Blog: FBC #109 - No Digis! Rubber Stamps Only
Simon Says Stamp and Show: Animal Antics
Simon Says Stamp and Show: Favorite Technique (my new is coloring with Copics)
TotallyPaperCrafts Challenge #130: Inspired by a Song (mine is WILD THING!)
Wags 'n Whiskers Stamp Challenge: Favorite Color Combination (I love blues and browns)


 Happy Crafting!