As I've mentioned before I am a gadget queen. I just love a good gadget...it can be something tto help in the kitchen like the Ulu knife my friend, Cyndi, brought me back from Alaska once that I use regularly for chopping herbs or nuts or anything that I want chopped fine. Or my Cuisinart Smart Stick Hand Blender which is great for chopping, smoothie making, sauce making, etc. Or my iPhone or iPad or Silhouette Cameo, Cricut Expression or iRock, or a really good pair of scissors.... I just love things that work for you and make a job a little simpler.
I think most paper crafters love bows on things and lets face it...sometimes tying those bows can be sort of tedious and you feel like either you need an extra set of hands or a few less thumbs! I actually do an ok job of tying a bow but if there is a way to do it more simply...well, I'm all for that!
I came across something on Pinterest yesterday that made me pause and say to myself "What the heck is that?" It was a bow maker from MY THOUGHTS EXACTLY. Alyssa, the blog owner had created a cut file for a bow maker which can be found on her blog. You can find the cut file here and a video on how to use it HERE.
I thought that was so smart....a little bow maker that would be easy to take with you for crops...doesn't take up much space...and works. Alyssa created it out of basic shapes in one of the cutting programs and was kind enough to share it with everyone who is interested.
Here is my version:
My version is not as cute as Alyssa's but I wanted to see how it would cut first before I used my really good stuff! She cut hers out with cardstock...I actually used a couple of pieces of thinner chipboard (a little heavier than a cereal box, though) and a couple of pieces of cardstock and then covered them with a couple of pieces of Basic Grey Periphery papers that were leftovers. All of this cut out easily on my Silhouette Cameo.
The pair of "legs" on the bowmaker above create a different sized bow...from about an inch up to about 2+ inches. You bow will basically be about the width of the pair of legs. Follow that? Great....
Here are a couple of samples of bows done with my handy dandy bow maker:
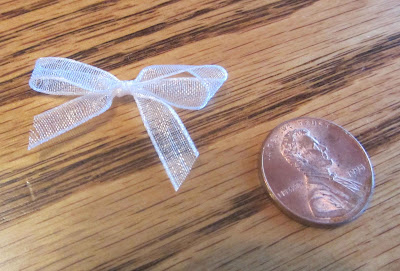
The first was done with some little organza ribbon ....you can see how small this bow compared to the penny (and let's face it...tiny bows are the toughest to make!):
A perfect little bow.
The second one was made with some Paper Trey Ink satin ribbon:
Now anyone who ties a bow with one side shiny and the other side not so shiny knows that tying a bow the conventional way (like your mom taught you when you were learning to tie your shoes) makes it difficult to get the bow to turn out with both loops the right way. This method of bow tying takes that problem away!
And here is one done with some really wide ribbon (about an inch wide):
My ends aren't cut so perfectly but the bow part looks fabulous...don't you think? And this was pretty simple to tie.
Anyway, thanks to Alyssa at My Thoughts Exactly for a really inexpensive alternative to the fancy schmancy bow makers out there!
Happy Crafting!


Wow- thanks for the information- I will have to check out that video- I sometimes use a fork (which is the same concept- except it doesn't do big bows unless you have a REALLY big fork! ) :)Amy
ReplyDeleteThanks for sharing. I'll be assembling my today & post on blog soon.
ReplyDeleteMelissa
"Sunshine HoneyBee"