Sunday, April 29, 2012

Fun in the Sun Layout

I just got back from 3 wonderful days at a lake house with some scrapbooking friends.  We were on Lake Hartwell which is between the border of Georgia and South Carolina.  Very nice.  My friend, Deb, has a huge lake house with 5 bedrooms and plenty of bathrooms for a group of ladies...there were 12 of us scrapping together. Very fun!

I did get a few layouts and projects completed which is always a good thing.  Here's one I did of little David at the pool last year.  I used Close to My Heart papers and chipboard embellishments.  This one is sort of out of the box for me...I don't ordinarily crop photos so small but I saw an inspiration layout with small photos at the Scrapbook Generation site and liked the idea.  I love the way this turned out

Here you go...left side:


and right side:
.


I hand drew and cut the "rays" of the sun and penstitched a bit to give it a little more "oomph" against that neutral paper.

I loved this little chipboard sentiment:


So true...don't you think?

And here they are side by side:


Happy Crafting!

Wednesday, April 25, 2012

Off for a Few Days....

...I'm heading off again to crop with some girlfriends.  A friend of mine has a lake house and 14 of us are going to crop for about 4 days.  I hope I have a few things to share when I get back.  I'm actually not taking as much stuff as I usually do so I may start a lot and finish a little.  ;)  But what a fun time we will have!  We eat, we drink a few cocktails, we laugh, we dance, we tease, we giggle, we share....it's very fun!  And a big shout out and a huge thank you to Deb for sharing her lake house with all of us.

And any of you internet stalkers who think you will come to my house while I'm gone and steal my scrapbook stuff...well, let me tell you....my big bad husband and my big ferocious dog and my man eating cat are all staying home to guard my stuff!  So don't even bother....

Happy Crafting!!!

See you in a few....

Tuesday, April 24, 2012

Birthday Card

This will be a quick post today...why?  Because I am leaving shortly to help my daughter out with the little kiddos.

Her husband's nephew is celebrating a birthday soon (he'll be 13) and she asked me if I had a card.  No problem...it gave me an excuse to get out this set of Unity stamps that are well loved in this household (well, by me....my husband probably doesn't know they exist!)...but he loves that I have a hobby that keeps me happy and so indirectly he loves these Unity stamps, too.

I used Cosmo Cricket Joy Ride which is a very boyish line of papers....and very cute if I say so myself!  I used a Kraft paper as the card base.  The ribbon is from Paper Trey Ink.  Edges were distressed with Antique Linen Distress Ink and I also used Memento Tuxedo Black.

I love all the combinations of colors and prints.  So much fun for me to mix like this! 

I just finished the card and used some Glossy Accents which haven't dried so the stars and birthday candle look a bit cloudy but they should clear up in no time AS LONG AS I DON'T TOUCH IT!  :)

and a bit of a closeup....


On the run!

Happy Crafting!!!

Monday, April 23, 2012

No Favorites for Me/CFC Challenge0422

I don't really have many favorites.  Ask me my favorite color and I'll name at least three...blue, red...and black (black is slimming you know)....I might even throw in green on some days!  Ask me my favorite thing to do and I'll name paper crafting, tennis and reading.  Ask me my favorite food and I'll say "It depends...".  I don't have a favorite animal (like 'em all)...don't have a favorite cartoon character although I do seem to be watching a lot of Thomas and Friends these days and if you ask my grandson what my favorite train is he will say "Skarlooey".  I always tell him Skarlooey is Omie's favorite.
In case you are not up on your Thomas...here is Omie's favorite Skarlooey:


I certainly don't have a favorite bug.  Mostly I don't like bugs. Bugs give me the heebie jeebies.  I'd rather touch a snake than a bug any day!  I do like butterflies, though...and I can put up with a dragonfly.  Dragonflies are pretty neat to watch....I just don't think they need to land on me.

Anyway, I am participating in my first challenge at the very cool site The Outlaws.  This is the Creative Freebie Challenge CFC Challenge0422 where you are given 2 digital images to use in a project...and if you complete the project you get two more.  The image I selected to use was Sandi Huggett's dragonfly.  And it did not give me the heebie jeebies, thankfully.

Here is the card I made:
I colored with Copics (yay)...and just had a fun time making a sort of op art dragonfly....I made a card base with some Spellbinder dies and used a Hero Arts sentiment stamped with some SU ink.  I also versamarked the entire dragonfly and embossed it with some SU sparkly embossing powder.  Added a little pearl gem to the flower, some pearl cotton around the mat and that was it!
And a closeup:
Not bad for a bug, huh?

And by the way, the cookies I made yesterday that I named the "Have It All" cookie were a big hit.  Scrumptious, wonderful, delicious...and perhaps a FAVORITE!

Happy Crafting!

Saturday, April 21, 2012

Forget the Paper Crafting!

And eat the chocolate!  (Well, I guess paper crafting while eating chocolate would definately be nirvana for me!)

Anyway...I've mentioned how addicted to Pinterest I am.  I have gotten so many great ideas off that site from house cleaning tips to decorating to kid crafts to paper crafting extraordinaire to wonderful recipes.  I pinned a recipe from a friend the other day and another friend made it for a tennis match.  Oh my God...I only had a teensy little tasted but it combines about my favorite sweet tastes in the world!  Chocolate chip cookies, brownies and Reese's peanut butter cups.

What you do is this...you take break apart chocolate chip cookie dough and smoosh it into a tin...put a Reese's peanut butter cup upside down on top of that and then put prepared brownie mix on top of that.
See?  Click HERE to see the idea on Pinterest.  And if you aren't already a Pinterest user I highly recommend it...you can click on the Follow Me on Pinterest link at the top of my blog. 

I decided to make some minis...so I used smaller chunks of the chocolate chip cookie dough and smooshed it into a mini muffin tin.  Then topped it with a miniature Reese's peanut butter cup and then put about a teaspoon of brownie batter on top.  And then they were baked at 350 degrees for about 15-16 minutes.

 I forgot to take a photo with the brownie batter on top but I bet you can imagine what that looks like.
Here they are fresh out of the oven....
It was a bit of a challenge getting them out of the tin...what I did was chilled them for a bit and then was able to use a knife to gently lift them out.

And here they are....(well, half of them)...ready for my tennis team tomorrow!


YUM!!!

....maybe I should make a cute little sign for these with some paper scraps. :)

Happy Crafting...er...baking!


Friday, April 20, 2012

I Love Leftovers!

I do love leftovers!  I love to cook up a bunch and eat leftovers.  It doesn't bother me to eat the same thing 4 days in a row!

I also like leftovers in the craft room....and probably save too many scraps "just in case"!

As I was cleaning up my room from the Great Thank You Note Project that I just completed for a friend (shown HERE and HERE) I came across some leftovers.  My thought was "If I don't use these right now....and I mean RIGHT NOW...I will forget I have them!"  So in the midst of the cleanup I whipped (I love saying that word) out this card.

 It's a window card made with a Hero Arts/Sizzix set.  You know how I love stamps and coordinating dies.  They cut out so neatly....they really appeal to the OCD part of me.
I used the same DCWV papers from the other day and some Hero Arts Chalk Ink (love that stuff....note to self...buy more) and some Hero Arts pearls and gems.

Here's a view of it closed up:


And a sort of side view:

Now...back to cleaning up!

But....not bad for "leftovers", huh?

I'm entering this in the A Blog Named Hero Challenge of creating a card with a view!

Happy Crafting!


Thursday, April 19, 2012

It's All in the Packaging...

I finished the set of thank you thank you notecards for my friend whose daughter is graduating from high school next month.  I am really happy with the way they turned out and I think she will like them, too.  It was a lot of fun but I don't know if mass producing something is "my thing".  I'm more a "one of a kind" gal, I think but I did have fun coming up with the design and once I had it they were pretty quick to assemble (Quick = < 4 hours).

I packaged them up in a clear cellophane bag and tied a tag I did in the resist technique to the top with some twine.  It is all in the presentation and packaging, isn't it?


Happy Crafting!

Tuesday, April 17, 2012

Thanks So Much

My friend, whose daughter is graduating from high school this year, "commissioned" me to make a set of thank you notes for her.
This is what I came up with:
I didn't want too much dimension as they will be mailed...I was happy with the result and hope they will be, too.  I used DCWV Coral Couture papers, ribbon from Paper Trey Ink, the small tag was cut out and stamped with PTI's Tiny Tags.  I cut Jessie's initials with my Silhouette slightly off setting them for a mat behind them to give a little dimension without the bulk.

And that is it for today!

Happy Crafting!

Sunday, April 15, 2012

Hello to You and a Question for Tim!

I wasn't able to get down in my craft room yesterday until about 8:30pm but "whipped" out this card in less than an hour.  I had the idea in mind...had seen some similar cards that had inspired me.  For one...I am totally inspired by Darlene of DARLENE DESIGNS.  I believe I read an interview by her once that asked her what her favorite line of paper is and she stated that she likes plain white paper the best because she can make her own printed paper.  She does amazing stuff with inks!  I am addicted to her videos!
Another card I saw had a bicycle and clouds on it...I just decided to do mine slightly different and here it is:
This was done with a Hero Arts/Sizzix set (which comes with the stamp and the coordinating dies).  I am most proud of myself though (patting self on back) because I "drew" the clouds in Silhouette Studio (basically a bunch of circles welded together) and cut them out with my Cameo.  I taped the clouds to my white paper and inked them with Tumbled Glass Distress Ink and then removed the clouds so that it would give me a nice blue sky with nice white clouds.  I loved the way that looked but then I thought...why not ink additional clouds and pop them up/ so that's what I did for a little more dimension and I loved it.  I even took another piece of paper and inked it up the same way...with some Evergreen Bough for the grass and a little Spiced Marmalade where the blue met the green and stamped on it with Memento Tuxedo Black and then die cut the bicycle out so that it would match the paper colors underneath.  I added a piece of black grosgrain ribbon to simulate a path.  I added the sentiment on a well chosen cloud and was done after mounting my design to a piece of kraft cardstock.  Finished...and a nice bright and cheerful card!
Here's another look:
Pretty Easy Peasy...and I love I did it with nothing more than some inks, a piece of white paper and a 6 inch piece of ribbon (well, and $5279 worth of Cuttlebug, Cameo, craft mat, fancy scissors, stamps, inks, ribbon, glue, dimensionals, trimmer, etc. etc. etc.!)  LOL!!!

I'm also entering this in The Go Fish Challenge #15 Anything Goes.  *Thanks for the heads up on it, Amy!

OK...now I have a question for Tim Holtz!  HOW DO YOU REMEMBER WHAT ALL YOUR INKS LOOK LIKE?  Do you just KNOW?  Or do you use a cheat sheet???

It seems like every time I use my inks I pull out the colors that are all similar and do little tests and waste a lot of time finding the right shade.  When I was on Darlene's blog the other day I saw she had made samples of all her distress inks and I thought...well, how smart is that?!

So, I began making my samples...I also have the sponge applicators for each one that I keep in the cutest teensy zip lock bags (with the name of the ink printed on each) so that I don't waste my applicators (trying to save money where I can! LOL!).  I ran our of applicators so I only got so far but here is what I have so far.  These are done on 2x3 inch pieces of paper and I printed the name on each one, as well.


So now I need to go spend more $ buying more sponge applicators!  But at least now I can tell the difference between Faded Jeans, Tumbled Glass and Broken China! 

Another question for Tim...do your hands look like this all the time???


Happy Crafting!

Saturday, April 14, 2012

More Watercolor Woohoo....

After I got back from my class yesterday I came home and completed these two cards, as well.  We had stamped the images at Archiver's (with their stamps...yay!), embossed and they were ready for watercoloring.

I rather like the way these turned out...

This bicycle was probably a little more difficult because there was so much blue to shade but it was fun trying...
I put some Stickles in the flowers:
And some Gelly Roll work on the spokes and parts of the bicycle.

And I did this lovely and vibrant hyacinth:
I thought the coloring and shading on this turned out nicely.

So what did I do today? I went and bought more Copics! LOL!

Happy Crafting!

Friday, April 13, 2012

Winner, Winner, Chicken Dinner and a Few Cards...

I went to Archiver's Today for a "Coloring" class.  Too funny.  I've been "coloring" since I was a little girl....who would have thought that in my "mature" years that I would be taking a class on coloring!  But that's exactly what I did!

The wonderful and awesome Suzi taught the class...she is definitely one of my favorite Archiver's ladies...she's always so helpful and knowledgeable and she always makes us laugh with her humor!  Lots of fun that girl is!

So the class was on coloring as I said.  We stamped and embossed images on watercolor paper.  Now I have watercolor paper I've bought in the art departments of the various stores I shop in but this paper was much smoother than what I have purchased in the past and took the embossing very well. 

We used Tombow water based markers to color in our images trying to shade and blend a bit as we went.  Sometimes we just picked up color and water from a craft mat and sometimes we stroked the pen directly on the paper.  It was fun and although I think everyone in the class felt they needed to work on this newly learned skill a bit more most were relatively happy with the results.

Here are the 3 I was able to complete:


On the hydrangea card we also used some yellow or gold "Smooch" (which is like a metallic paint and comes in a little bottle reminiscent of a fingernail polish) for the centers of the flowers. 

The birthday greeting card was done with a little Flower Soft in the centers of the flowers and a little Stickles applied to the dragonflies and butterflies (and yes, Cyndi...I did touch the Stickles before it was dry...OF COURSE!).

The tulips greeting card had some glitter Gelly Roll pen work on it but can't really be seen in the photo.

It was fun....and I did like the technique and will definitely use it again.  I've done water coloring with pencils but I think this method gave a much more vibrant color.

Now on to the second part of my long post today...a few weeks back I entered some of my projects (2 layouts and a card) in a contest at Art Made With Heart ...for each project you got a certain number of entries and you could also get an entry for Tweeting, posting on Facebook and so on.  Shanna Vineyard (the owner of the Art Made With Heart blog) had created this adorable digital kit that I used with my Silhouette.  You can see my projects HERE, HERE and HERE.

Well, all my hard work paid off and I WON!  Woohoo!!! The prize was a huge box of BoBunny papers, chipboard, buttons, stamps, mini albums, embellishments and more!  I was stunned! 
First is the Et Cetera line:


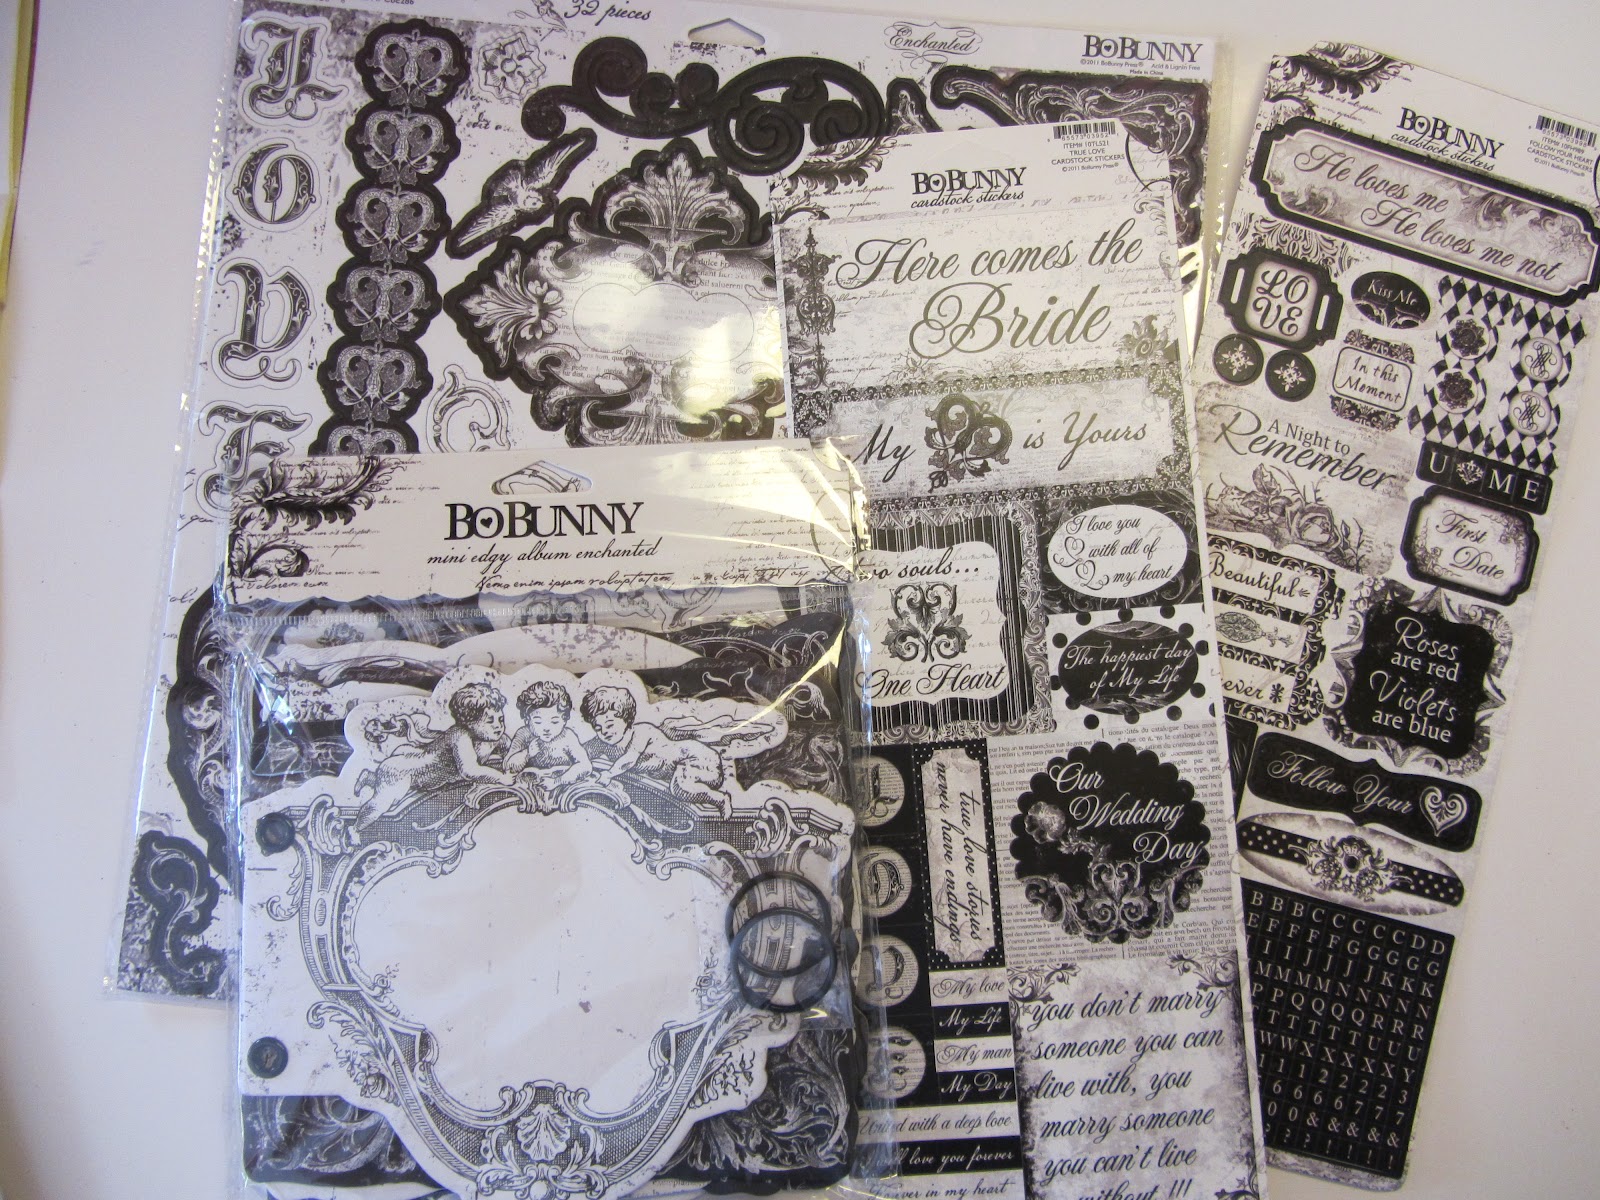
Also included was the Enchanted line... a beautiful and elegant line:


And lastly the colorful Alora line:


Wow!!! What a lucky girl I am!  Thanks, Shanna for all the goodies!!!

Happy Crafting!

Wednesday, April 11, 2012

Merci, Thank You and Gracias!

Another Hero Arts goodie!  I made this with the same set I used for my card yesterday (it was part of a 2 stamp set):
I stamped it with black Memento ink but then I restamped the butterfly with Versamark and embossed it with black embossing powder.  I colored it in with some Copics and cut it out and glued the body of the butterfly on so that the wings can flap away! :)
The sentiment is from another Hero Arts set and was also stamped with Versamark and embossed with black embossing powder.  The blue paper is Hero Hues from Hero Arts.  What I love about it is that it is white on the other side so it gives you a nice surface to write on when you do you note on the inside.  The button and the pink paper is from Paper Trey Ink and then I used a little crochet cotton to tie a teensy bow.

And that's it for today, my friends!

Happy Crafting!

Tuesday, April 10, 2012

More Hero Arts Favorites

I do love Hero Arts stamps.  I love the clear, the wood mounted, the rubber cling.  Several years back I took a class from Jennifer McGuire at a Creating Keepsakes University and was just amazed at this teensy little engineer turned paper crafter!  She taught us some different techniques with Hero Arts stamps and I was sold!

So I've been collecting for a few years now and I do seem to go back to my collection of Hero Arts stamps more than some of my other collections.

Here is a card I made with a stamp from the Greeting set.
The sentiment is one from a clear stamp set which I embossed with some white Zing embossing powder. The border was done with a Recollections border I got on CLEARANCE at Michael's.  I love CLEARANCE...don't you?  All papers are Paper Trey Ink...I do love the cardstock from PTI...so nice and MEATY!

This card was inspired by one made by...yep...Jennifer McGuire....in the latest issue of PaperCrafts.

Happy Crafting!

Sunday, April 8, 2012

Happy Easter!

Wishing everyone a Happy and Blessed Easter!

We will be spending the day with the adorable grandkids and their parents and my just graduated from college but looking for a job please help (!) son eating Honey Baked Ham (thanks, Debbie!), German potato salad made by Omie, deviled eggs, more food than can be imagined and carrot cake!  And lots of chocolate!

I hope you all have a wonderful time with family and friends, too!!!

And if you get some time to craft...that will be a bonus!

(and Blogger is changing it's format and I'm all befuddled!)


Thursday, April 5, 2012

Using Burlap and Favorite Hero Arts Stamps

I saw some cute sample cards with burlap as an embellishment or background recently so made a few cards with one of my favorite Hero Arts/Sizzix sets ....you know, this is the set which comes with the stamps and the corresponding dies.  Love them!
I colored with Copics (not (!)...I made a huge mess so need to do more research on inks to stamp with for Copics coloring) pencils and used Gamsol (odorless minerals spirits) for some simple blending.  The Happy Easter sentiment is from Close to My Heart.  I used some Core'dinations cardstock and ran it through my Cuttlebug for a little embossing and then sanded the cardstock a bit.
After I took these photos I added a little Rock Candy Stickles to the bees and the center of the large flower but didn't retake the photo so you will just have to imagine how cute that is!

Here they are:
And a little closeup:
Also...there is a new blog in town called A Blog Named Hero which is a blog devoted to all things Hero Arts.  I love Hero Arts....it's my all time favorite stamping company (and I have a lot of favorites!).  There is a challenge going on there now so check it out!

 Happy Crafting!

Tuesday, April 3, 2012

A New Technique

I love technique...and I love trying new ones.  It's just like any time you try something new...there may be a few misses!  This is my first time doing this...I need to work on it a little bit...just like I need to work on my coloring skills! But isn't it oh so fun to keep trying.

Here is my card:


So...what is this new technique you ask?  Inking on coffee filters!  I had seen this on Virginia Lu's blog (Yes, Viriginia) where she had decorated a little ice cream container with coffee filters and paint and repurposed it for her craft room. It was so cute and looked like fun...and let's face it...coffee filters are dirt cheap!

I inked my coffee filter with Tumbled Glass Distress Ink, stamped them with some older Hero Arts stamps I have, cut them out and spritzed them with some Glimmer Mist. 

I inked a plain piece of cardstock for a mat and also for the sentiment (which was also from a Hero Arts set I have).  Birds and Swirls Cuttlebug folder was used for a little embossing...and lastly, I added a few Teresa Collins pearls to the centers of the flowers. 

Very simple, very easy and kind of cool the way the flowers are a little peek a boo see through!

Happy Crafting!

Monday, April 2, 2012

Giveway at Shery K Designs!

Check out Shery K Designs here for a chance to win a Spellbinder Die!  Thanks for the chance to win, Shery K!

Scalloped Edged Shaped Card

Scalloped Edged Shaped Card...that's quite a mouthful! :)

I love watching youtube videos of card making and get some email feeds about some great videos.  I love Lily Pad videos...she speeds them up and just has this quirky music playing in the background and they are just fun to watch.  Anyway, she did one recently with a Spellbinder die and I thought it was very cute so decided to do my own with the same shape.  You can see hers HERE (as well as her video) and my versions here:

I inked the background with Tumbled Glass Distress Ink and if you leave the paper in the die then you can get a cute little white border around it.  I used the Jillibean/Unity Gazpacho Soup stamp set (SO CUTE!) and cut the clothes hanging on the line out of brightly colored Paper Trey Ink papers.  Colors in this photo are not quite right...and I did not doing any adjustments so it is what it is! ;)

I used a little Glossy Accents on the teensy birds.  And that was about it.

Happy Crafting!

And a total non crafting aside....if you are a wildlife lover or a birder then you should check out the eagle cam in Decorah, IA.  It is a live feed...24 hours a day of a pair of eagles and now their 3 hatchlings (less than a week old).  It is just fascinating to watch and read about.  The parents are feeding the eaglets about every 2 hours so if you don't get a glimpse of the babies when you first log on (the mother or father sits on them) check back.  In a few more days they will not be under the parents quite so much.

Click HERE for eaglemania!

Sunday, April 1, 2012

Coloring with Copics

As I mentioned in a previous post I had bought some Copic markers recently.  I swore I wouldn't get into buying them because of their price but then I just saw such cute things done with them on all of your blogs so they became a "have to have".  I bought a few...not many...I really wanted some do do faces with so I bought a set of skin colored markers...then I bought some others...and then a few others...and...and...
LOL!
Here is my first attempt at some blending. 


I watched a few tutorials (well, really only 1) and thought...well, what can be so tough about coloring?  I've been coloring as long as I can remember!  I've taken a few art classes so get the idea of highlights and shading so figured it would be about the same.  Well, it's not as easy as it looks!  HAHA...so now I will be watching more videos and tutorials!  
I used the cute little digital image from Whimsie Doodles and just colored away.
Since I had some "bleed" above her head I just ended up cutting the cute little girl out and mounting her on a frame cut out with a Spellbinder die which was inked with some Stampin' Up ink (can we say run on sentence?).  I used some pretty paper from K and Company for the card base and added a bit of seam binding for a bow which I tied with my great little handmade BOW MAKER seen HERE. I put a couple of little pearls on her hair bows and used a little white Signo pen work.

She's cute...I can live with her but will be trying to improve those coloring skills! :)

Happy Sunday and Happy Crafting!