Saturday, June 9, 2012

Birthday Card with Burlap

I had picked up 3 rolls of Burlap from The Pink Plum a few months back and have done NOTHING with it.  I saw a card that had used some and decided to give it a whirl.  It was fun to do and worked up pretty quickly.  I like the dimension and texture it gives the card...turned out sorta cute!


I used My Minds Eye StellaRose for the printed paper and a piece of Kraft cardstock for the card base.  The little tags were die cut  with Papertrey Ink's Tiny Labels and stamped with sentiments from Tiny Labels and Tiny Labels 2 and I used some PTI twine to tied the labels on.  A little edge inking was the only other thing I did.

Here is a closeup of the little tags:


I really liked the blend of roughness (the burlap and twine) and the softness (the little tags and the small print paper).  Cute!

I entered this in the following challenge:

Papertake Weekly Challenge: Anything Goes

Happy Crafting to you!

Friday, June 8, 2012

Another Father's Day Card

A quick card to share with you today.  I picked up a free Silhouette file HERE at Scrap Your Story (the file is also available as an SVG).  I cut it out on my Cameo (fast and easy)...glued the pieces down after inking them and added a few buttons for a "button down look".  I used a Paper Trey Ink stamp for the sentiment.  It worked up really quickly and I thought turned out so cute! I used the same paper stack as yesterday...the very cute This and That by Lori Whitlock for Echo Park.


Easy Peasy Bo Beasy, Banana Fanna Fo Feasy, Fee Fie Fo Feasy...Peasy!  Remember that song?  LOL!

Entered in the following challenges (Thanks for the heads up, Sunshine Honeybee!):
Catch the Bug Anything Goes 
DLART Thankful Thursday Challenge 
LEJ Designs Ch5 Button It 
Papertake Weekly Anything Goes Challenge
Pile it On 23 Put a Button on It
Speedy Fox & Friends Ch110 Use Buttons
Scrappy Moms Stamps Terrific Tuesday - Father's Day


Happy Crafting!

Thursday, June 7, 2012

Father's Day is Nearly Here!

I lost my father shortly after I turned 20 but a day does not go by that I don't think of him.  Thankfully I still am around some awesome fathers.  My son in law, for example....he has stepped into the roll of fatherhood very nicely and is a wonderful daddy to his little ones.

Here is a simple card I made for him...he's an avid golfer...and I thought he would get a little bit of a kick out of this.


The inside says "You're an awesome DAD!" 
I used Echo Park This and That papers on a Paper Trey Ink card base with s piece of Paper Trey Ink ribbon.  You can't see it here but I used some Glossy Accents on the golf ball. 

And that was it.   Clean and Simple and FAST!

Happy Crafting!

Wednesday, June 6, 2012

Clear Stamp Storage on the Cheap!

As I've discussed her before, scrapbookers and paper crafters LOVE to organize.  We organize our buttons, ribbons, gems, tools, papers...etc.  And just about the time we finish one system it becomes obsolete because we outgrow it!  LOL!

I had been storing some of my Hero Arts stamps that come on 4x6 cards (as well as Lawn Fawn stamps)  in a little box.   That worked ok...I had the stamps in the original clear envelopes they came in but many of them had torn or sometimes it was difficult to get the stamps in and out of the sleeve because of the adhesive strip.  Know what I'm talking about?  It was becoming a mess!


I Googled storage systems and the great Stamping Queen Jennifer McGuire had a nice system where she used 3 ring notebooks and had purchased CD/DVD holders from an office supply store.  It looked great but the last thing I wanted to do was go buy more stuff.  I wanted to figure out a way to use what I had on hand.

I had a box of 8 1/2 by 11 page protectors and thought there should be a way to easily modify them to use.

The first thing I did was split one down the middle but I thought it would make the stamps too floppy when stored on their end in a binder.  And I also thought the top one might fall out of the opening.
So I threw that one out! :)

 Then I decided I would make a little slit on the side to slide the stamps in that way.
So....I started with an uncut page protector:
 
  In order to prevent cutting through both layers I used a piece of chipboard between them.

I used a metal ruler and exacto knife to make my cuts both about 5 1/4 inches long.
 Here is one with the slit:
Then I used the Beast (my sewing machine) to stitch down the middle and to stitch the top closed like this:


And that was it...then I just slid my stamps in the side slits and that was it!

Pretty simple, fairly quick and very inexpensive!  I'm happy!  

And I finally finished sample swatches for my Tim Holtz Distress Inks.  This works great for me because I can just see how the ink looks on white...you know how the colors on the labels aren't quite "true"...this works well!
Happy Crafting and Happy Storage....and if people have great ways of storing things...please share them!


Monday, June 4, 2012

Flat and Little!

I don't usually do flat and I don't usually do little.  I like buttons and ribbons and lace...and all those things that make sending a card by mail virtually impossible!  Is that why I make cards but keep them?  I probably have a card sitting here for you I never mailed! LOL!

I don't do little either.  I don't like when cards don't fit into envelopes perfectly.  And square cards cost more to send than A2 or more standard sized things.  I'm frugal....why should I pay more to send a square envelope?  Wah, wah, wah.....

It must be the rain here in Atlanta today .... we need it but it makes me cranky!!!

Anyway, here is a little 4x4 card I did with some various stamps....I used a Hero Arts stamp to make the background....inked a piece of paper with some Broken China Distress Ink and then stamped it with the same color ink.  The cute little images are by Penny Black.  I colored with Copics and added a little Glossy Accents to her glass of Lemonade.

I cut the images out and then put them on some foam tape to add a little dimension.

We celebrated Taylor's birthday with a party yesterday and it was also her mother's birthday who happens to be my daughter (are you following that?).
Here are some photos from the day...first the cake and table that my friend Kelly made for us (to match the one from Saturday when we did her photoshoot)...It was absolutely gorgeous....and the inside was four layers and the bottom layer started with a darker pink...and each layer got lighter.  So gorgeous!
And the table:
And a photo of the 2 birthday girls:

 Happy Crafting!

Sunday, June 3, 2012

Party Time!

Yesterday was Taylor's birthday....I used to call her ABG which stood for Adorable Baby Girl...but now that she's a year old her nickname needs to be AGIEAPMOIIHMG...Adorable Gets Into Everything and Puts Most of It In Her Mouth Girl....and that's just too much to write!

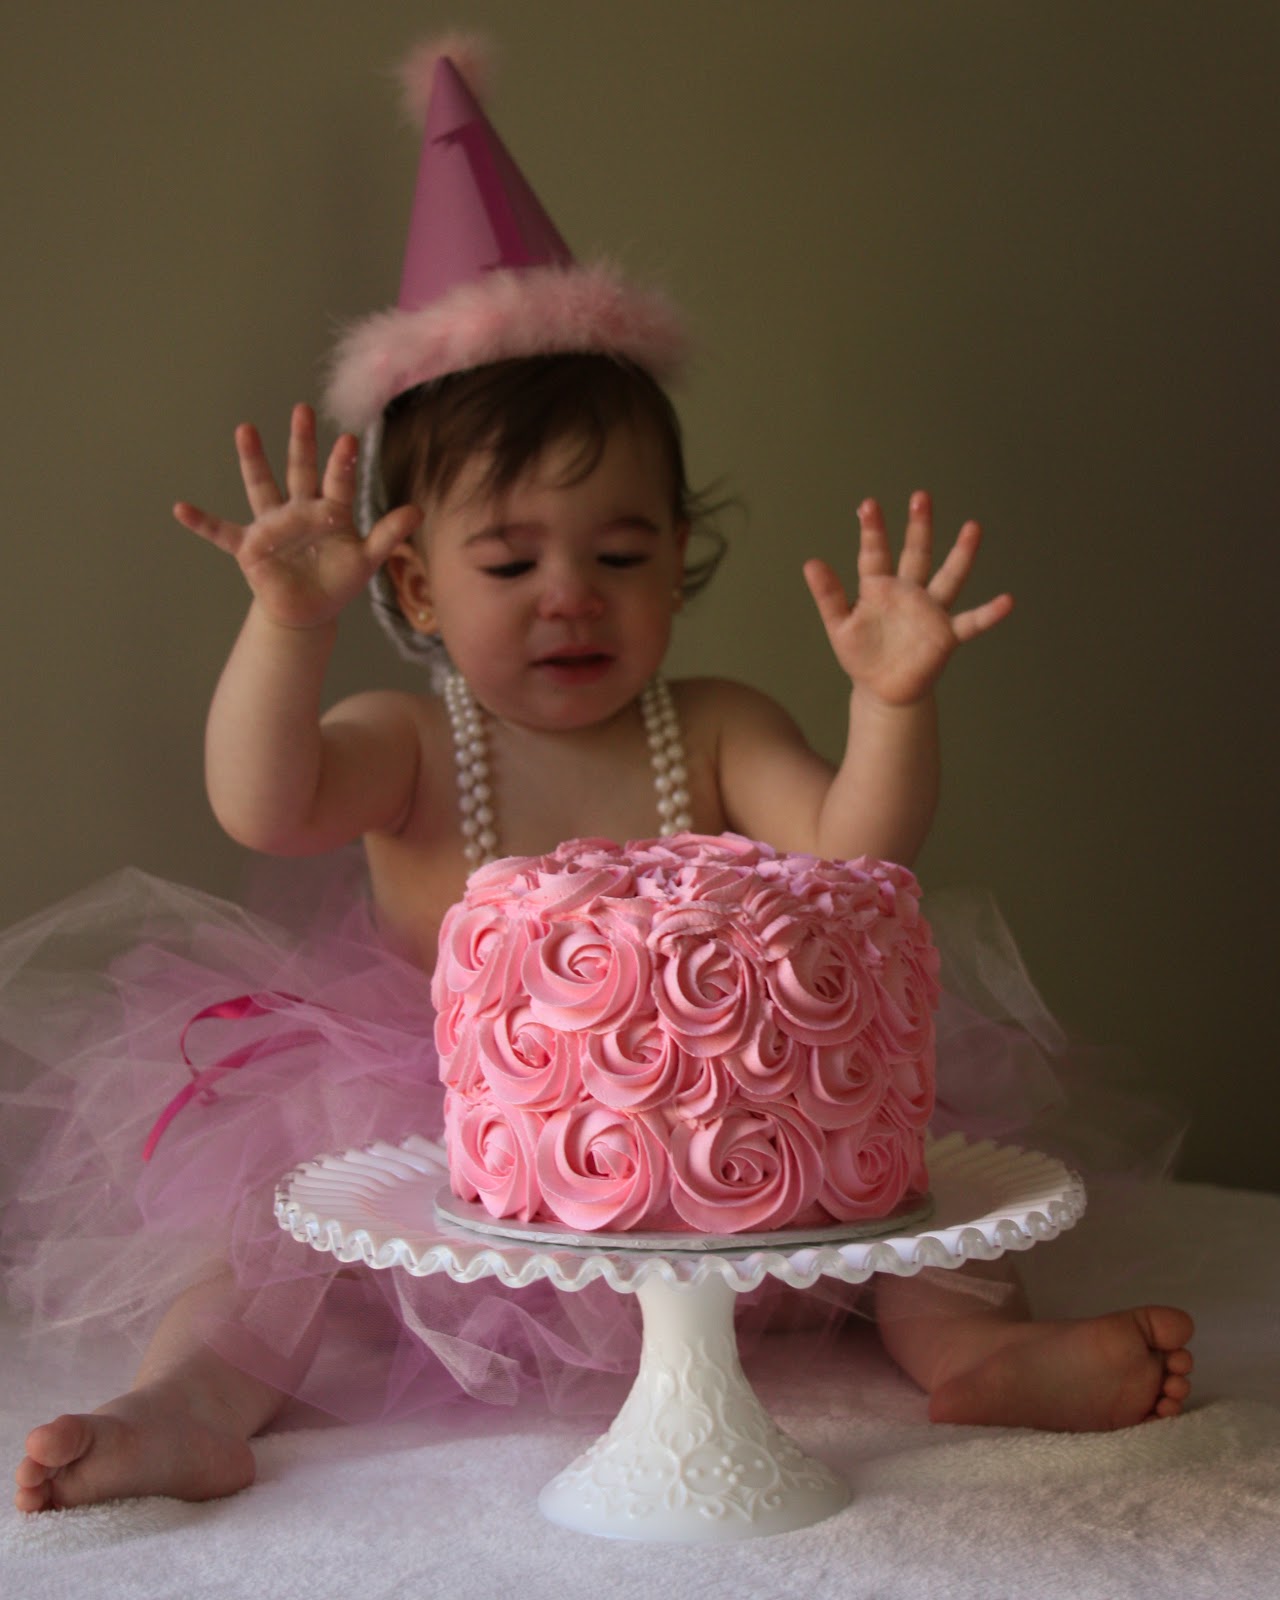
My good friend and tennis buddy, Kelly, made this cake for Taylor.  Isn't it gorgeous?  Amanda had seen something like it on a blog and she wanted Kelly to duplicate it. Here is the original photo that we used as our inspiration.


 Isn't our little princess so cute?

I made this shaped card from a design from the Silhouette Store.  It was fast and easy and I love how the Cameo did such a nice job cutting out the letter.
I just used various card stock scraps I had...mostly Bazzill and Core'dinations, some twine and a white signo pen.  Blinge it up just a bit.

Here's another look:


Happy Crafting!

Saturday, June 2, 2012

Happy Birthday, Taylor Aemelia!

Happy Birthday, Taylor Aemelia!

Wow! This past year has flown by...you've grown from being a little 6 plus pound of sweetness to a 1 year old little princess!

You can see a couple of the first pictures of Taylor  HERE.
And here she is at nearly a year old.
Isn't she lovely?  :)

We are having a small family get together tomorrow to celebrate her birthday...which also happens to be her mother's birthday!  And today is her uncle's birthday.  Wow....lots going on!
Anyway, since many of the people at Taylor's party will be adults Amanda wanted some "party favors" that would be useable so she came up with the idea of giving hand sanitizer.  In this day and age you can never have too much of that stuff handy!  (BTW, I try to always use hand sanitizer after touching a menu....I figure that is about the grossest thing around~!  I confess....I'm a germophobe!)
Here is what I came up with....I got some Avery clear (although they aren't really clear) labels and ran them through my printer after designing the label.  Avery gives you a web based design program that is easy to use....I could even rotate my images and text so that my label was vertical.  Cool!

I also did a little gift wrap....cut a few things out with my Silhouette Cameo.  I used Echo Park papers....the roses would probably have done a bit better if the paper wasn't so thick (Echo Park papers are very heavy duty...love them but don't work so well for rolled things).  I did wet them to try to curl the petals but they were still so stiff they just didn't want to cooperate much.  I didn't want to spend a tremendous amount of time on this, either....because you know what happens to gift wrap, right?  Torn off and tossed!  LOL!

Happy Birthday, Taylor Aemelia, Happy Birthday, Jonathan and Happy Birthday Amanda!

And....Happy Crafting to you!