Showing posts with label Lori Whitlock. Show all posts

Sunday, February 14, 2016

Happy Valentine's Day to All!

Wishing you all a very Happy Valentine's Day.  I have 3 very sweet little Valentine's with me right now...my three grandkids! Having time with them is better than a box of chocolates... :)

I made some treat boxes for them (put some Hershey Kisses inside) with the We R Memory Keepers 1-2-3 Punch Board.  Cool board.  It makes bows, boxes and envelopes.  Well, I mean it doesn't do it all by itself...the thing needs the help of a master crafter. LOL! Not really...it's simple and easy to use and is a just an amazing little well engineered product!

Here are the little boxes with a little mouse on top that was done with a Lori Whitlock cut file from the Silhouette Design Store.


The little mouse was done with 2 Hershey Kisses glued together. They look better IRL (In Real Life)! I promise.  And the kids thought they were so cute..especially my granddaughter who is an animal lover! 

Here are the 3 I did:

I made this other little treats for some other special Valentine's in my life:

These were done with a Lori Whitlock file as well.  Those are Hershey Nuggets inside wrapped in some Washi tape.  The die was cut with an Impression Obsession die.  The paper and stickers are from Michael's...the Recollection line which was just practically free when I bought it! 50% off plus another 20% off my total purchase.  Practically free, I tell you!  I added a little acetate window to close the whole thing in.
Don't want those chocolates escaping, you know!

And that's it for today...wishing you a wonderful Valentine's Day....and Happy Crafting!

Sunday, April 12, 2015

Gifting Cards

I recently was asked to address some envelopes for a friend's daughter's wedding invitations. I enjoyed doing it so much...I dabble in calligraphy and decorative writing so it was so much fun to do it. I was really happy with the results...I handed the finished envelopes off to the bride's mother the other day and she said she loved them and thought they looked fantastic. I was proud. LOL!

I decided it would be fun to make the bride a set of thank you note cards that she could send out.  I had asked her mother what the bride's wedding colors were and she said "cream, blush, and celadon green".  What the heck??!  LOL!!! I'd never heard of celadon green but apparently it's a grayish green. Anyway, I figured the chance of getting an exact match with that green would be difficult so decided to just use some paper from an "old" paper stack I had on hand.  I used Neenah off white cardstock for my base.  I decided to make the cards mostly flat for easy mailing for her.  I initially put ribbon on but decided to minimize it and simplify it and took the ribbon off.

I used my new BFF MISTI to stamp the sentiment and am always amazed how quick and fast it is to use when you are doing multiple cards AND most importantly for me...how easy it is to align to get the perfectly straight look.

Here are the cards and I used the Paper Smooches Roses die set and the sentiment is Paper Smooches Lovely Thoughts:

 I love that die set....

 I also used the stitched rectangle set for my mat from Simon Says Stamp. The mat was popped up on some Stampin' Up foam dimensionals.

 I added a few gold pearls for a little more interest and they were done pretty quickly.

Fun and easy...and I think she will enjoy using them for some "special" thank yous!

I also made a little box to hold the cards in from a file by Lori Whitlock purchased from the Silhouette Online store and cut on my Cameo.  I've said it before...Lori Whitlock's are always so perfect and cut so well!  She must have been an engineer in a previous life!

Here is the box...using the same papers from the roses and leaves:
The bride's initials were also cut on the Cameo using a font I have installed on my computer that I love...Lavenderia.

Here is another look...a little creamy organza bow finished it off:


And that's it for today...Happy Crafting and Happy Sunday!

Tuesday, March 3, 2015

Project Life, 2015: January Layout 4

Layout #4 for January pretty much brings me to the end of January.  So on to February and then March...and by then it will be June...
I will forever be in a state of "catching up-edness".  It's a fact.
No worries...I guess what would be worse than always being behind is not taking pictures and capturing memories...especially those of my grandchildren growing up. They are very well documented kids! My husband always tells me that he has very few photos of his childhood.  I've only seen 2, I think.  He was a middle child...lots of photos, apparently, of his older brother...and than quite a few of his younger sister...but his parents didn't do quite as many of him.  That's his story, anyway. My grandchildren will know just about everything they ever did....whether they want to or not! LOL!

So here is my fourth set of layouts which, as I said, closes out January, 2015. Yay. Me.
Here is the left side...we continued another fun filled and busy week at the beach! I used Just Jaimee's Storyteller for January, 2014 for the papers and elements and assorted templates from the Lily Pad and Lori Whitlock for my cards.


Here is the right side:
We went back to Wonderworks (we had visited it last year and both David and Taylor remembered it and wanted to go back). It is a great indoor amusement park...but it is all educational! You learn about weather, physics, science and more. It is very interactive and hands on and the children really enjoy it. I highly recommend it if you have children over the ages of 3...and it's fun and interesting for adults, too. We visited the one in Panama City Beach, FL but there are locations elsewhere (Orlando, FL and Myrtle Beach, SC to name a few).
Below you can see the layouts side by side as they will appear when printed out:


Well, I only have 2 more days at the beach before heading home! I can't believe my 6 weeks are up!

Sunday, March 1, 2015

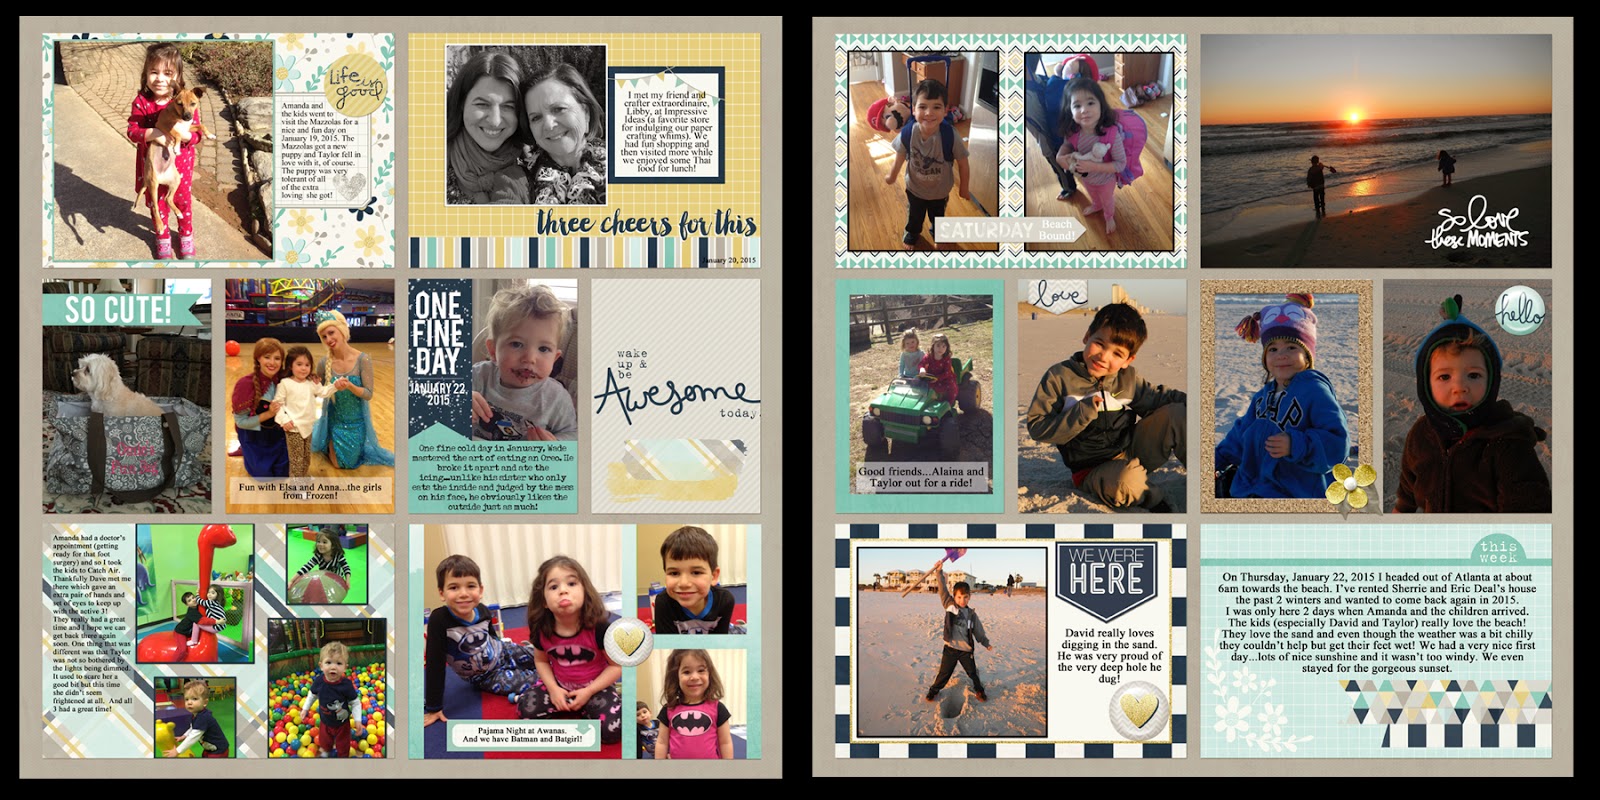
Project Life, 2015, January Layout 3

I was able to get more layouts done for January and was happy with that.  And then today it became March.  Couldn't it have just waited another few days?  What is it with February being such a short month?!

So here is my two page layout using the Traci Reed January kit again (as I did for my first weeks' layouts).


I added a gray solid paper from the kit to put behind the photos and cards. 
It looks so different from the other layouts I did with the same kit as I put the bluish printed paper behind the cards and photos as you can see below.
Same kit...different looks.  That helps me justify the cost of the kit. And as much as I love Traci Reed's kits...they ain't cheap!
Anyway, back to my third set of layouts which covers mid January and up to the time I left for my annual "sabbatical" to the beach in Florida.
Here is a look at the left side:
Since I'm not doing my layouts week by week, so to speak, I don't feel the need to have title cards for each week.  I will do a title card at the beginning of each month and let it go at that.  I love Project Life and how one can make it the way one wants....it's however you want it, Girly!
I used some Lilypad, Katie Pertiet and Lori Whitlock templates. 
Here is the right side:
Mostly just fun photos of the kids....I didn't feel like I need a ton of journaling but hope I covered the bases. :) 
I did use an Ali Edwards brush on the photo of the sunset. with David and Taylor. "So Love these MOMENTS" certainly captures how special this sort of picture is to me.  Cute kids fascinated by the vastness of the Gulf and also watching Mr. Sun go Night-Night!
That's it for this period of time....onto the next one!

I am finding my 13x13 inch layout that I talked about in other posts is working fantastically well.  I am not having to spend nearly as much time resizing things....and I love that!  After I've finished the layout I resize the entire canvas to 12x12. I don't think it really matters either way but now it is resized to the more traditional 12x12. I just think it's easier to work with when it is digitally set at 13x13.

Happy Crafting!


Sunday, February 15, 2015

And a Very Belated Happy Valentine's Day to You!

Oh my....I so meant to post yesterday to wish everyone a Happy Valentine's Day but the day got past me.  My Valentine was here with me and we were able to spend a nice day together doing a hike and going out for a nice meal.

A friend of mine got a Tiffany necklace.  I as jealous of that.  No jewels for me.  LOL! 

But I did make a few exploding box cards for my kids from a file by Lori Whitlock which I found in the Silhouette store.  I think they are so cute and were so much fun to make.  I think Lori does and amazing job on her files...they always go together perfectly!

Here is the first one:
I used BoBunny papers....love the frogs and ladybugs and other little critters!  Isn't it adorable?  Look at that folded envelope.  So sweet!

My friend and fellow creative person (she is über creative...amazing what she does!), Debbie, was here with me for a few days and she enjoyed making one, too.

Here are two other versions...the one Debbie did is on the right:
So much fun!  On to the Silhouette Store to see if they have one for St. Patrick's Day! ;)

Happy Crafting!

Monday, January 5, 2015

Project Life:2014 Week 25

This week posed an interesting dilemma for me.  I usually have too many photos and it is time consuming to go through them and determine what will get used...and what will get tossed.  This week was the first time I had the opposite problem. My daughter and I use Dropbox for file sharing and lo and behold when I went in to pull out the photos that she had taken...well, there were only about 4.  Then I looked in my own files to see what I had and I only had a few, as well! I sat here at my laptop with my iPhone to the right of me...texted my daughter that I was sad we had no photos of David for this week.  Not one photo.  She texted back that she had a video of David doing the monkey bars for the first time and within 3 minutes and dropped 6 frames into Dropbox for me to use. Problem solved fairly quickly! As we all say over and over...Technology. Is. Amazing!!

So this is what I came up with for Week 25 using Just Jaimee's June Storyteller kit:


I still didn't have a ton of pictures so I had to sort of improvise a bit.  I loved the photo of Wade sleeping in his mother's arms but I thought it might look more striking as a black and white. I also modified the Becky Higgins template by "elongating" the top left slot (which is normally for a 4x6 inch photo) and made it 8x6inches roughly.  I thought that gave me a nice balanced look to the page.  I made the Week 25 card with a brush from the Story teller kit as well as a 4x6 card.

Here is a closer look at the left side:
Check out Taylor in her bed! HAHA!

Here is the right side:
I used a template from Paislee Press for the photos of David on the Monkey Bars.  The photo of Wade with the booboo nose is from Lori Whitlock.

I love my simple Less is More layouts. Maybe my goal should be to take fewer photos...not MORE!

Happy Crafting!

and for me...? On to Week 26!

Monday, December 29, 2014

As the New Year Approaches...

2015 is literally right around the corner, isn't it? I'm always a little sad as the year ends but am excited about what 2015 may bring.

2014 has been a wonderful year...the high point is always when I am with my children and grandchildren and I had lots of opportunity for that in 2014. The wedding of my son to his bride was certainly at the top of the list, too.

The foot surgery...not so much...but I am looking forward to being pain free and hopefully am saving myself foot problems in the future!  I'm doing well...getting around well...but looking forward to when I can get a little more exercise!

I fell in love with these 3D cards designed by Lori Whitlock.  I am so very much hoping that she designs more for other holidays and events!  Here is the last one I made and decided to use it to wish someone a Happy New Year.  I love the way this one turned out, as well...gives the feel of a snowy, wintry day.


Here you can see the layers a bit more:
I love the contrast of the red bird against the white...so very pretty to me.

I am itching to get into my craft room but probably won't be able to for a few days! I have an out of town guest who is not a crafter and we spend our time together talking, eating, reading and yapping.  What a great friend...sure wish she scrapbooked or paper crafted, though! Anyway, she is a wonderful friend and I am so happy to have her here as we bring in the New Year.

Happy New Year to ya'all!

I'm entering this in the Simon Says Stamp Challenge Anything Goes HERE.

Happy Crafting!

Friday, December 26, 2014

A Belated Merry Christmas!

Christmas is over...a big sigh of relief is heard around the world...but I know many, like me, always feel a little sad that it is over.

We had a wonderful day filled with family....it was crazy, hectic but so much fun. David and Taylor were so excited about Santa.  I love Christmas through the eyes of the little ones.  So much magic!

I had made this 3D card for the grandkids which I gave them a few days before Christmas with a little treat.  I think the card was played with a bit too much and is now a heap of nothing but it was cute while it lasted.  And since I have the file I can make another one whenever! ;)

It was created from a file designed by Lori Whitlock who makes the most amazing stuff!!!


I just love the detail in it.  It cuts so beautifully on my Silhouette.  I am hoping Lori Whitlock comes out with more designs for other events!  The sentiment was stamped with a Hero Arts stamp and Memento pigment ink...and then embossed with clear embossing powder.

Here is a close up of the layers:

I think Santa would have liked this card! :)

Happy Crafting and for me...a day of resting! LOL!

I entered this in the Anything Goes Challenge at Simon Says Stamp HERE.


Sunday, December 21, 2014

4 DAYS AND COUNTING!

The next few days will be busy for most of you, I'm sure!  Since I was having that horrid foot surgery last week I got most everything done before I knew I'd be laid up a bit.
Well, imagine my surprise...only 5 days post surgery and I am hoofing it!  Ok, well, maybe that's a slight exaggeration but I am moving around quite well and actually was able to get to my craft room yesterday for day of fun! :)

I had seen these 3 dimensional shadow box cards on the Lori Whitlock blog and decided to buy a file to try out.  Oh my goodness...it cut so well and was so much fun to put together.  They fold flat for mailing and then you just sort of "square" it back out to the frame shape.  I made this one for my son and daughter in law as they are celebrating their first Christmas as a married couple and I thought the 2 little red birds were just perfect.


It is constructed of 6 layers.  I cut all from 8 1/2 by 11 sheets of heavy cardstock.
Here you can see the layers a bit better...

The little snowflake was done with some Stampin' Up glitter.

And the Peace Love Joy sentiment was stamped with a Hero Arts stamp and with Memento pigment ink and embossed with clear embossing powder.

I love this card...it was such much fun and I'm hoping it goes through the mail well!

Happy Crafting and Happy Holidays!

Monday, November 24, 2014

Thanksgiving Box Card

These little box cards have become quite popular....my friend, Christine, has made several adorable ones with cut files from the Silhouette Store. I was searching for Thanksgiving cards in the Silhouette Store and this little Lori Whitlock file popped up.  I just thought is was really cute and decided to make it for my son and his new bride (whom I may not see on Thanksgiving. *sniff!)  My daughter in law likes all things crafty so she will like this, I'm sure.  My son probably won't 'get it'! LOL!!!

Here it is:
I used paper from DCWV...love the colors and prints!
Gobble, gobble...isn't he cute?

And here is the sentiment stamped with a Close to My Heart stamp.
And another look at my little turkey...

All pieces cut out beautifully on my Silhouette Cameo.  I had no paper tears or booboos...even with the little teensy tiny beak!

It was very easy to assemble and it folds up for easy mailing.  I did make a custom envelope to go with it with some coordinating paper.  Stuck a little Washi Tape on it and had a cute "packet" to send my card in.

I hope you have a Happy Thanksgiving, my friends!

Happy Crafting!

P.S. I am entering this in the Simon Says Thanks/Thanksgiving challenge which you can find HERE.

Thursday, November 13, 2014

Project Life, 2014: Week 19

Moving right along...getting close to the halfway mark in the Project Life year!

Here is the two page spread of Week 19:

 I used my usual assortment of Tracy Larsen, Lori Whitlock, and Lily Pad templates as well as the big overall page templates by Becky Higgins. I used papers, cards, and elements from Just Jaimee's Storyteller for May.
Here is a closer look at the left side:

Wade turned 7 months and just keeps getting cuter and cuter.  On the 4th of May...his official 7 month birthday he had no teeth...but by the end of the week one had finally broken through the gum! Poor little guy...he's had a tough time getting that tooth through!

I love the pictures of the kids sleeping. So stinkin' cute!

And here is the right side:

I love that my daughter remembered to take pictures of them at their dental visit!

And that is it for today...!

Hope you find some heat in this cold weather!

Happy crafting!

Monday, November 10, 2014

Project Life, 2014: Week 18

Well, after the hoopla of the wedding the week before things got down to nice quiet week of a school program, a visit to the Atlanta Zoo, a baseball game, my birthday (!)  and other fun things!

I used Traci Reed's May kit because...it was May! Silly....

Here is the 2 page layout:

This week went a little easier because I didn't have hundreds of pictures to sort through and edit.  LOL!

Here is a closer look at the left side:
That's my Granddog in the upper left photo. She's a very smart Border Collie and belongs to my son and his wife.  She came and stayed with us for a week or so while they were on their honeymoon. Such a good girl...and she gets along great with our little princess, Isabella.
Here is the right side:
Even though they aren't the greatest pictures I love see the photos of David singing with his classmates. So cute!

Today was such a beautiful day here...we had such gorgeous weather. It was a fun day of tennis.  We had our season beginning matches today and I think my opponents had a particularly good time if you know what I mean! LOL!!!  Oh well...yep we lost but it was fun.

That's it for today...hoping to start on week 19 tonight!

Happy Crafting and Keep Creating!

Thursday, November 6, 2014

Project Life, 2014: Week 17

Week 17 was a big week in our family as my son married his bride. The entire week was spent preparing for and then hosting the rehearsal dinner so I decided to use some of the dozens and dozens of photos taken during the event and use those for my week.  I mean...we seriously did little else this week!

It was most difficult to go through the photos to narrow down those to be used.  I probably could have done a couple of layouts on the rehearsal and then the dinner but forced myself to limit my photos and choose some that represented the occasion. And I tried to include photos of all the "key players". For the most part, anyway.  I can still do a photo book of the entire evening and use more photos of the day but for my Project Life album I decided to limit it to two pages.  And. It. Was. Difficult!

I also used the Donna Gibson method and this week it worked much better for me.  After I had spent some time editing my photos and deciding which to use I went ahead and placed them on my templates.  I moved a few things around...did a few collages and then went back in and added my papers and elements. I think it really did streamline the process for me....that is to add in my photos and then slide my papers behind.   I would say it only took me about 2 hours to plop the photos in...and then another 2 hours to add the other stuff so that is a step in the right direction!  LOL!!!

But, I will say that mostly I love, love, love doing it and I love the way my book is looking!

Here is the 2 page spread:

I used Traci Reed's April kit once again....the colors worked well for this springtime layout, I thought.
Here is the left side:

And here is the right:
It was such a fun evening...I think everyone had a wonderful time and the next day was even better!

And now my progress report.  I have done about 25 weeks worth of layouts.  I didn't start working on my weekly layouts until late August so I am proud how much I've gotten done.  I may finish this by the end of the year.  Or. Not.

Next year I will NOT dilly dally!  I will keep up with it better.  Yeah. Right.  LOL!

Happy Crafting and keep creating!

Monday, November 3, 2014

Project Life, 2014: Week 43

I have been looking at ways to become more time efficient (READ: DO IT FASTER) approach to Project Life. I doubt many people other than Donna Gibson and myself spend 12 hours doing a layout! Donna says it takes almost that much time to just pick her photos out! Ok, I made that up but I bet I'm not far off!

Donna is an über talented digital scrapbooker...and so GOOD at her Project Life layouts.  She was on the 2013 Becky Higgins Project Life creative team and rocked her pages week after week.  You can check all of her stuff out HERE. She has a great writing style, too...so much fun to read her blog so if you haven't headed over there before I say you need to give it a whirl!

So...she has been tutoring me in ways to do PL to speed things up.  I misunderstood, of course...and went from spending about 6 hours doing a two page layout to basically doubling that.  But that was my fault... 1. I didn't fully get what she was saying...and then the lightbulb came on.  and 2. I insisted on cramming 26 photos into this week's layout which is nearly impossible.  But I did it! LOL!

Here is the two pager:
 I used Traci Reed's October kit and I love the colors of it...perfect for Fall!

Here is a closer look at the left side:
I got some cute photos of little Wade this week...was so happy about that.  Such a sweet little boy.  I love that kid!
And I used the same old template selections for my photos I have in previous weeks.  And some I tweaked the way I wanted.

Here is the right side:
 
There are 17 photos there...count 'em! 

I'm worn out doing this faster approach!  LOL! I know it will be easier the next time, though, as Donna gave me some great tips.

Happy Crafting! I'm taking a break!


Sunday, November 2, 2014

Project Life, 2014 Week 44

What a fun week last week was with all the Halloween festivities for the little ones! We love Halloween in our family...the children have such a good time playing dress up.

I went ahead and did my Project Life layouts for last week.  LOL...I've done weeks 1-16...a few in the 20-30 area and now week 44.  It's getting done...just not in consecutive order which drives the OCD in me just a bit crazy.  But I'm still living and haven't chewed my fingernails off so I guess I'll manage!

Here is the spread.  besides the usual assortment of templates from Becky Higgins, Tracy Larsen, Lori Whitlock and the Lily Pad I used the That Old Black Magic digital kit by Design by Dani.  It was perfect!


Here is a closer look at the left side and my little Halloween munchkins!

And here is the right side:

I used Becky Higgins Template F for the layout above but tweaked it to fit my needs a bit and made two 4x6 cards. 
And that is another benefit of doing it digitally...you can adjust just about anything...resize...move...and this digital kit cost me a whopping $1.00!  And I can use it again and again! :)

And that is it for week 44!

Happy Crafting!

Wednesday, September 10, 2014

Project Life, 2014: Week 12

We now venture into the time period of Week 12 in Project Life, 2014 which for me was March
and included the first day of my favorite season of the year, SPRING!  I love SPRING!  I love when everything turns green again and all the flowers bloom.  I can even put up with the 3 inches of yellow pine pollen that covers everything!

So here is my week 12 of my Project Life...done digitally, of course.  You can tell digital from paper because digital is perfectly aligned...paper not so much!  We digital scrapbookers want it to look like paper...maybe we should put things slightly askew to make it look even more like paper! LOL!

Here is the 2 page layout:


I used the Echo Park Springtime kit for this week.  It's not your typical project life kit but it worked for my photos this week.  We went to the Atlanta Botanical Gardens this week when all the lovely tulips and daffodils were in bloom. BEAUTIFUL!  My week card was done with an Ali Edwards week stamp as well as a Katie Pertiet vertical stamp for the dates.

Here is a closer view of the left side:


Here is the right side which includes other photos of our life.  I even got a photo of the kids with me...
Yay for that as I'm usually behind the camera or a lot of the photos I use are those my daughter takes for me!

The little 2 dollar kit worked well for me, I think.  I also used photo collage templates from some various sources like Lori Whitlock and Tracy Larsen.

And that's it for today....

Happy Crafting!!!